Making backups of our iPhone is a habit that we should all indulge in regularly. In case of losses or irreparable damages, having a backup will allow us to recover and not lose data such as our contacts, photos, videos, calendars, etc. It is true that there are still many users who do not use this type of service, some for lack of knowledge and others for not trusting that their data is secured in the possession of companies. But the benefits far outweigh the disadvantages.
To make a backup copy, we need to make a series of configurations on the devices. Below we will show you the several options on how to backup iPhone to MacBook.
Solutions on How to Backup iPhone to Mac
Having a backup saved on your Mac is highly recommended for every iPhone user especially because you know that this copy is exclusively under your control and does not depend on external servers or omnipotent clouds.
Apple offers you a complete list of all types of files and information that are stored in one of your backup copies.
Luckily, there are still several other ways to backup iPhone to MacBook, PC, or on the Internet. Almost all options are free and easy to carry out.
Thanks to Apple's cloud storage service, iCloud, you can constantly synchronize important files on all your devices. iTunes also offers you the possibility of making a quick backup in a single click.
In addition, there are a large number of cloud storage services from third parties that offer very good services. Let's introduce you to the several possible solutions:
Solution 1: Backup iPhone to Mac via iTunes
If we prefer to keep our data on our computers and not upload them to the cloud, we can make backup copies through iTunes. The software is available for Windows and for Mac, so the first step will be to install the latest version of the software on our computer. If you have a Mac, you will have it installed by default and if you use Windows, you can download it from the official Apple website for free. In addition to this, we will also need a USB cable to connect the device to the computer. Once we have prepared the necessary elements we can go into the process, which we will explain step-by-step.
To backup iPhone to Mac iTunes, we have to follow the following steps:
Step 1: Connect the iPhone to the computer through the USB cable.
Step 2: In case it does not run automatically, run iTunes.
Step 3: Click on the device that we want to make a copy from.
Step 4: Click on the " Make a backup now" button.
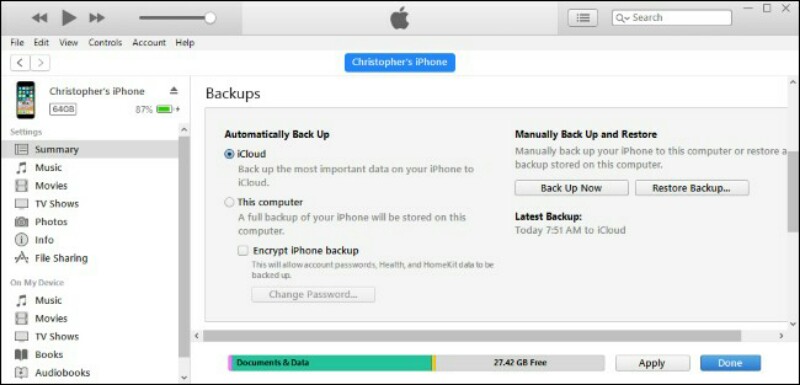
This is it: with these four simple steps, iTunes will begin to make a backup of your iPhone and we will have it available on our computer for restoration whenever needed.
Solution 2: Backup iPhone to Mac via iCloud
The second option that we will discuss is all about how to make a backup of all the data stored on our iPhone through iCloud, the official Apple cloud service.
Currently, Apple offers 50GB for €0.99 and 200GB for $2.99. You can compare the prices of all the countries on the platform.
Making backup copies with iCloud is very simple. Once you have activated it, it will be done automatically every time your devices connect to a Wi-Fi network.
To be able to use this tool, you will need to have an iCloud account. This account is always created and configured when you use your iOS device for the first time.
Step 1: Open the 'Settings' application on your Apple device. You will see your photo and username at the top. Touch on your image.
Step 2: Select 'iCloud' and scroll down until you find the option 'Backup iCloud'.
All ready. Your iPhone will back up automatically without you having to do anything else.
Are you worried about the security of iCloud?
As you surely know, there is a possibility, either due to technical or human errors, of cybercriminals, that is, hackers, accessing the data that you are storing in the cloud.
Apple generally has a very good reputation in terms of security, although there have been a couple of occasions in which this security has been compromised or has not been considered one hundred percent effective. It is worth mentioning these cases.
For example, in 2014, several nude photos of celebrities were stolen and published. The photos were completely stolen from iCloud using phishing (a computer term that refers to a form of a virtual scam by means of which identities are impersonated in order to obtain passwords, bank details or any other type of confidential information).
Another famous case in which the security of iCloud was endangered is the "computer hijacking" carried out by a criminal group that called itself The Turkish Crime Family.
This group claimed to have Apple ID's of 300 million people and threatened to erase all data from iCloud accounts if Apple did not pay a ransom of $75,000 in Bitcoin or Ethereum before April 7, 2017.
Solution 3: Backup iPhone to Mac via AirDrop (backup photos only)
Another great option available to you is to use AirDrop. With AirDrop, iPhone users can effortlessly transfer documents, websites, media, map locations and other data wirelessly to nearby Mac or iPhone.
To backup iPhone content to your Mac, go through the following simple and quick process:
Step 1: From AirDrop's menu bar, click Go > AirDrop from the menu bar in the Finder.
At a Finder window's sidebar, select AirDrop. After this, the window will show AirDrop users which are nearby.

Step 2: Drag your files to the device(s) of recipients' accounts shown.
Solution 4: Backup iPhone to Mac via Google Drive
Google has added a new feature in its cloud storage system, Google Drive, specifically for iOS. This system, like any other, allows you to store your files (contacts, calendar, photos, etc.) in the cloud.
The reason behind this Google initiative is to encourage iPhone users to switch to Android. Backing up in Google Drive means that much of the information on your iPhone will be easily transferred to an Android device.
Apple also has an Android application called Move to iOS that performs the same function which makes things easier for users to decide to move from Android to iOS.
Also, keep in mind that Google Drive will not back up everything. For example, it will not save your text files or your music library.
This solution allows you to upload your files to the cloud to access them from any device with Internet access. It is normal that this type of services offers automatic synchronizations, and will not interfere at any time with iCloud.
By just downloading this application, you will have at your disposal a network of personal file protection running in the background.
Our only warning about this option is that you check the configuration of each of these applications to activate their synchronizations only when you are connected to a Wi-Fi network or, otherwise, all your data will be consumed.
Solution: 5: Free Backup iPhone to Mac via Tenorshare iCareFone
With iCareFone, you can backup and restore your media, contacts, SMS and other files without limitation and for free of charge.
With this app, iPhone users can easily control what happens to their data. You can import, export, add, delete and also re-duplicate your files just at the effect of a click.
With the Transfer option, you can import your files to an iPhone and also export your files to your Mac/PC.
With the Add option, you can transfer contacts, bookmarks and create bookmark folders and new music playlist, either individually or in batches.
With the Delete option, you can remove or uninstall files which you think are of no use again so you can free limited space.
With the Re-duplicate option, you can remove duplicates automatically while making file transfer and as well merge some contacts information on your iPhone.
Extra Tips: How to Unlock iPhone Backup Password
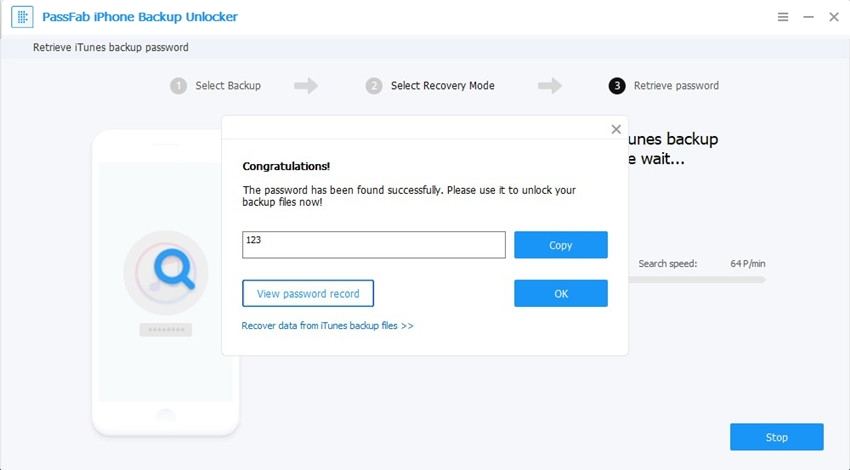
With the intuitive PassFab iPhone Backup Unlocker, iPhone users have a handy option for unlocking their backup passwords just in case they forget them. This paid application gives you an access to messages, contacts, apps, photos which are in your backup copy files.
To unlock your password with PassFab, you can go through this quick and easy process below:
Step 1: Import file that contains your iPhone backup.
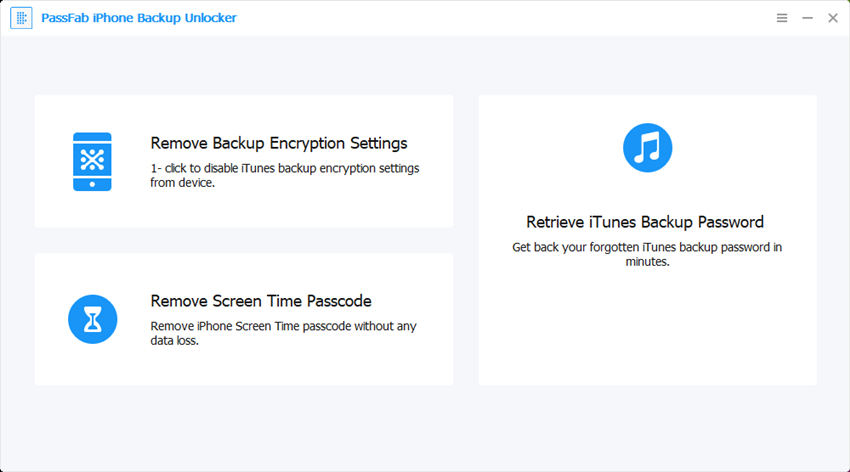
Step 2: Select which attack you want to use from the available three options in the screenshot below:
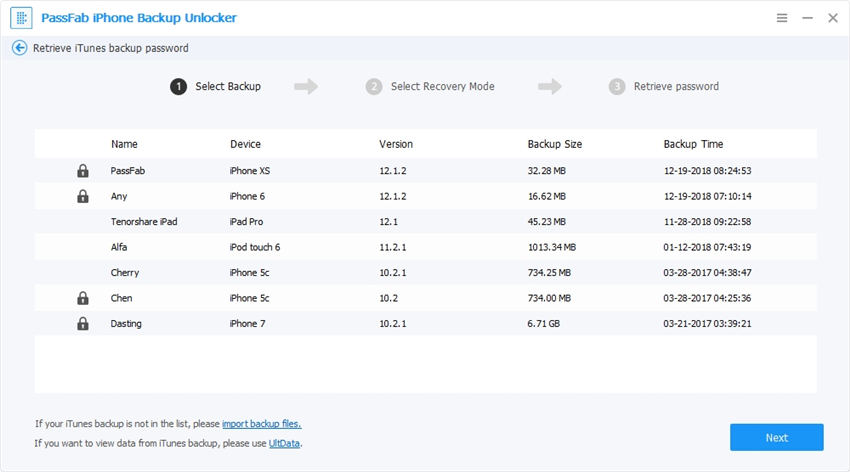
Step 3: Start the recovery of your backup data password by simply clicking start.
Conclusion
Now that we know how to backup iPhone to MacBook through iCloud, iTunes and other third-party services such as AirDrop and Tenorshare, we have no excuses about not acting now. Having a backup is very important, because in case we lose our device, or when it gets stolen or damaged, we simply have to restore the data (photos, contacts, calendars, files, etc). Also, if we buy a new iOS device, this process can be used to quickly configure it as the old one and have all the data we had stored in the old one. Finally, if we ever forget our iPhone backup password, the PassFab iPhone Backup Unlocker is there to help us find our way through.
