Bitlocker is a tool used to encrypt your data, files, music, images, and movies, etc. protecting it from any harm. With the updates and differences in the latest Windows OS, the process of turning the bitlocker on and off can seem a bit tricky. In this article, you’ll learn a variety of ways on how to turn off Bitlocker.
7 Improved Ways to Turn off Bitlocker
Turning off Bitlocker can also be referred to as decryption of a drive.
There are hidden various ways to turn off Bitlocker. The internet is full of those ways. They are easy to understand and execute. As long as you have little to more computer knowledge, the following ways will be easy to execute. Follow the below-mentioned steps, and you will be able to turn off the Bitlocker soon enough.
- 1. Turn off Bitlocker with Bitlocker Manager
- 2. Turn off Bitlocker from Control Panel
- 3. Turn off Bitlocker with CMD
- 4. Turn off Bitlocker with Powershell
- 5. Turn off Bitlocker via Local Group Policy Editor
- 6. Turn off Bitlocker in Services
- 7. Turn off Bitlocker in Settings
1. Turn off Bitlocker with Bitlocker Manager
You can turn off Bitlocker encryption using the Bitlocker manager by following these steps:
- Turn on your PC.
- Boot into the Operating system of Windows.
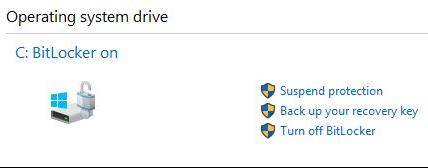
- Access the “Manage Bitlocker” window.
After selecting the relevant drive; hit the “Suspend protection” for temporary suspension or “Turn off Bitlocker" if you want to get rid of encryption permanently.

- You will receive a warning, confirming whether you want to go through with it or not.
- Click on yes, and the job is done.
2. Turn off Bitlocker from Control Panel
This method might be the easiest way to turn off BitLocker in Windows 10. To begin with, the process, make sure that you are logged in to the admin account of your PC. Otherwise, you won’t have access to perform this action. After logging into the admin account, follow these steps:
- Open the start menu and go to the “control panel”.
- In the window of the Control panel, click on “System and security” and then access the “Bitlocker drive encryption”.
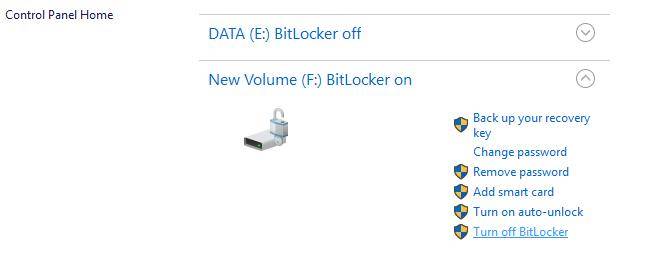
- When you click on BitLocker drive encryption, it will show a list of drives that have been encrypted.
Now you have to select the drive(s), on which you want to turn off BitLocker encryption.

- After selecting any drive, a dialogue box will pop up, to confirm whether you want to proceed.
- Click on turn off BitLocker or decrypt the drive, and the process of decryption will begin.
Turning off Bitlocker might take considerable time as it depends on the amount of data that was encrypted.
3. Turn off Bitlocker with CMD
- To turn off BitLocker using CMD, it is necessary to be logged in to the admin account.
- Access the Command prompt.
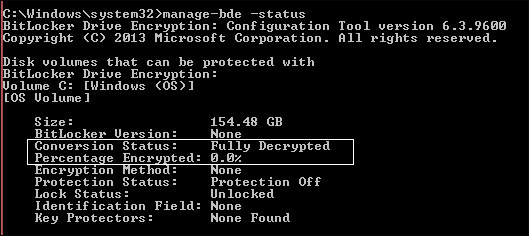
- Write the command “manage-bde-status” to check BitLocker’s encryption status.
- If the result is “Percentage Encrypted:100%”, give the command “manage-bde-off drive letter: ”like (manage-bde-off-D)
Recheck the status. It should be "Percentage Encrypted:0%”.

4. Turn off Bitlocker with Powershell
This process to turn off Bitlocker may be a little complicated than the former ones.
- Access Windows Powershell in administrator mode.
- Type these commands “PS C:\>$BLV=Get-BitlockerVolume” and “PS C:\>Disable-BitLocker-MountPoint$BLV”.
- Execute the command “PS C:\> Get-BitlockerVolume”.
- Check that the decryption was successful or not in Volume Status. The displayed Encryption Percentage will also show that decryption is completed.
5. Turn off Bitlocker via Local Group Policy Editor
- In the Local Group Policy Editor section, click on Local Computer Policy. Then select the following: Computer Configuration > Administrative Templates > Windows Components > Bitlocker Drive Encryption > Removable Data Drives.
- Right, click on Control Use of Bitlocker on Removable Drives and press “Edit”.
- Press “Enabled”.
- Untick “Allow users to apply for Bitlocker protection on removable data drives” under the “Options” menu.
- Click on “Allow users to suspend and decrypt Bitlocker protection on removable data drives” and press “OK”.
6. Turn off Bitlocker in Services
- Click “Win + R” key together and enter “services.msc.” Click on “OK”.
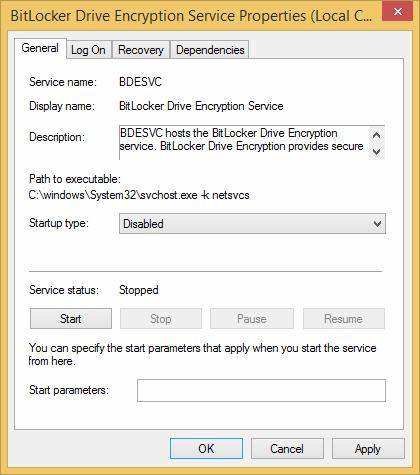
- In the Services window, find and double click on Bitlocker Drive Encryption Service.
Select “Disabled” in the Startup Type and click on “Apply” and “OK”.

Bitlocker should turn off after you disable the Bitlocker service.
7. Turn off Bitlocker in Settings
- Open the window of the settings application. Simultaneously press “Win + I” shortcut keys to achieve that.
- Open the “System” section after opening the Setting app.
- Press the “About” button located in the left control panel.
- Navigate towards the "Device Encryption" section and click on the "Turn off" option.
- Click on “Turn off” again as soon as the confirmation box appears.
After going through these instructions, the Windows 10 turnoff Bitlocker should be achieved on the computer system.
Bonus Tip: How to Turn off Windows Login Password with PassFab 4WinKey
There are still someone who forgot their Windows login password. So how to turn off Windows login password without password? the easiest way is to use PassFab 4WinKey. Here is how:
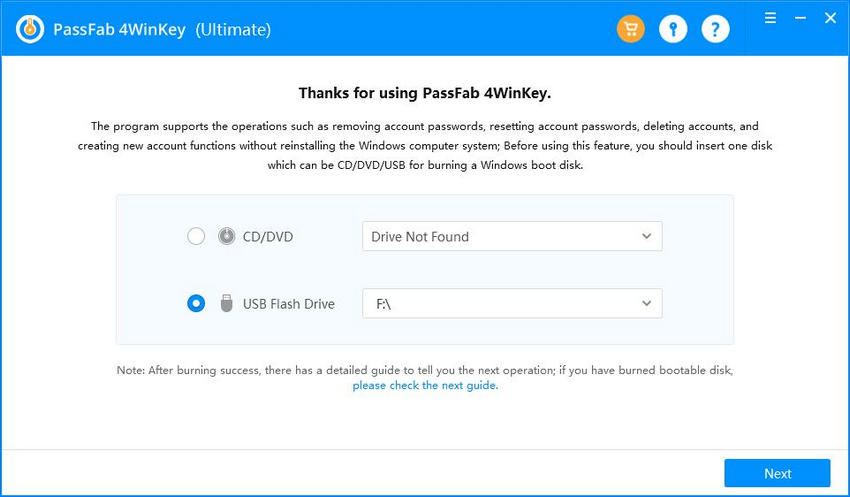
Install the software in your system. Launch it and select either “USB or CD”. Insert the desired media and press “Next” to burn a recovery disk.

- Plugin the recovery disc into the locked computer. Press "F12" or "ESC" to open the boot menu and select "USB/CD" to boot with the recovery disc inside.
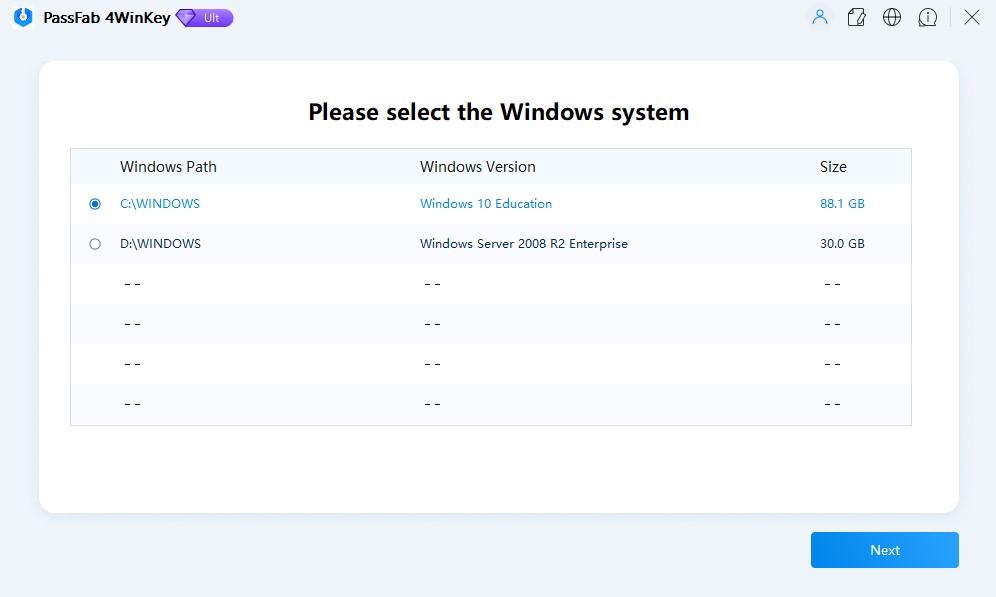
After booting, choose your desired Windows Operating System depending on your computer.

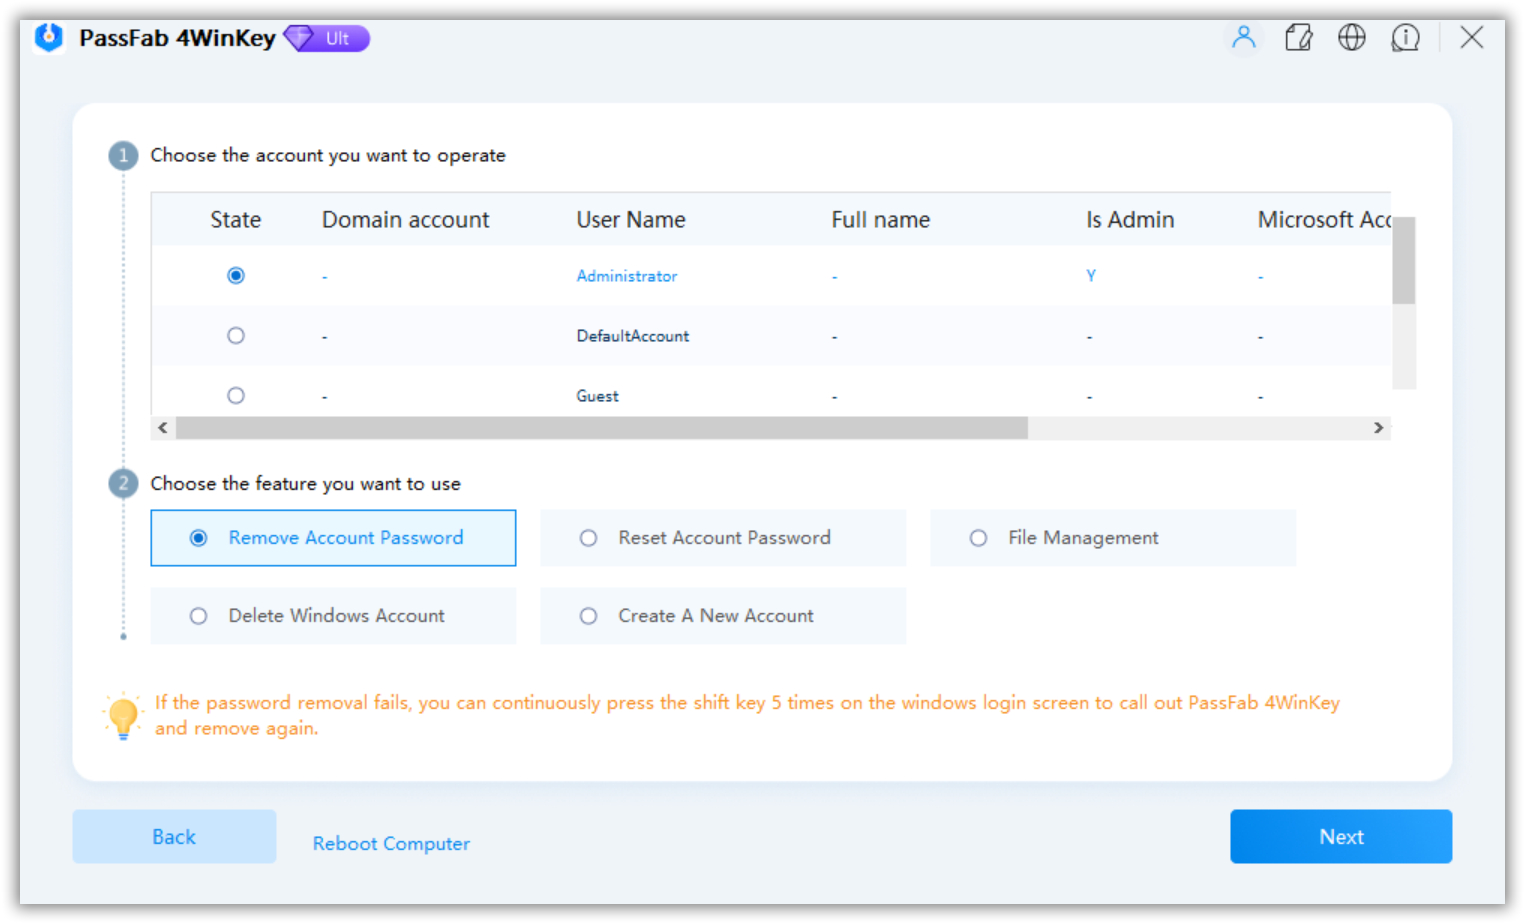
Choose your account and click “Remove Account Password” and then press “Next” to proceed.

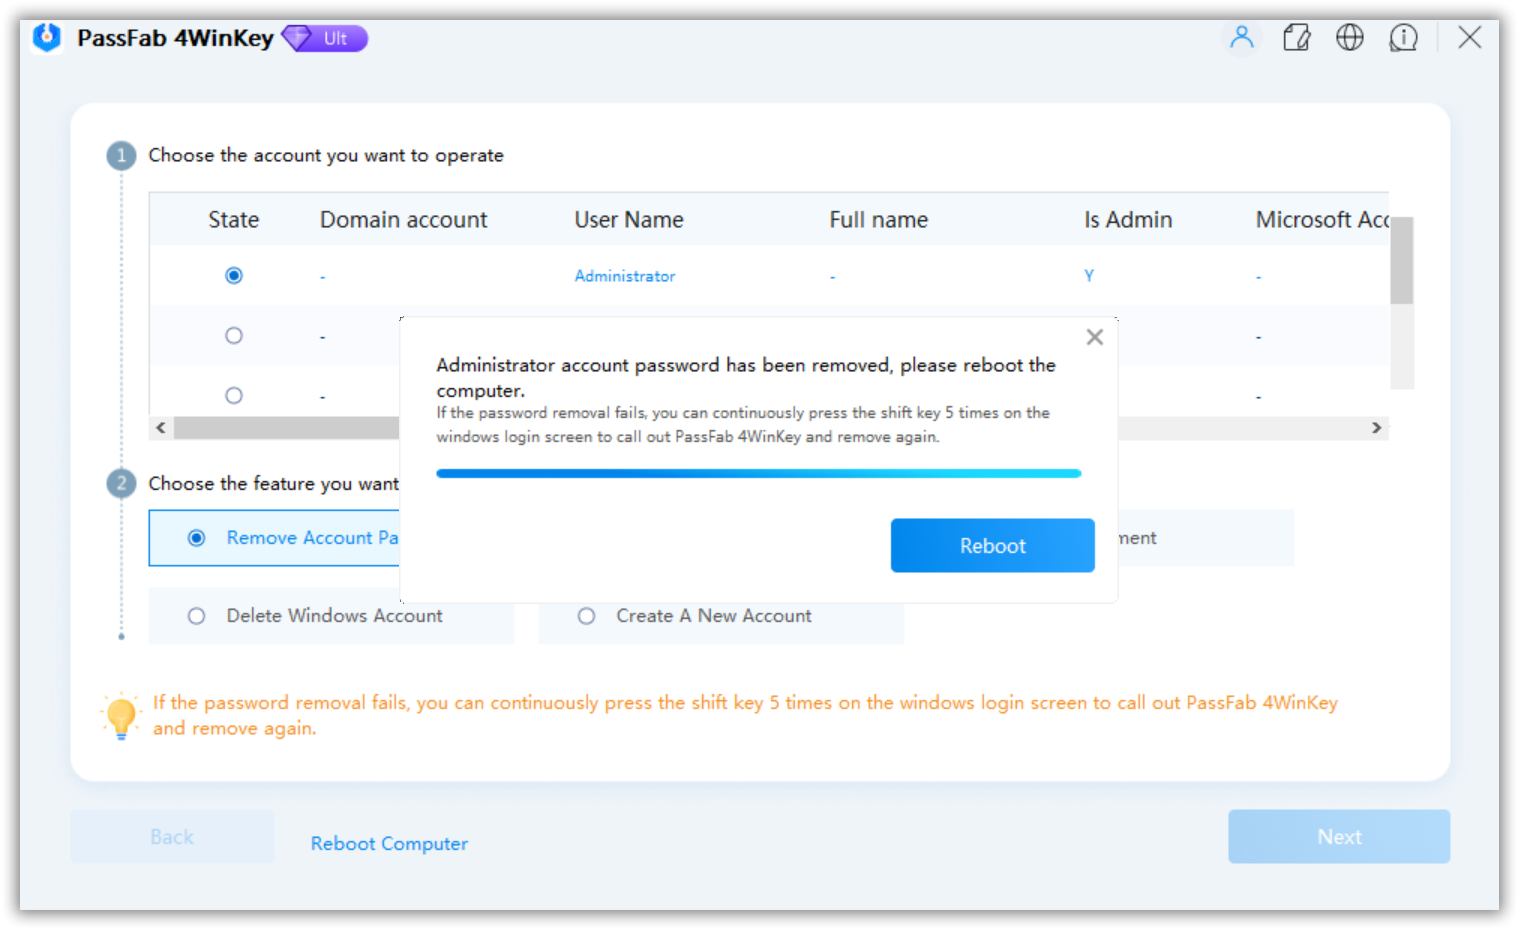
Then press the “Reboot” button. After rebooting, remove the USB or CD as the last step.

Conclusion
Now, how to turn off BitLocker in Windows ten has become easier with this helpful guide. There are various ways to remove the Windows login password from your machine with complicated steps one after the other. What we bring forth is a guide none like the other, which includes simple steps using PassFab 4WinKey to remove the password quickly.
