Protecting your Excel 2010 file with password was never that easy. Microsoft Excel 2010 provides the best privacy for a user who wants to keep their spreadsheets hidden from others. We always have such files which contain our sensitive data and thus we don't want every other person to edit it or remove any of our precious information. So, how does a person secure those sensitive files? The following article will include the simple method on how to password protect an Excel file 2010.
Part 1: Password Protect Excel 2010
Privacy is one the biggest issues of 21st Century. Every other software made, tries to keep the best care of that. Thus, Microsoft Excel 2010 provides you to keep your precious data to yourself. The issue is, everybody doesn't know how to put the password on Excel file 2010. Some of the simplest methods to do so are as follow.
Section 1. Protect Excel 2010 with Open Password
To lock your Excel 2010 file with a password, you can simply use this method.
1. To apply password on your Excel 2010 file to open it just go to the "File" section and select "Save As".
2. A new window will pop up asking a user to enter the desired location to save. Ignore that location thing, and look at the bottom of the window you will see "Tools".
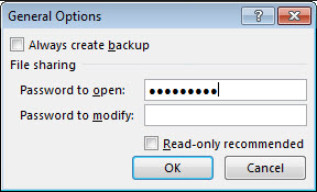
3. When you select "Tools" a dropdown will open, select "General Options" from the dropdown and a new prompt will open.
4. The prompt will ask you to enter the "Open Password" you want to set to your Excel 2010 file.
5. After setting the password, just save the file and the next time you will open your file it will ask you to enter the password first.
Section 2. Protect Excel 2010 via Modify Password
Sometimes, the users want their file to be shown to others but doesn't want others to edit it. This case can be seen often when one organization sends their Excel file to another organization. In such case, user tends to apply to modify password on their Excel 2010 file. If you are new to Excel, you probably don't know how to password protect in Excel 2010. It's very simple.
1. Just open the file you want to apply to modify password to.
2. From the "File" section select "Save As".
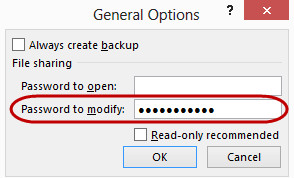
3. A new window will open, select "Tools" from the window and choose "General Options".
4. A new prompt will open and it will ask you to enter the "Modify Password".
5. By entering the password, just save the file and the next time you open the file you will not be able to modify it.
Section 3. Protect Excel 2010 with Read-Only Password
Excel 2010 provides user to set different limitations to the file. You can set passwords to the file so that the user can only view them but not make any change to it.
Just follow the same procedure mentioned above, but before saving the file, when you enter a password to set, there is another option to be checked, a checkbox asking for a read-only recommendation.
If you check the checkbox and then save the file. The next time you open it, it will ask for password and will provide the user, "Read-only" option. If the user selects "Read-only", the file will be opened but the user couldn't be able to make any changes to it.
Section 4. Protect Excel 2010 using Workbook Structure Password
Unlike protecting the whole worksheet of Excel, Excel 2010 provides a feature in which you can easily lock some part of the file. Sometimes, the user wants to prevent others to view some part of the file, edit it or move it somewhere else. In such cases, the basic issue comes in mind is, how to protect cells in Excel 2010? How to protect some specific part of the file? It's very simple.
1. Just click "Review" and select "Protect Workbook" from there.
2. A pop up will come and it will ask for a password which is optional this time.
If you don't set any password, anyone can easily turn the protected file to unprotected. If you set the password, then the next time you want to visit those hidden parts you will have to enter the password first.
Section 5. Protect Excel 2010 through Sheet Password
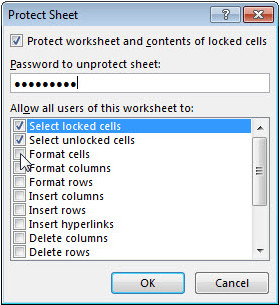
1. To lock your Excel sheet simply click on the "Review" section and choose "Protect Sheet" from there.
2. A prompt will open asking for a password and some permissions from you.
3. Set a password and check all the checkboxes to which you want to grant the permission. This will simply lock the worksheet and you are good to go.
Part 2: How to Unprotect Excel 2010
Excel 2010 provides every possible feature for the user to keep their precious data safe. You can lock almost anything you want to. One major issue is, if you forget your password for the protected file, Excel doesn't provide any "Forgot Password" feature for it. For that, there is a very powerful tool known as PassFab for Excel, which can break almost all kinds of password protected Excel 2010 files.
The software is available for Windows. It provides 100% password recovery rate as it uses 3 kinds of password breaker attacks. The software doesn't require any rocket science to run, as the environment is very user-friendly and doesn't require any special skills. The software is not free of the cast but you can use the demo version for free. Following are the steps that are being followed:
Step 1: Open the software and choose your protected file in it.
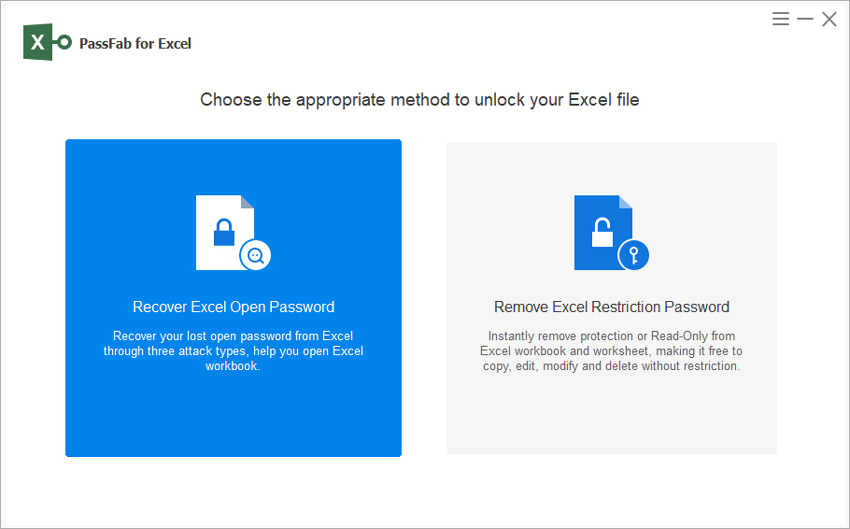
Step 2: The software uses different kinds of password removal attacks like, Brute force attack, Brute force with Mask attack and Dictionary attack. Select the attack you want the software to execute with.
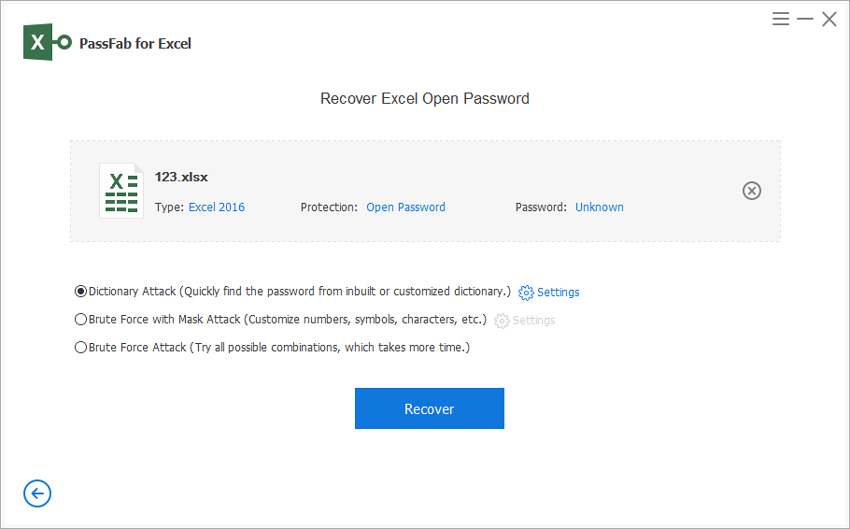
Step 3: The software will remove the password itself, this process will take some time, depending upon the length of your password.
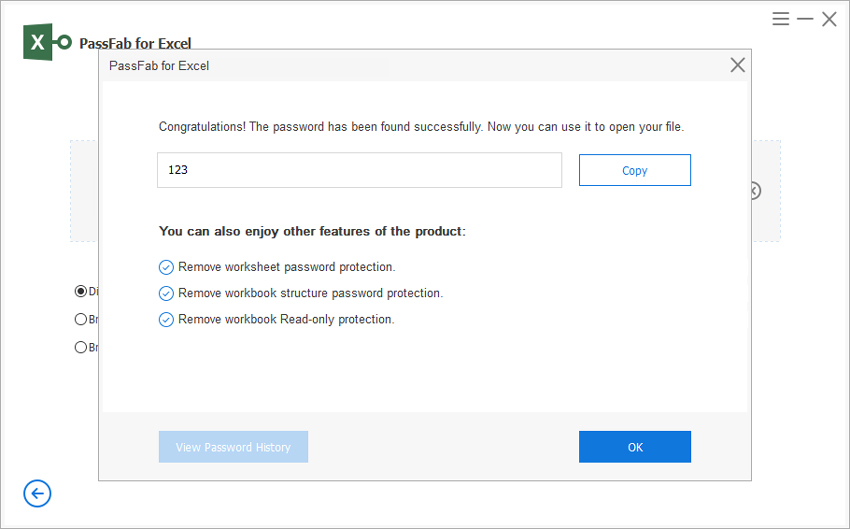
Summary
Excel 2010 tries to provide every possible feature for user's privacy. We have discussed some amazing ways to protect your Excel 2010 file. We have also discussed a very powerful software which can help you remove any kind of password from your Excel file if you forgot the password for any. If you can find any other cool ways to protect Excel file or how to unprotect the password protected Excel file, do let us know and we will surely look into it. Thank you.