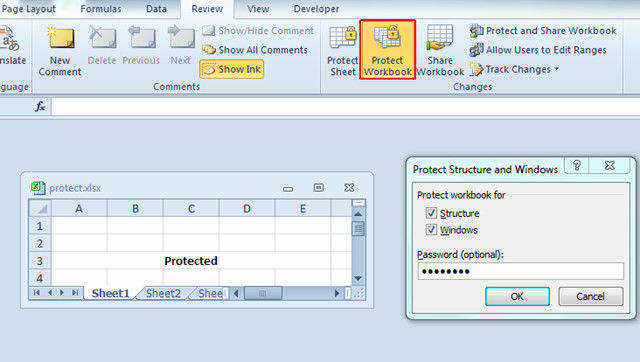
In the contemporary world where data is an important asset in business, the importance of safeguarding Excel files, both personal and official, cannot be overstressed. Inarguably, a casual user or trained professional should understand the value of data entered into a spreadsheet in Excel. And thus, effective techniques in ensuring the security of such document must be engaged; that is why you need to save Excel with password.
Data are unrefined gold that would be of great benefit when explored. If you do not how to save an Excel file with a password, the reason for saving it could be missed. This could arise from unnecessary changes by unauthorized users which the read-only feature may not prevent.
How to Save Excel File with Password Protection
For those in the know, to save Excel with password would be a walk in the park. However, it could be a difficult task for a novice. With the following steps taken to letter, the gap will be bridged between a novice and an expert. You will then be able to say if it is easy to save an Excel with a password or not.
For the 2003 version of Microsoft Excel, the following steps are indispensable.
With the 2013 MS Excel opened, click the Tools tab on the menu bar to view a list of menus.
- Select the Options menu.
- On clicking the Options menu, the page for entering the password chosen would be opened.
You have the opportunity to enter a password both for the opening of the Excel file and modification of the file. Therefore, a user without the password would not be able to open and make changes to the file.
Additionally, Microsoft has provided the Advanced Encryption option to further secure the file. This can be done by:
- Clicking Advanced in the page;
- Selecting an Encryption Type in the following page;
- Clicking OK, and OK again;
- Entering the password to open to confirm in the confirm dialogue box…afterwards, clicking OK;
- Entering the password to modify and then clicking OK;
- Clicking File on the menu bar to open the drop-down list…afterwards, clicking Save;
- Typing a name on the Save As and clicking the Save.
With these steps followed, you would have sole access to the Excel file as the dialogue box would appear whenever attempt is made to open the file.
Like you know, each version of the Microsoft Office comes with different options. To cater for the difference, we provide the steps to encrypt Excel files for the 2016 version. Even though the steps for encrypting Excel files are similar in all versions, understanding the peculiarities of each version is essential to successfully save Excel file with password, in each version.
For MS Excel 2016, the Excel file can be protected by:
- Opening the Excel file that you want to protect;
- Clicking the File on the menu bar and clicking either Protect Worksheet or Protect Workbook;
- Clicking Encrypt with Password on the page;
- Typing any password that you choose in the Password Box and then typing the same password again in the Verify Box.

The above-stated steps are effective as you can be sure of absolute security for your spreadsheet. It is important to note that you should choose passwords that you can easily remember because Microsoft cannot help in retrieving forgotten passwords. Also, you should know that this only protects a single file. You will need to repeat the aforementioned steps to protect other documents. All protected files can be easily discovered in the Info tab.
Interestingly, you are free to choose a password of any length and type (either characters, numbers, or a combination of both). However, you must understand that the password is case-sensitive, i.e. 'PaSSword' is different from 'password'. If you want to protect a folder of Excel files, you would need to take an entirely different and longer series of steps.
As you can see, protecting your Excel files is very easy. Each step of the procedure would become easier for you as you repeat it daily. We hope you have learnt how to save Excel with a password.
Extra Tips: How to Remove Excel Saved Password
Having understood how to save Excel file with password, we imagine that sometimes you would need to disable the password protection of an Excel file. This could be because you want many individuals to have access to it, having educated them on the importance of the file and with clear instructions not to make any changes to it.
Bearing such situation in mind, you can remove the password of the Excel file with the following steps:
- Open the Excel file that you want to get its password removed.
- Click the MS Office tab which you would see on the top left portion of the file.
- Click Save As on the dialogue box that appears.
- Click Tools.
- Click General Options on the dialogue box that appears.
- Delete the password already in use in the Password to Open box.
- Click OK on deleting the password.
- Hit the Save button.
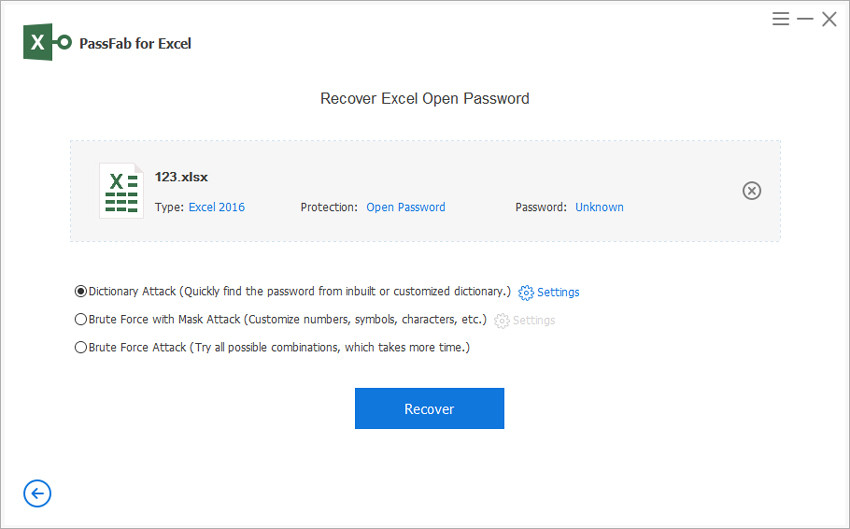
Believe me, you are covered with the PassFab for Excel whenever you forget the password to your valued Excel file. Nowadays, it is an effective software widely used by Excel users. We strongly recommend this tool produced by PassFab Inc. It helps through the Brute Force Attack means as well as Brute Force with Mask Attack and Dictionary Attack.
To establish the usefulness and effectiveness of this password recovery tool, the steps to take to access the protected file whose password you cannot remember is highlighted below.
Step 1. First, download the PassFab for Excel software by clicking the below link. Then, install it on your computer.
Step 2. Second, you would see a wide "+" tab, click it and select the record.

Step 3. Third, click the attack type you want and make invasion adjustments.

Step 4. And finally, click "Recover" on the taskbar to access the password.

You can use the PassFab software for free trial. However, you would be restricted. On paying the subscription fee, you have full access to the software.
Summary
Having read and taken all the steps stated above, you would agree that these steps are truly effective. We have clearly stated how to ensure the privacy so you can save Excel file with password, and how to prevent it from unauthorized modification in the early parts of this piece. In the part of the piece, you also have the steps involved in removing/extracting the password when forgotten. Watch out for more informative pieces. I am sure you will.