Excel 2016 has a password protect feature that protects the entire workbook, the workbook structure and the worksheets. Without these passwords, you cannot make changes to the respective Excel subsets. It is therefore, important to know how to perform Excel 2016 unprotect procedure in the different scenarios. This is a handy guide to help you unprotect Excel workbooks, their structures and the worksheets therein.
- Way 1. Unprotect Excel 2016 Workbook with Password
- Way 2. Unprotect Excel 2016 Workbook without Knowing Password
- Way 3. Unprotect Excel 2016 Workbook Structure with Password
- Way 4. Unprotect Excel 2016 Workbook Structure without Password
- Way 5. Unprotect Excel 2016 Sheet with Password
- Way 6. Unprotect Excel 2016 Sheet without Password
- Way 7: Copy Protected Excel Contents to Another Worksheet
Way 1. Unprotect Excel 2016 Workbook with Password
All workbooks that have been protected with passwords cannot be accessed without entering the password. Excel 2016 unprotect workbook procedure is as detailed below.
Step 1: Navigate to the location of the Excel file and open the workbook.
Step 2: Click the File tab locate in the ribbon then select Info.
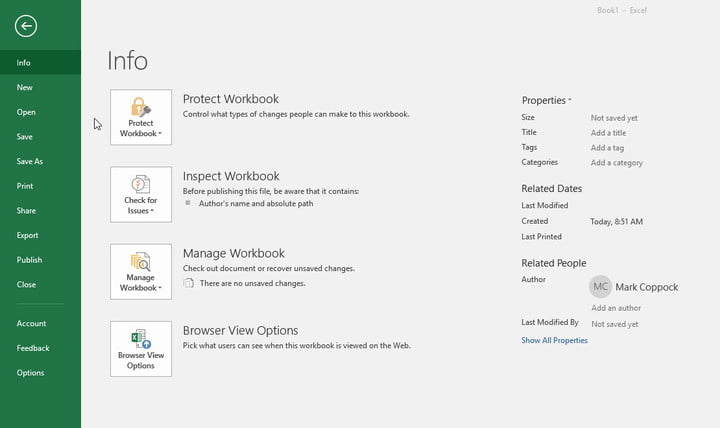
Step 3: Click the arrow next to the Protect Workbook button.
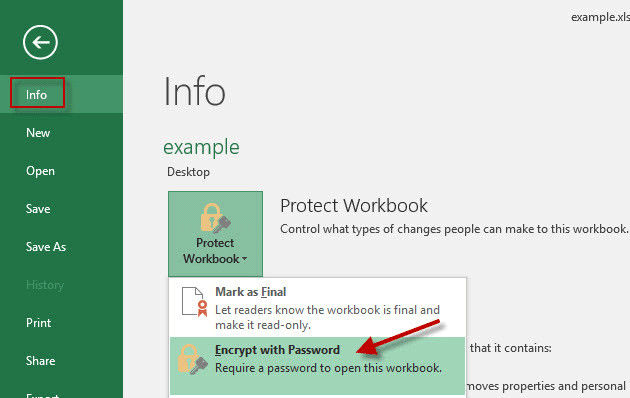
Step 4: Click “Encrypt with password” option.
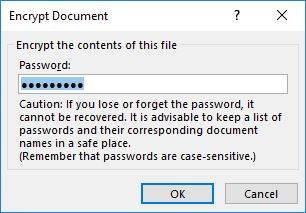
Step 5: A pop-up window will be displayed. Clear the black dots that represent the password in the password section and click Ok.
Step 6: Save the document by clicking the Save icon that resembles a floppy disk.
You will not be prompted to enter a password when you open the file.
Way 2. Unprotect Excel 2016 Workbook without Knowing Password
The simplest way to unprotect Excel 2016 is by using PassFab for Excel. It is a great tool that enables users to remove password protection on the Excel File. It guarantees 100% decryption of workbooks and supports decryption of multilingual Excel files.
Step 1: Download install and run the free trial version of this Excel password recovery program on your computer.
Step 2: Click "Remove Excel Restriction Password" option on the main interface.
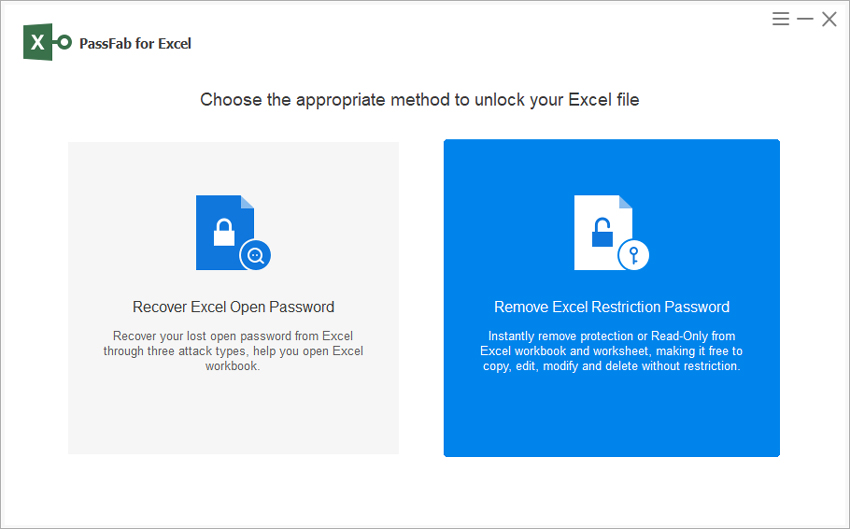
Step 3: Navigate to the location of the file you wish to remove or recover the password and add it.
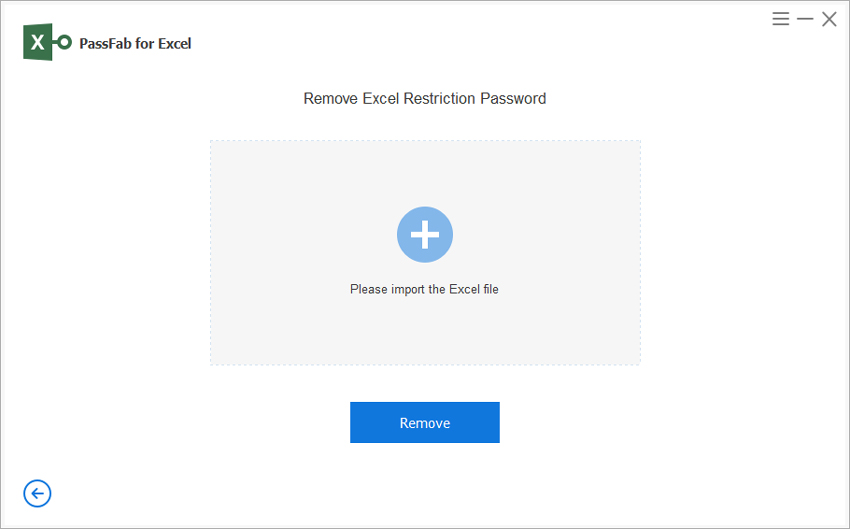
Step 4: Click Remove button and the document will be unprotected.
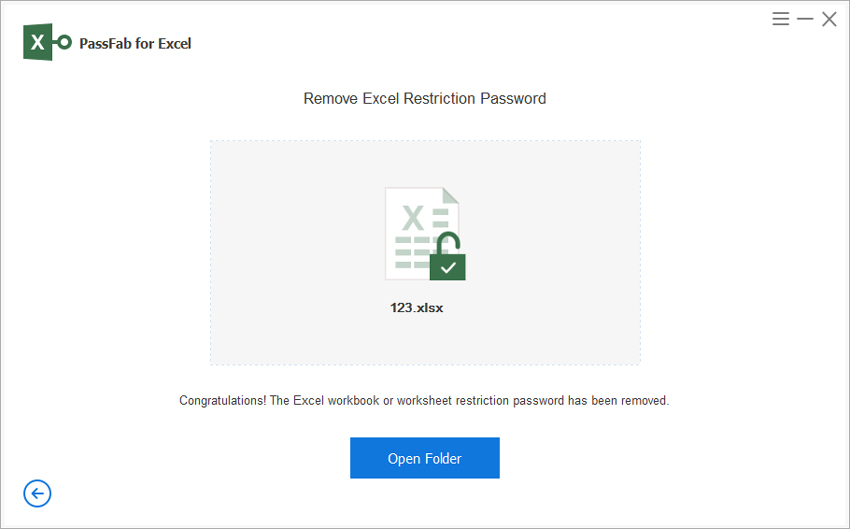
You can also watch this video tutorial about how to unprotect Excel worksheet, which is also supporting Excel 2016:
Way 3. Unprotect Excel 2016 Workbook Structure with Password
A workbook structure includes the worksheets and cells. Users cannot add worksheets to a file that has its workbook protected. To unprotect a workbook structure, follow the procedure below.
Step 1: Navigate to the location of the Excel file and open the workbook.
Step 2: Click Review located in the ribbon then, under the Changes group, click Protect Workbook.
Step 3: A small dialog box titled Unprotect Workbook will pop-up, enter the password and click Ok.
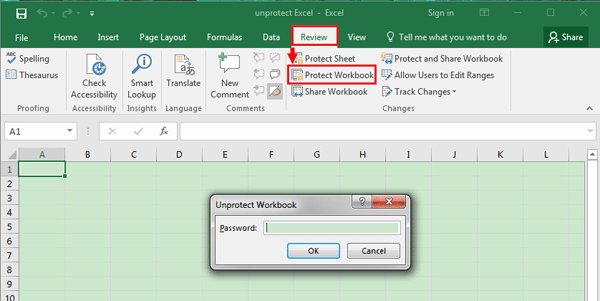
You will have unprotected the Workbook structure: users can now make changes to it.
Way 4. Unprotect Excel 2016 Workbook Structure without Password
In case you do not have or have forgotten the password that protected the workbook structure, follow the procedure below.
Step 1: Navigate to the location of the Excel file and open the workbook.
Step 2: Hit the Alt + F11 keys simultaneously to launch Microsoft Visual Basic for Applications.
Step 3: Click Insert located in the main menu on the top bar and select Module.
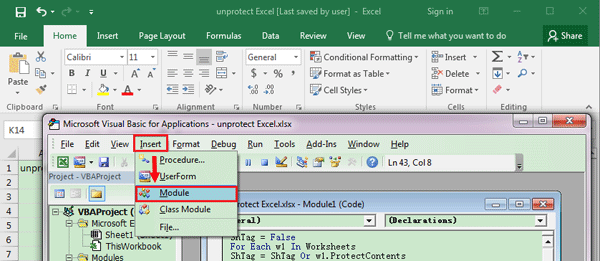
Step 4: Enter the VBA code in the Module.
Step 5: Click the Run button or press F5 to execute it.
Wait for it to run. It may take some time to respond. You can edit the workbook structure when the process is complete.
Way 5. Unprotect Excel 2016 Sheet with password
To edit the contents of the cells, you have to unprotect sheet Excel 2016. To do so, follow the procedure below.
Step 1: Navigate to the location of the Excel file and open the Excel file.
Step 2: Click Review located in the ribbon then, under the Changes group, click Unprotect Sheet.
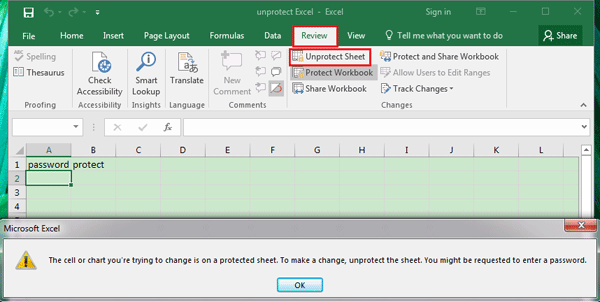
Step 3: Enter the Unprotect Sheet password in the dialog box that appears and click Ok.
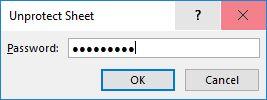
You can now make changes to the worksheet.
Way 6. Unprotect Excel 2016 Sheet without Password
If you do not have or have lost the worksheet password, you cannot make changes to it. Excel 2016 unprotect sheet procedure is as detailed below.
Step 1: Navigate to the location of the Excel file and open the workbook.
Step 2: Hit the Alt + F11 keys simultaneously to launch Microsoft Visual Basic for Applications.
Step 3: Click Insert located in the main menu on the top bar and select Module.
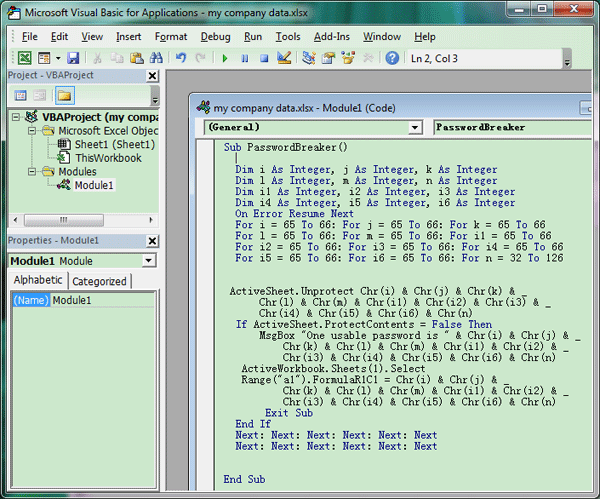
Step 4: Enter the VBA code in the Module.
Step 5: Click the Run button or press F5 to execute it.
Though it may take some time to complete the process, you will be able to make changes to the data in the worksheet.
Way 7: Copy Protected Excel Contents to Another Worksheet
A great workaround to access the content of a protected Excel file is by simply copying it to another worksheet by following the procedure below.
Step 1: Open the protected Excel file.
Note: You can only view the contents of Read Only protected files and not those that have been protected by a password
Step 2: Hit the Ctrl + A buttons to select the contents of the worksheet then press Ctrl + C to copy.
Step 3: Open a blank Excel file and press Ctrl + V.
Summary
The only way to access content of protected Excel workbook, workbook structure and worksheet is by unprotecting them respectively. A workbook consists of the workbook structure; a workbook structure consists of the worksheet and the cells. This article has detailed all the procedures of unprotecting the three subsets. In case you have forgotten the password to your workbook, we recommend using PassFab for Excel to remove it.