To bypass iCloud activation lock without password, you should jailbreak your iDevice first. Due to there is no jailbreak tool for Windows system, you can follow this guide to create a jailbreak environment on your Windows computer to jailbreak your iDevice.
Tips:
If possible, jailbreak your iDevice on Mac.(The operating system should be macOS 10.13 - 10.15).
Part 1. Preparations for Jailbreaking iDevice on Windows
Preparation for jailbreaking iDevice on Windows system:
- Windows 7 or later version, 32bit or 64bit
- The USB with at least 2GB ( Please backup your data first because the USB will be formatted)
- Download checkn1x-1.0.6-amd64.iso on Windows system
- Download rufus-3.1.1.exe on Windows system
Part 2. Detailed Guide to Jailbreak iDevice on Windows
2.1 Burn the ISO File of checkn1x to the USB
-
Insert your USB flash drive to the computer.
-
After downloading executable file Rufus, click Rufus to run it.
-
In Rufus, find the ISO file of checkn1x you have downloaded, and click "SELECT" button. Then "checkn1x-1.0.6-amd64.iso" will appear in the boot selection. Keep other options default, and then click "START".

-
Choose and click "Write in DD Image mode". Then click "OK" button. And there will pop up a warning from Rufus that all the data on the USB device will be formatted (please back up your USB first if necessary), click "OK" to confirm.

-
It will take 2-3 minutes for Rufus to burn checkn1x.iso to USB.

-
Click “CLOSE” button after burning process.

Note:
To avoid that the system couldn’t recognize the USB, please re-plugin it to the computer after burning process.
2.2 Jailbreak iDevice via Checkn1x You’ve Burned
Step 1. Restart the computer. When the computer is turned on, press F12 shortcut key to choose boot options before loading operating system.

Note:
For most computer brands, the shortcut key for boot options is F12. You are supposed to search for the correct key matched your computer if F12 doesn’t work. Here are some common shortcut keys for boot options.
| Boot Key | Desktop Brands | Laptop Brands | Motherboard Brands of Assembly Computer |
|---|---|---|---|
| ESC | Dell | ASUS, Sony | MAXSUN, UNIKA, SUPOX, Spark, SOYO, EPOX, UNIKA, Jetway, J&W, Colorful, ECS, SOYO, FOXCONN |
| F8 | ASUS, BenQ | ASUS, YESTON, J&W | |
| F9 | HP, BenQ | BIOSTAR, GUANMING | |
| F10 | ASL | ||
| F11 | MSI | MSI, ASRock, ONDA, Colorful,ECS, Gamen, Topstar | |
| F12 | Lenovo, HP, Acer, Hasee, eFound, THTF, Haier | Thinkpad, Dell, Lenovo, TOSHIBA, Samsung, IBM, Acer, Hasee, Haier,eFound, THTF, GIGABYTE, Gateway, eMachines | GIGABYTE, Intel, Cthim, SOYO, FOXCONN, Gamen, Topstar |
If you can't enter Boot Menu, enter BIOS/UEFI to change Boot Options settings. So that you can run Checkra1n on Linux. Please read the following articles to get detailed information.
- BIOS/UEFI Settings: How to Boot Your Computer from USB/CD/DVD
- How to Set Computer Boot from USB/CD/DVD
Choose the USB you’ve burned on the boot options window.
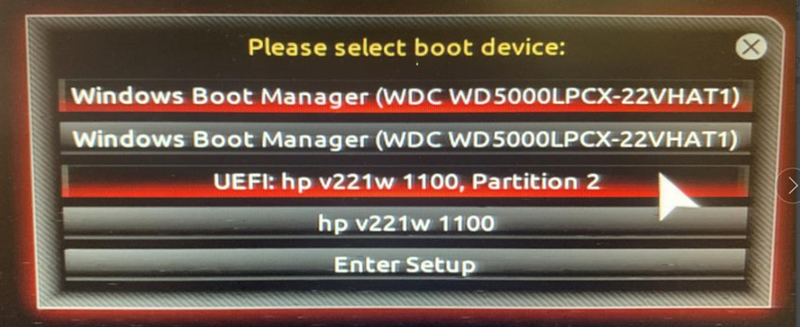
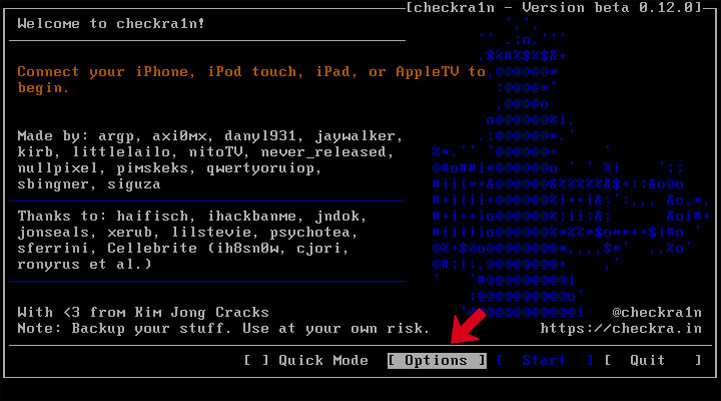
Step 2. Restart the computer. When the computer is turned on, press F12 shortcut key to choose boot options before loading operating system.
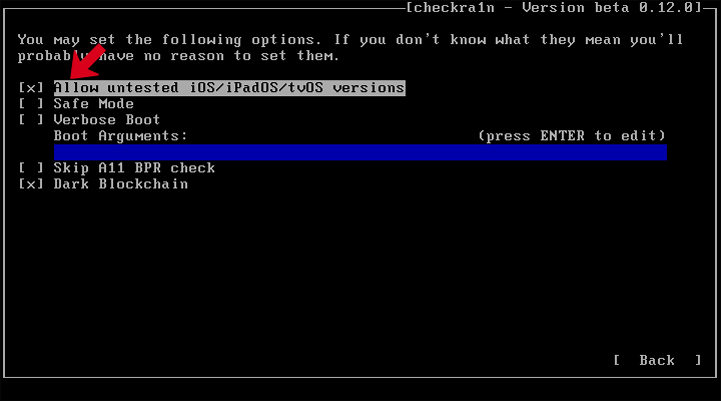
Use arrow keys to select Allow untested iOS/iPadOS/tvOS versions in settings and press Enter key.
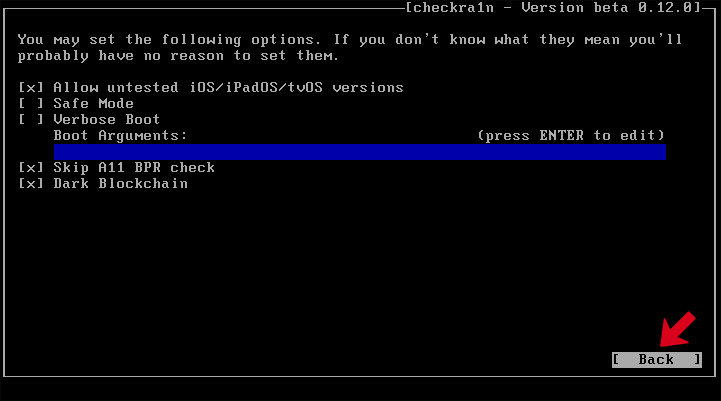
Then navigate to Back and press Enter key to return to the main interface.
Hit the Start button to start jailbreaking.
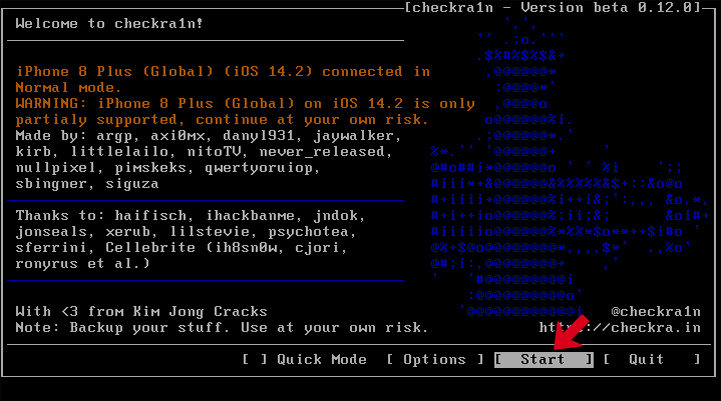
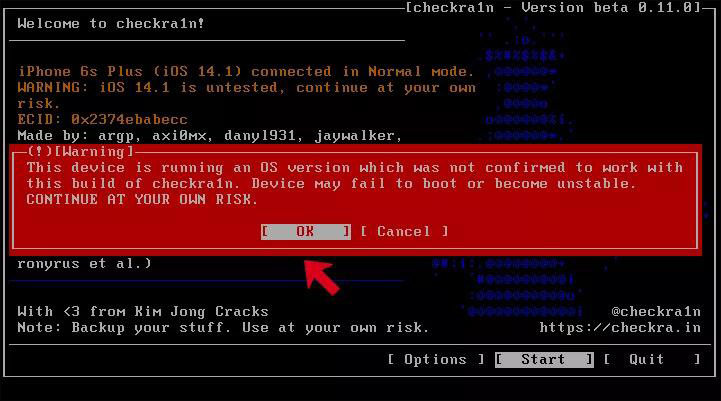
Checkra1n will pop up a warning before jailbreaking. Please choose OK to jailbreak your iOS device.
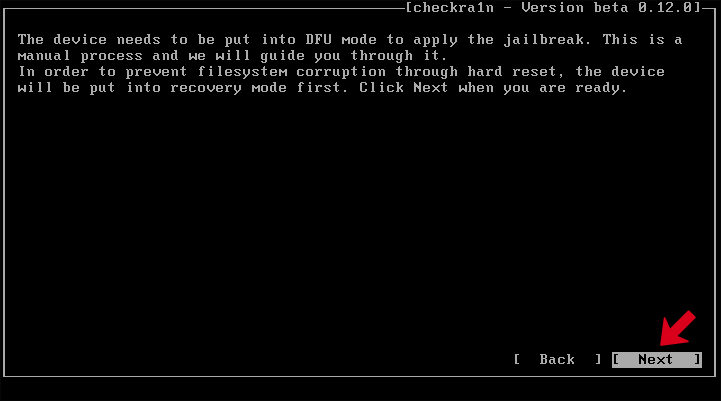
Step 3. To jailbreak your iDevice, checkn1x requires your device to be in DFU mode. Please select “Next”, and the program will guide you to put your device into DFU mode.
Check1x will first put your iDevice into Recovery mode automatically when you select “Next”.
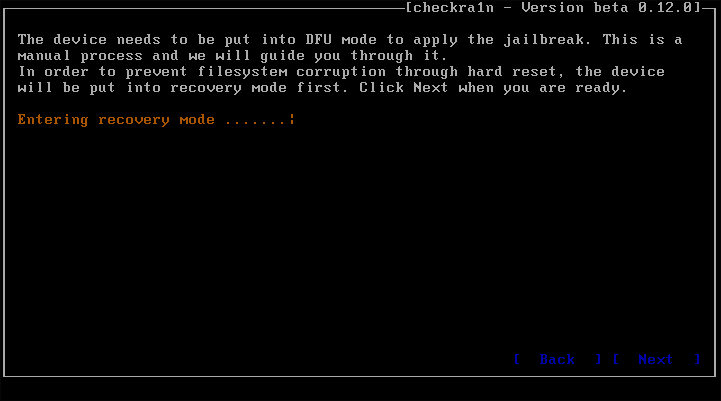
Step 4. Select “Start” when your iDevice is in Recovery mode. Then follow the guide of checkn1x to put your iDevice into DFU mode.
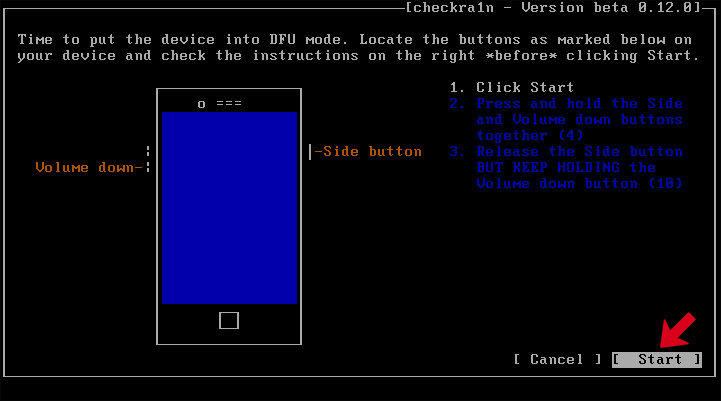
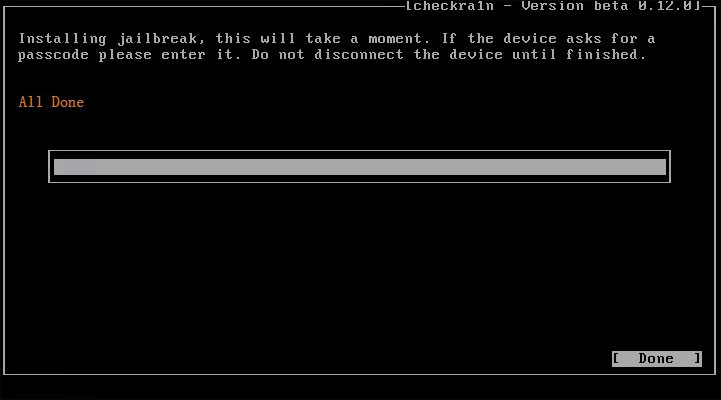
Step 5. Enter DFU mode successfully later, checkn1x will automatically jailbreak your iDevice. Select “Done” when the jailbreaking process completes, and then unplug the USB.
If get stuck in the process of jailbreaking, try the following solutions:
- Use another USB and repeat the above steps
- Restart your iOS device and computer, then try again
If the jailbreak fails, please plug your device into the USB port on the back of the computer mainframe, and try the jailbreak process again. (Usually the USB port on the back of the computer has better compatibility)
Part 3. Remove iCloud Activation Lock
Restart the computer after jailbreaking successfully. Your computer will enter Windows operating system automatically. Now please use PassFab Activation Unlocker to remove iCloud activation lock. You can check out this User Guide to know how to use it.


