You might panic when you discover your computer won't boot up when you turn it on. The situation becomes quite frustrating, especially when you see a blank black screen with no error message or details. In this case, your computer becomes completely useless, and you are stuck with this black screen.
However, the situation is not disastrous sometimes, and you can easily fix your computer. But before doing that, you must diagnose and identify the actual reason behind the error, as not doing so may result in more severe errors.
Part 1: Understanding Computer Won't Boot Issue
Part 2: How to Fix a Computer that Won't Boot Up?
- Solution 1: Check Power Connections and Hardware Components
- Solution 2: Verify BIOS or UEFI Settings
- Solution 3: Check your Display
- Solution 4: Perform Startup Repair
- Solution 5: Perform System Restore
- Solution 6: Boot in Safe Mode
- Solution 7: Scan for Malware and Virus
- Solution 8: Smart Repair by PassFab FixUWinEasy
Part 1: Understanding Computer Won't Boot Issue
When a computer beeps when turned on and won't boot up, there is a problem with your computer's hardware or software. It indicates a startup issue when you press the power button, but your PC does not start, or if your computer won’t turn on after being off for a long time. In most cases, restarting resolves such issues, but if they persist, you must look for their potential reasons and try to fix them.
Why Won't my Computer Turn On?
If your computer is not turning on entirely, the reason could be a faulty internal or external power supply. But if it turns on and the lights light up, but you see no display, there could be a problem with your display or the boot settings. A virus or malware can cause this too.
Part 2: How to Fix a Computer that Won't Boot Up?
Here is what to do if computer does not boot up after turning on:
Solution 1: Check Power Connections and Hardware Components
When your HP PC is not starting after pressing the power button, it means your computer has no power supply. It may be due to a broken power cable or a non-functional electric socket. So, you should try another cable or switch to another wall to plug your computer into it.
If this does not fix the problem, detach all the hardware from the motherboard, such as I/O devices, hard disk, RAM, etc., and put them back, ensuring everything is properly connected. Now, check if your computer boots up.
Solution 2: Verify BIOS or UEFI Settings
BIOS and UEFI contain the hardware settings, and one of the potential reasons behind a PC won’t turn all of a sudden is misconfigured BIOS or UEFI settings. If the boot priority is not set to your primary HDD or SDD, your computer may fail to boot to Windows. An enabled Fast Startup feature or any other unusual setting can cause this error. We suggest you check these settings before trying any advanced solution:
Step 1. Start up your system and press the boot key.
Note: The boot key differs for different PC brands. The common keys are ESC, F12, F8, F10.
Step 2. Set your hard drive on boot priority.
Step 3. Disable the Fast Boot setting.
Exit the boot menu and check if your computer can boot normally. If not, you should reset BIOS/UEFI configurations.
Solution 3: Check your Display
When your PC is running, the lights are on, and you can hear the fan running, but you see no display; it is a huge indicator of a faulty display. In such a case, try connecting a different monitor to your system and check if it works. If so, you may need to replace your display as the current one has been damaged.
Solution 4: Perform Startup Repair
Startup Repair is a Windows utility to troubleshoot startup issues. This feature is designed to rescue you when your Dell computer has the power but won’t turn on. You need to boot into the recovery environment to access it as follows:
Step 1. Restart your PC, and press the power button as the Windows logo appears. Repeat the process thrice.
Step 2. When you enter the WinRE, click the Advanced options button.
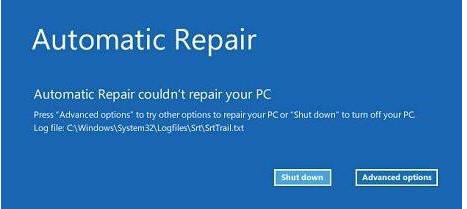
Step 3. Choose Troubleshoot - Advanced options.
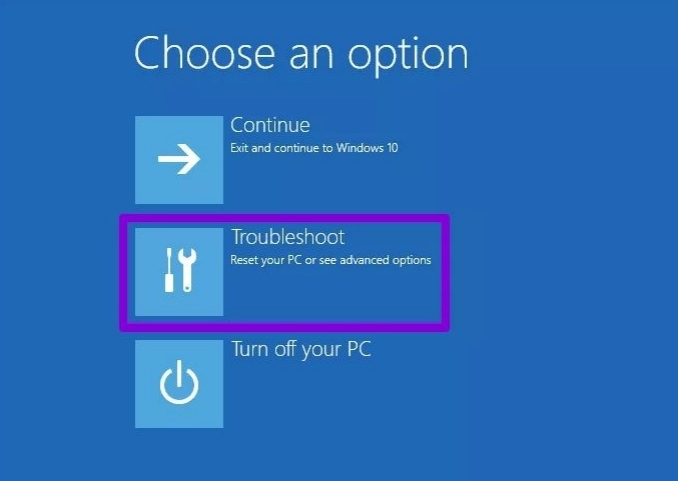
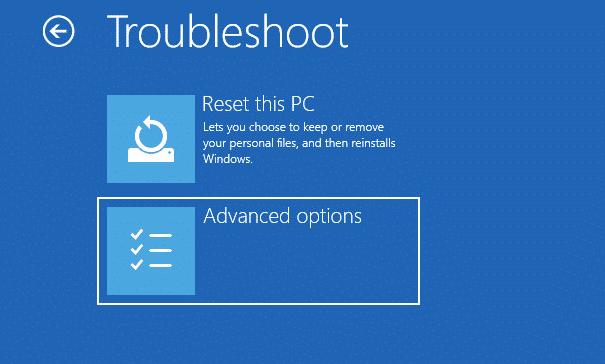
Step 4. Choose Startup repair.
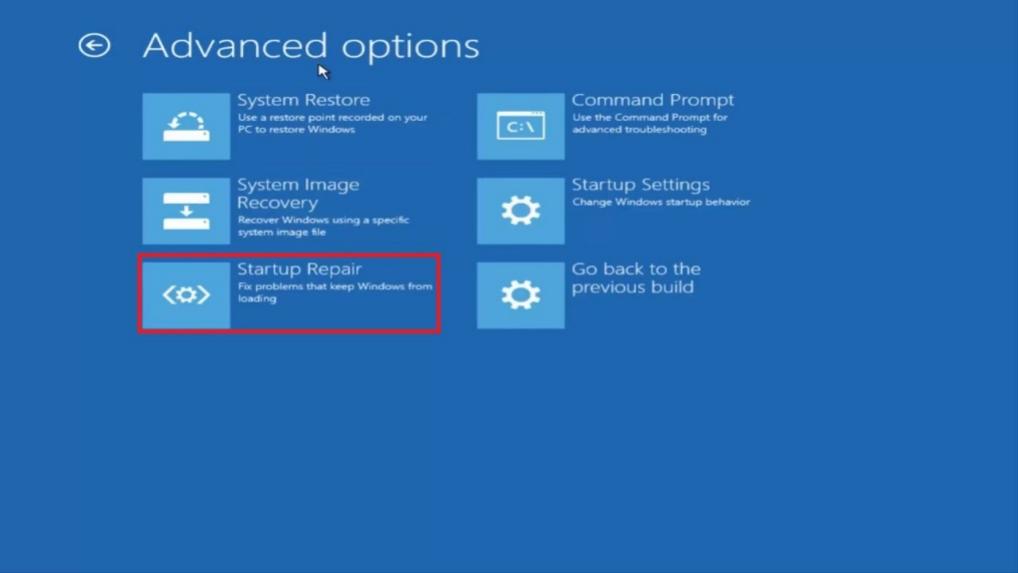
Follow the on-screen instructions onwards. The startup repair will start diagnosing and fixing your system. Your computer will automatically restart if the problem is fixed, or you will see a message otherwise.
Solution 5: Perform System Restore
Performing a system restore can also eliminate the Lenovo PC won’t boot Windows 10 error by removing all the recent changes and installed programs from your computer. Try the System Restore feature if you doubt some recent update or software may have caused the issue. But before proceeding to the steps, please note that this method works only if your PC has a restore point.
Step 1. Restart the system and hit the power button as the Windows logo appears. Repeat this thrice.
Step 2. Click Advanced options button.

Step 3. Choose Troubleshoot > Advanced options > System Restore.


Step 4. Select a user account, enter the password, and click Continue.
Step 5. Choose a restore point, click Next.
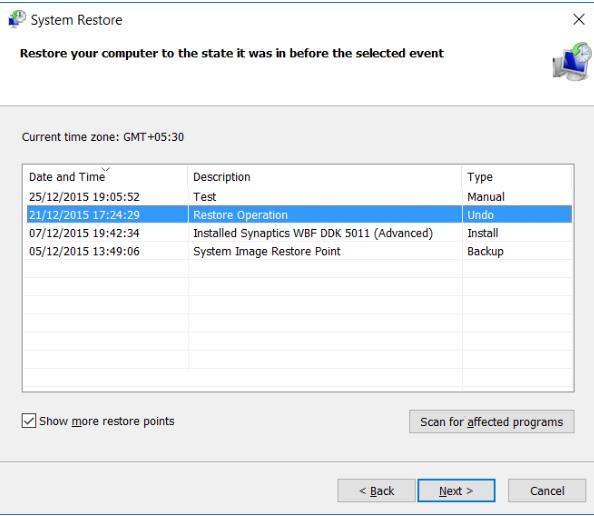
Step 6. Click Scan for the affected programs to know which programs will be removed. Click Close.
Step 7. Click Next and then Finish to start the system restore.
After the restore completes, hopefully, you will not face any issues when you turn your PC on.
Solution 6: Boot in Safe Mode
The Windows Safe Mode is a special boot scheme in which your system boots into Windows with limited features and programs. Luckily, you can use this feature to fix boot issues in Windows even if it fails to start up normally. To start your system into safe mode, follow the steps below:
Step 1. First, force shut down your system by holding the power button for up to 10 seconds.
Step 2. Now, turn on your PC and press the power button when Windows logo appears.
Step 3. Repeat step 2 thrice.
Wait unless your system restarts into the Windows Recovery Environment (WinRE).
Step 4. Click Advanced options button on the Automatic Repair screen.
Step 5. Choose Troubleshoot followed by Advanced options.
Step 6. Select Startup Settings and click Restart.
Step 7. When you see a list of options, press the corresponding key for Safe mode with networking.
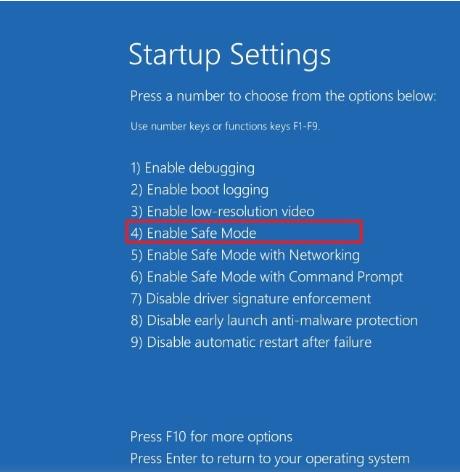
When your system boots to Safe mode, run troubleshooters and uninstall any program you think might be the culprit.
Solution 7: Scan for Malware and Virus
Almost 10% to 30% of PC problems are caused by viruses and malware. If your PC won’t turn on but motherboard light is on, it indicates the presence of a harmful program on your PC. However, scanning your system and removing viruses can help resolve Acer PC won’t boot black screen errors.
There is no built-in way to run a virus scan in Windows directly from the boot menu or the recovery environment, so you must use third-party software. Therefore, we recommend that you boot your system with another bootable device and run a virus scan.
Solution 8: Smart Repair by PassFab FixUWinEasy
When every other workaround fails to solve Windows errors, PassFab FixUWin comes to the rescue. It is an amazing Windows repair tool that fixes any Windows error effortlessly. It lets you create a Windows recovery disk, uses its algorithms to scan your system for potential reasons, and eliminates them automatically. You can use it without worrying about your privacy and security, as it is 100% safe. Besides, its 100% success rate also makes it stand out in the competition.
Step 1. Install and launch PassFab FixUWin in any accessible system and plug in a USB.
Step 2. Click Create boot disk now button.
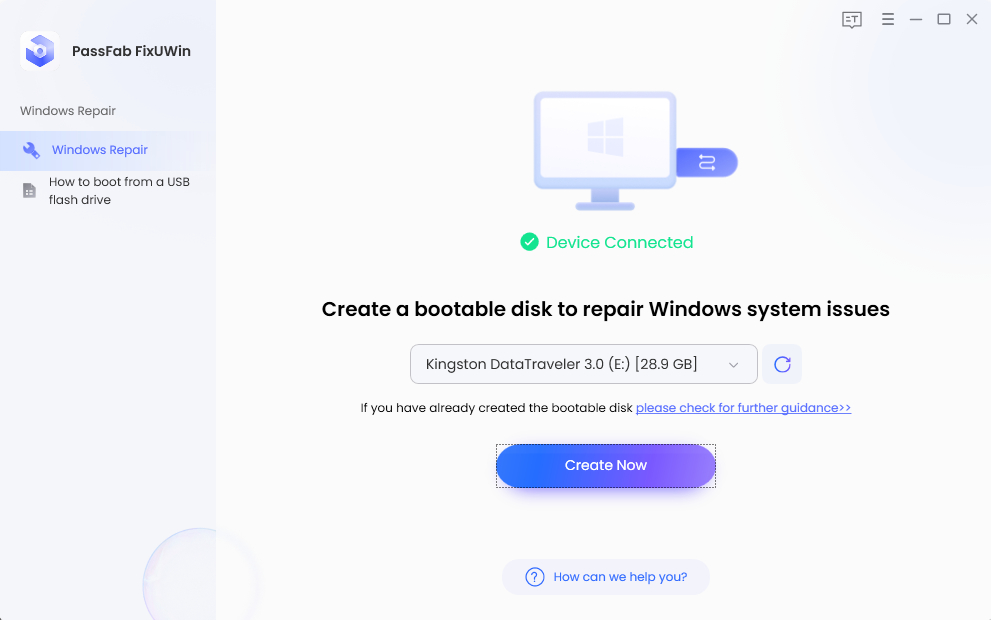
Step 3. Choose your USB drive and click Next to create the Windows repair disk.
Step 4. Once the bootable device is ready, switch to the defective PC.
Step 5. Plug in the bootable USB and restart it.
Step 6. Hit the boot key upon startup and set the bootable device on priority.
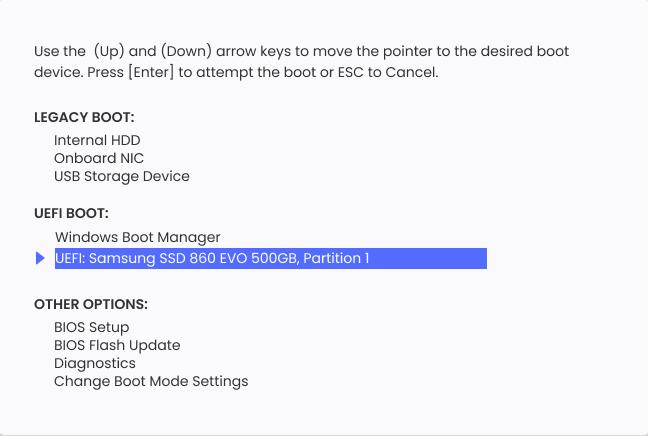
Step 7. Click Automatic Repair.
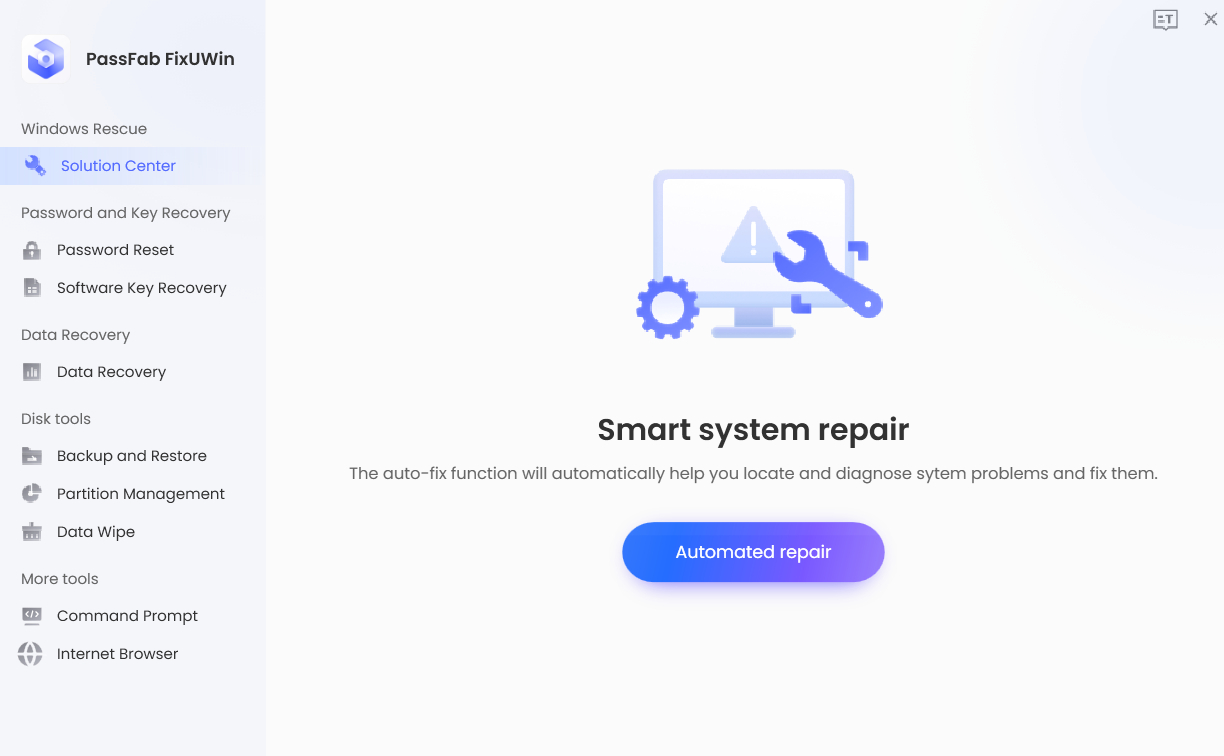
Step 8. Choose the disk partition to repair, and click Start repair.
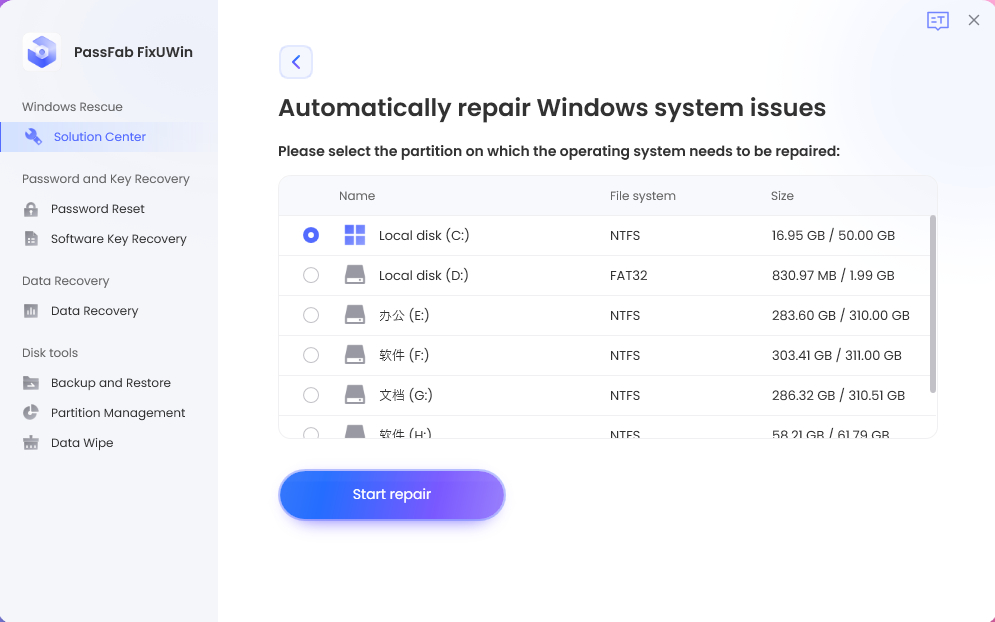
The program will start scanning your system. The more data you have on disk, the more time it will take to complete the scan, so wait patiently.
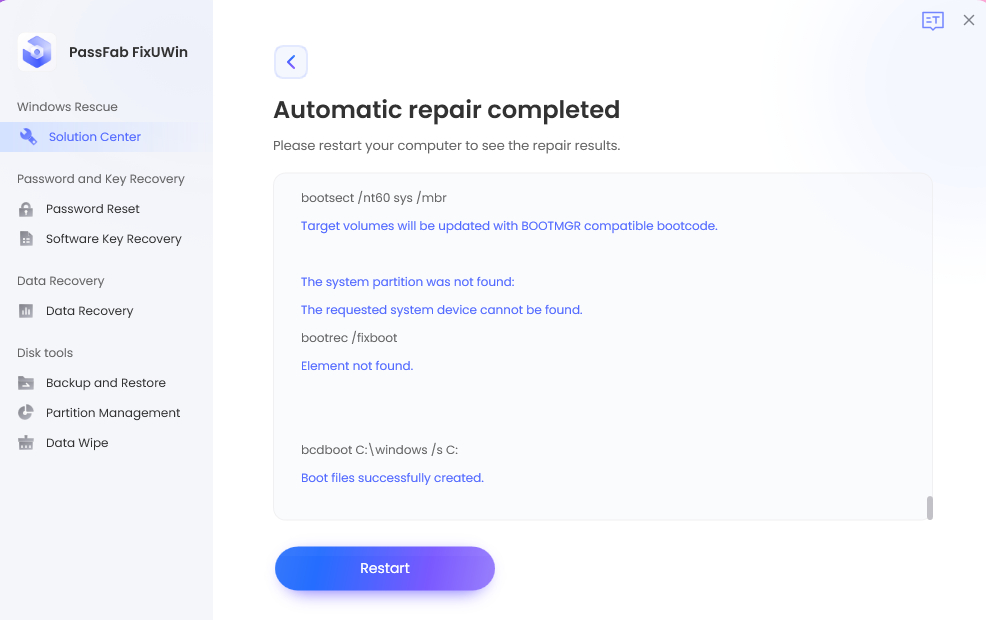
Step 9. Click Restart.
Conclusion
It’s frustrating when your PC won’t boot and you only see a black screen when you turn it on. If you are stuck in such a situation, follow the instructions in this guide to fix it. Out of the suggested methods, we recommend using PassFab FixUWin for a quick fix.