Windows Update Error 0x800f0984 When Attempting Install of KB5004945. Please help.
Microsoft releases updates to improve its operating system from time to time. Many of these updates are released to resolve a bug or an error many users face, but sometimes, these updates become a problem for the user. When you try to install such updates, you may see the error 0x800f0984. After installing Windows update kb5000842, Windows 10 fails to get the latest cumulative updates installed, and you see errors with different codes.
However, in this article, you will see the best workarounds to resolve Windows update 0x800f0984 errors.
Part 1: What is Error Code 0x800f0984?
Part 2: What may Cause Error 0x800f0984?
Part 3: How to Fix Error 0x800f0984?
- 1. Uninstall any Third-Party Software or Antivirus tool
- 2. Use PassFab FixUWinEasy
- 3. Perform SFC and DISM Scans
- 4. Reset Windows Update Component
- 5. Remove Everything from SoftwareDistribution Folder
- 6. Reset Windows Update Agent Manually
- 7. Use In-Place Upgrade to Repair Install Windows 10
- 8. Perform Windows Update Medic Service (WaaSMedicSVC)
- 9. Use Media Creation Tool
- 10. Reinstall Windows (Final Solution)
Part 4: FAQs About 0x800f0984 windows update Error
Part 1: What is Error Code 0x800f0984?
When installing a certain cumulative update in Windows 10/11, the installation stops suddenly. You see an error code 0x800f0894 with a message stating, “There were some problems installing updates, but we’ll try again later…..”. The error message does not hint at what went wrong, but if you search error code 0x800f0984 on Google, you will find that this error code is also known as PSFX_E_MATCHING_BINARY_MISSING (Matching component directory exists but binary missing).
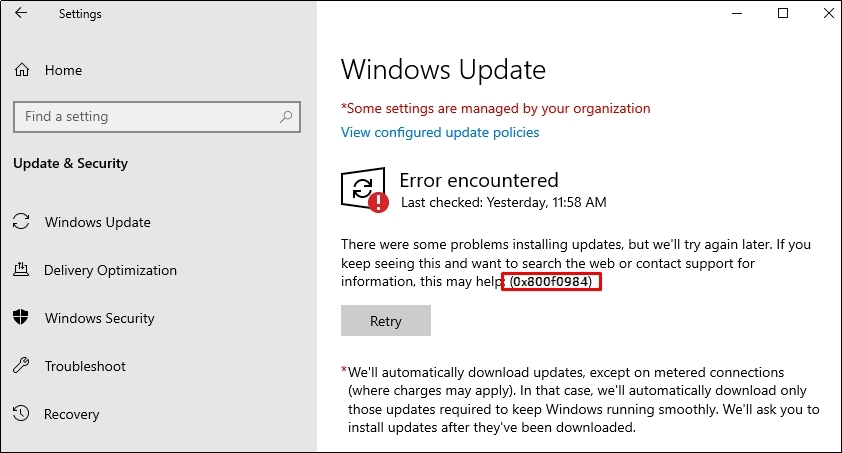
Many users face this error after installing KB5001330, KB5004945, KB5005565, and KB5004237. The issue occurs on Windows 10 PC that automatically removes outdated resource records. During this process, the Latest Cumulative Update (LCU) installed is marked as permanent, the older components are removed from the PC, you cannot uninstall KB5003690 or KB5003214 from your PC, and you fail to install any further Latest Cumulative Updates (LCU).
Part 2: What may Cause Error 0x800f0984?
Behind the 0x800f0984 windows update error, there could be various reasons, such as:
- Power-Saving Mode: If you keep your system in power-saving mode to extend the battery life, it can stop some background services and make some components less performing, causing the addressed error.
- Corrupt System Files: If the system files on your PC get corrupt, you may see error 0x800f0984.
- Third-party Software/Antivirus: If any third-party software installed on your PC interrupts the system routines or the antivirus does not allow a system file to run on your PC, the error under discussion occurs.
- Corrupt Windows Updates Components: Windows update components play a vital role in smoothly installing and implementing an update in Windows. If any of these components get corrupted, you face the error 0x800f0984.
Part 3: How to Fix Error 0x800f0984?
Fixing an error in Windows 10/11 is not as difficult as it used to be with earlier versions. You can try to fix any error, including 0x800f0984 windows 10, by following the solutions given below:
1. Uninstall any Third-Party Software or Antivirus tool
A third-party antivirus or a firewall installed on your PC may interrupt system routines and stop some system files from running on your PC, causing the error 0x800f0984. You should try to uninstall any such program from your PC and retry to install the updates again.
2. Use PassFab FixUWinEasy
If you are looking for an easy and straightforward fix to resolve 0x800f0984, we recommend using PassFab FixUWin. This is a Windows repair tool that helps you get rid of any Windows error within a few clicks. PassFab FixUWin scans your system repositories and replaces or repairs any damaged or problematic files automatically. It works like a charm with blue/black screen errors, PC crashing problems, stuck on boot/restart loop, or any other Windows error. Some of the reasons behind recommending this magical tool include the following:
- Highly user-friendly
- Automatic error detection and resolution.
- Stunning with 3 different repair modes, ensuring high success rate
- No privacy intrusion
- All computer brands are supported and compatible with all modern Windows versions
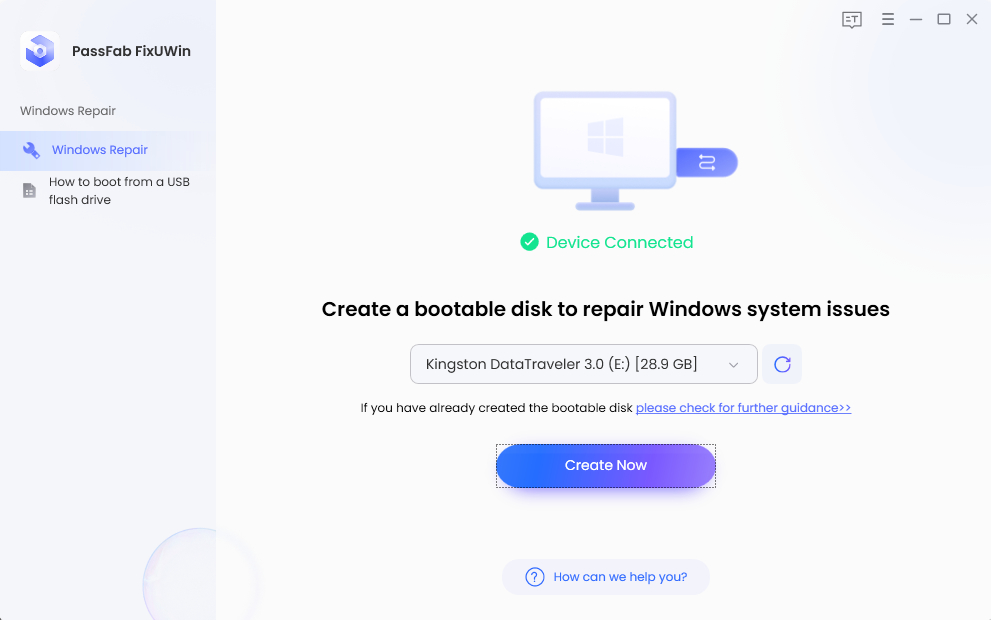
- Install PassFab FixUWin on your personal computer and then plug in a compatible USB drive.
- Create a boot disk by selecting the USB drive and following the prompts.

Wait for a few minute, PassFab FixUWin will create a bootable media to the USB.
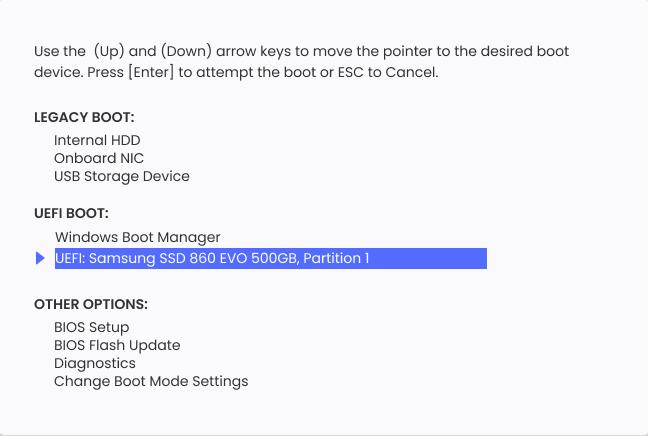
- Restart your computer and press the designated boot key upon startup.
- Set the USB drive as the primary boot device and save changes before exiting.

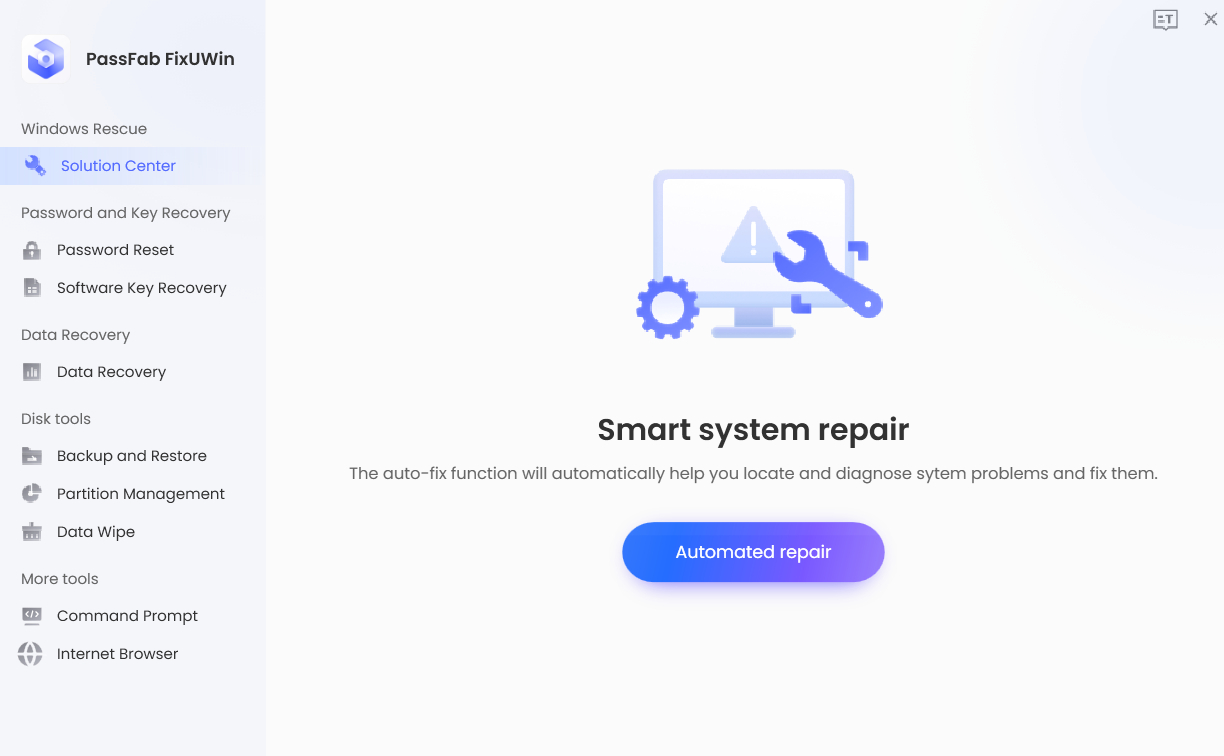
- Select "Automated Repair" and choose the partition you wish to repair.

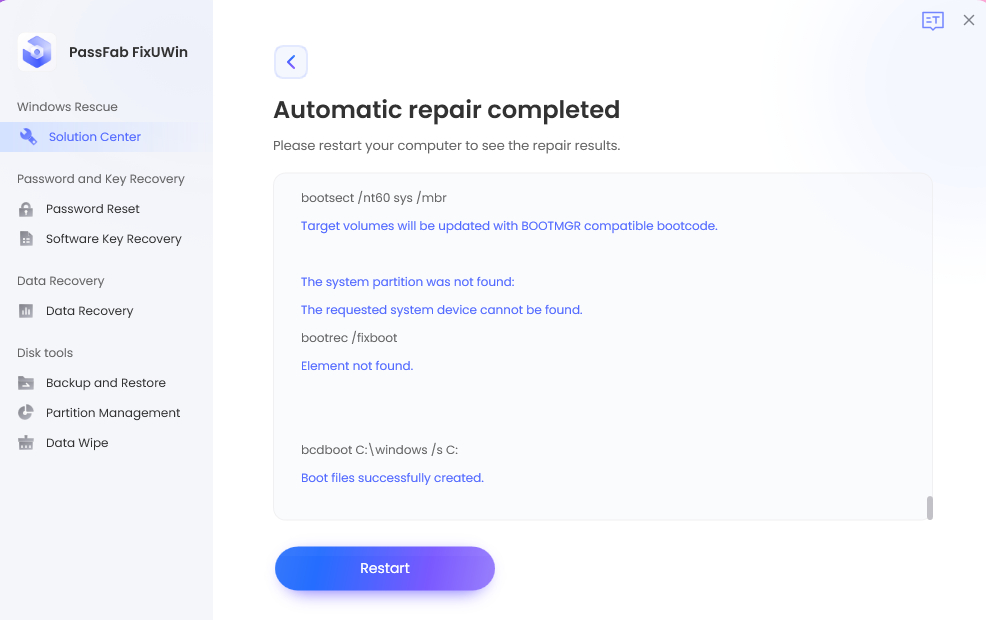
- Click "Restart" to reboot your pc after repair completes.

3. Perform SFC and DISM Scans
Windows provides several built-in ways to repair corrupt or damaged systems files, and SFC and DISM are two.
The System File Check (SFC) command automatically checks your system directory for damaged system files and replaces them with their healthy version
Step 1: Open the elevated CMD window.

Step 2: Type sfc /scannow. Hit Enter.
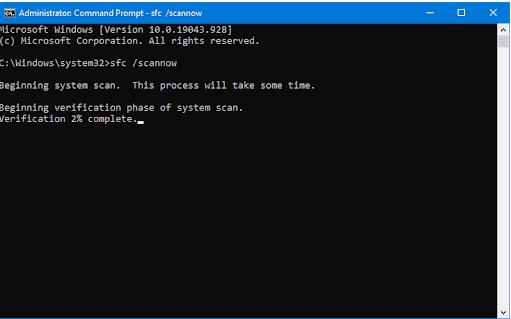
The scan will start and resolve issues with system files.
Now, you can run the Deployment Image Servicing and Management (DISM) tool to scan further and reconstruct the Windows image file if damaged.
Step 3: Type DISM /Online /Cleanup-Image /RestoreHealth. Press Enter.

This workaround may take 20-30 minutes. After you have run both scans, check if Windows update installs without error 0x800f0984.
4.Reset Windows Update Component
As mentioned earlier, you may face a Windows update 0x800f0984 error due to corrupt Windows update components. We recommend you reset these components by first stopping all the services and then restarting them.
Step 1: Open the elevated CMD window.
Step 2: Stop Bits, Windows Update, and Cryptographic services by running the following commands:
- net stop bits
- net stop wuausersv
- net stop cryptsvc
Step 3: Now, type DEL “%ALLUSERSPROFILE%\Application Data\Microsoft\Network\Downloader\qmgr*.dat”, hit Enter.
Step 4: Type cd /d %windir%\system32, press Enter.
Step 5: Run the following commands each at a time to re-register the BITS and Windows Update files.
- regsvr32.exe atl.dll
- regsvr32.exe urlmon.dll
- regsvr32.exe mshtml.dll
- regsvr32.exe shdocvw.dll
- regsvr32.exe browseui.dll
- regsvr32.exe jscript.dll
- regsvr32.exe vbscript.dll
- regsvr32.exe scrrun.dll
- regsvr32.exe msxml.dll
- regsvr32.exe msxml3.dll
- regsvr32.exe msxml6.dll
- regsvr32.exe actxprxy.dll
- regsvr32.exe softpub.dll
- regsvr32.exe wintrust.dll
- regsvr32.exe dssenh.dll
- regsvr32.exe rsaenh.dll
- regsvr32.exe gpkcsp.dll
- regsvr32.exe sccbase.dll
- regsvr32.exe slbcsp.dll
- regsvr32.exe cryptdlg.dll
- regsvr32.exe oleaut32.dll
- regsvr32.exe ole32.dll
- regsvr32.exe shell32.dll
- regsvr32.exe initpki.dll
- regsvr32.exe wuapi.dll
- regsvr32.exe wuaueng.dll
- regsvr32.exe wuaueng1.dll
- regsvr32.exe wucltui.dll
- regsvr32.exe wups.dll
- regsvr32.exe wups2.dll
- regsvr32.exe wuweb.dll
- regsvr32.exe qmgr.dll
- regsvr32.exe qmgrprxy.dll
- regsvr32.exe wucltux.dll
- regsvr32.exe muweb.dll
- regsvr32.exe wuwebv.dll
Step 6: Reset Winsock by running netsh winsock reset.
Step 7: Restart the services that you stopped at the beginning of this fix by executing the commands below:
- net start bits
- net start wuauserv
- net start cryptsvc
After performing the above steps, close the command prompt window, restart your PC, and attempt to install the Windows update again.
Tips:
This process would be a bit complicated as it requires running many commands. If you run the wrong command, in some cases, the command may have no effect. But it also may cause harmful consequences like chaning some system settings.
5. Remove Everything from SoftwareDistribution Folder
The SoftwareDistribution folder temporarily stores Windows update files required to install new updates. Although deleting the SoftwareDistribution folder is not recommended, as it helps keep your system secure. However, if you are facing issues while installing the updates, renaming or deleting this folder may help.
Step 1: Open the elevated Command Prompt window through the Run prompt.
Step 2: Type net stop wuauserv, and press Enter to stop Windows Update services.
Step 3: Type net stop bits, and hit Enter to stop Background Intelligent Transfer Service.
Step 4: Now, rename the SoftwareDistribution folder by typing rename %windir%\SoftwareDistribution SoftwareDistribution.bak, and press Enter.
Step 5: Restart the Windows update and bits services by typing net start wuauserv and net start bits, respectively.
After following the above steps, Windows will recreate the SoftwareDistribution folder and download the required files for new updates. However, if this does not work, you will need to clear the folder as follows:
Step 6: Stop Windows Update service and bits by typing net stop wuauserv and net stop bits, respectively.
Step 7: Open the File Explorer and navigate to C:\Windows\SoftwareDistribution.
Step 8: Select all items in the folder and delete them permanently.
Step 9: Relaunch the elevated command prompt and start the services you stopped earlier by running the following commands:
- onet start wuauserv
- onet start bits
6. Reset Windows Update Agent Manually
Most probably, you are facing error 0x800f0984 windows update due to a damaged Windows Update cache. This cache stores important files required to install cumulative updates, and if any of these files get corrupted, it causes various error codes. Maintaining this cache is the responsibility of Windows Update Agent, and you can try resetting it manually.
Step 1: Open the Command Prompt as an admin through the Run dialog.
Step 2: Type the following commands, one at a time, and hit Enter to run it:
- net stop bits
- net stop wuauserv
- Del “%ALLUSERSPROFILE%\Application Data\Microsoft\Network\Downloader\qmgr*.dat”
- cd /d %windir%\system32
- regsvr32.exe atl.dll
- regsvr32.exe urlmon.dll
- regsvr32.exe mshtml.dll
- regsvr32.exe shdocvw.dll
- regsvr32.exe browseui.dll
- regsvr32.exe jscript.dll
- regsvr32.exe vbscript.dll
- regsvr32.exe scrrun.dll
- regsvr32.exe msxml.dll
- regsvr32.exe msxml3.dll
- regsvr32.exe msxml6.dll
- regsvr32.exe actxprxy.dll
- regsvr32.exe softpub.dll
- regsvr32.exe wintrust.dll
- regsvr32.exe dssenh.dll
- regsvr32.exe rsaenh.dll
- regsvr32.exe gpkcsp.dll
- regsvr32.exe sccbase.dll
- regsvr32.exe slbcsp.dll
- regsvr32.exe cryptdlg.dll
- regsvr32.exe oleaut32.dll
- regsvr32.exe ole32.dll
- regsvr32.exe shell32.dll
- regsvr32.exe initpki.dll
- regsvr32.exe wuapi.dll
- regsvr32.exe wuaueng.dll
- regsvr32.exe wuaueng1.dll
- regsvr32.exe wucltui.dll
- regsvr32.exe wups.dll
- regsvr32.exe wups2.dll
- regsvr32.exe wuweb.dll
- regsvr32.exe qmgr.dll
- regsvr32.exe qmgrprxy.dll
- regsvr32.exe wucltux.dll
- regsvr32.exe muweb.dll
- regsvr32.exe wuwebv.dll
- netshwinsock reset
- net start bits
- net start wuauserv
Reboot your PC and try to install the pending updates. Expectantly, you will not see error 0x800f0984 again.
7. Use In-Place Upgrade to Repair Install Windows 10
The Windows update error 22h2 can also be resolved with the help of an in-place upgrade as follows.
Step 1: Disable any third-party antivirus, firewall and drive encryption software.
Step 2: Create an OS backup using a tool such as PassFab FixUWin.
Step 3: Install the Media Creation Tool from Microsoft’s official website and run it to create an ISO image file.
Step 4: Right-click the ISO image file and click the Mount button.
This will create a Windows setup file.
Step 5: Go to File Explorer and look for a new drive similar to the DVD drive and open it.
Step 6: Now, look for the setup.exe file and run it for an in-place upgrade.
Step 7: Choose to keep personal files and apps option.
Step 8: After completing the process, right-click on the drive letter and select Eject.
After the in-place upgradation has been completed, you may notice some changes in the look and feel of your Windows. However, your data will remain untouched.
8. Perform Windows Update Medic Service (WaaSMedicSVC)
Another way to install an in-place upgrade is using Windows Update Medic Service (WaaSMedicSVC). This service runs in the background to diagnose and repair Windows updates based on WaaS Assessment Impact Level. This service specifically works on systems that have not been updated for a long time. WaaSMedicSVC can also resolve 0x800f0984 windows 10 error.
9. Use Media Creation Tool
Media Creation Tool can also help you get rid of 0x800f0984 as it offers to repair your PC. You can use it as follows:
Step 1: Download the Media Creation Tool on your PC and right-click on the downloaded file.
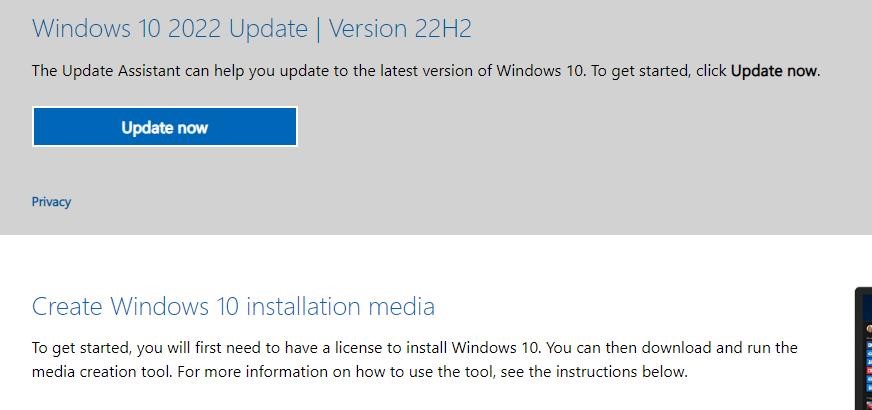
Step 2: Run the tool as administrator.
Step 3: Choose Upgrade this PC, click Next.
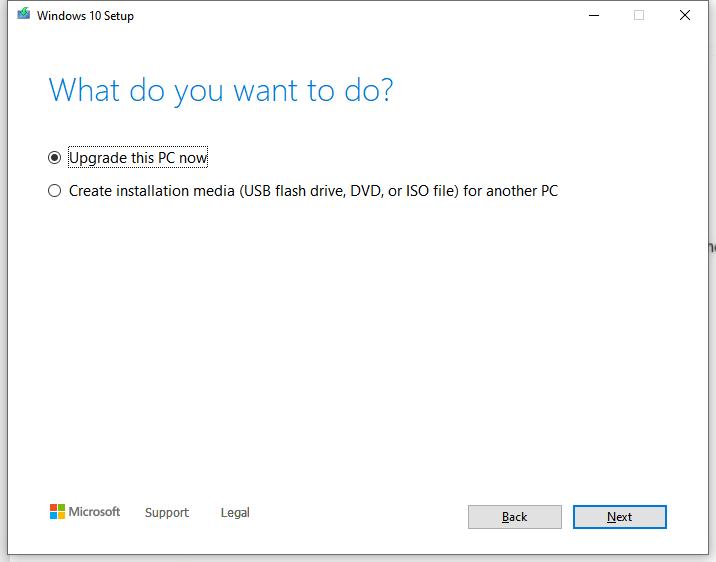
The tool will start downloading the latest updates according to your OS version. This will consume some time, based on your Internet speed. Once downloaded, the updates will automatically be installed.
10. Reinstall Windows (Final Solution)
If none of the abovementioned ways worked for you, reinstalling the entire Windows is your last resort. You can reinstall Windows yourself.
After installing Windows, your PC will appear as new, and all the personalized settings will be gone. This process will remove any malicious software, virus, or other harmful programs from your PC. Furthermore, you do not need to install any updates now.
Part 4: FAQs About 0x800f0984 windows update Error
1. How do I re-download failed Windows 10 updates?
If the failed updates do not appear in the Windows Update and Security settings, you can download them manually from Microsoft Update Catalog using the KB number.
2. What is Windows Update Medic Service (WaaSMedicSVC)?
WaaSMedicSVC is a service responsible for diagnosing and repairing issues with Windows updates based on WaaS Assessment Impact Level. It is specifically built for PCs that have not been updated in the long run.
Final Words
Error 0x800f0984 is a common error when Windows updates fail to install. It happens due to corrupt system files, Windows update components, or a third-party software interruption. In this article, we have proposed the best ways to resolve this error. That is PassFab FixUwin as its powerful function and user-friendly operations. We hope you took benefit from this guide.
