Looking for ways to repair your UEFI boot on Windows 10? This guide covers the best methods for fixing a damaged or corrupt UEFI, including using the command prompt.
Keep in mind that updating from BIOS to UEFI can bring benefits such as improved security, faster boot times, and support for larger disks, but it also carries the risk of damaging the bootloader if something goes wrong.
If you encounter "fix UEFIboot windows 10 access denied" while trying to repair your UEFI, these methods can help you get back on track.
Part 1: In case of no Boot Configuration Data Found (EFI/Microsoft/Boot/BCD)
Part 2: Fix UEFI Boot Windows Using PassFab FixUWin
Part 3: Fix UEFI Boot Windows 10 with Diskpart
Part 4: Fix UEFI Boot Windows 10 with Command Prompt
Part 5: Fix UEFI Boot Windows 10 with Windows Build-in Tool
Part 6: Fix UEFI Boot Windows 10 with Adding Disk Driver
Part 7: Fix UEFI Boot Windows 10 with Changing Bios Setting
Part 1: In case of no Boot Configuration Data Found (EFI/Microsoft/Boot/BCD)
A computer designed with UEFI along with an installation of Windows in the native mode will not boot in case of a corrupt Windows EFI bootloader. If you try boot, you will be displayed the following tab, also known as the Blue Screen of Death (BDOS) indicating that the Windows bootloader configuration is corrupted or in some cases, has been fully removed. Even if you try to repair the bootloader through bcdedit tool on a UEFI computer, you will still receive an error.
If you are using a Windows 10 or 11 computer on native UEFI mode through a GPT disk, then your Windows Boot Manager would store the boot manager and BCD configuration on a totally different EFI volume which is hidden in the FAT32 file system. Since this partition is hidden, the bcdedit tool fails to see this and likewise fails to do the bootloader configuration.
Part 2: Fix UEFI Boot Windows Using PassFab FixUWin
Fix UEFI boot windows 10 access denied using PassFab FixUWin! PassFab FixUWin is an online boot manager designed to assist Windows users in getting their system up and running. It allows users to get their system back up and running quickly and easily once it has been frozen by a virus or other problem.
With a promise of fixing your Windows related problems easily and quicky,PassFab FixUWin is known for fixing EFI boot manager Windows 10 since this has an automatic built-in Automated Repair. It can be downloaded on any computer or laptop and is currently workable for Windows 11/10/8/8.1/7.
- 1.Download and install PassFab on your computer.
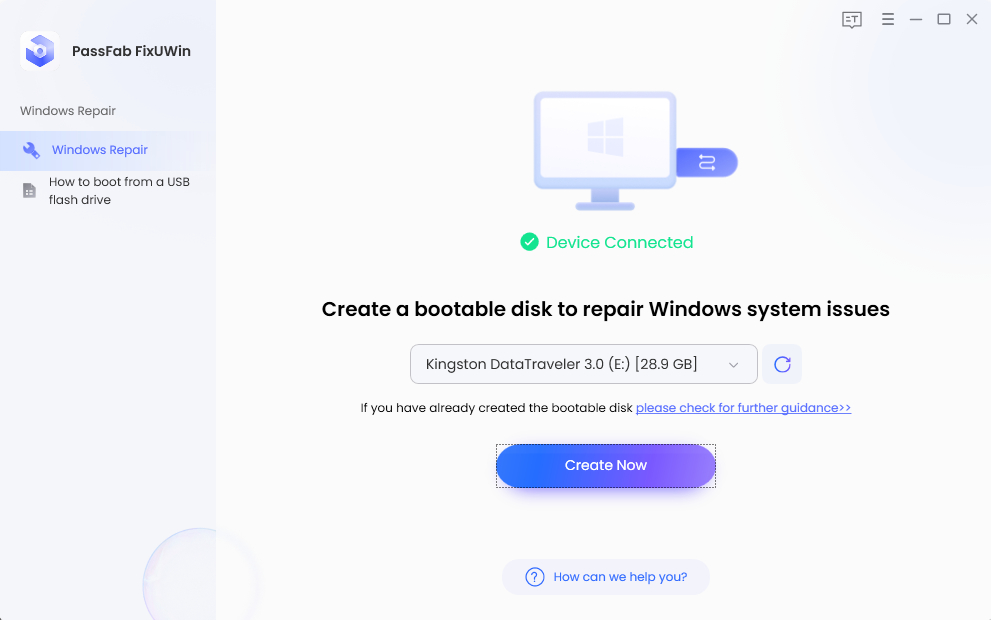
- Insert a USB drive then click Create boot disk now. Once done, the tool will create a bootable disk.
- Next, take out the USB drive. Then switch to the faulty computer and insert the bootable device in it.
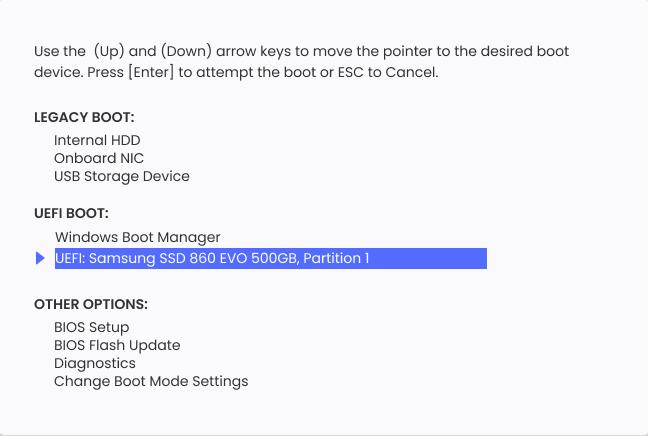
- Then reboot the problematic computer. Press the boot key to let the booting process start from the USB drive.
- Next, set your USB on priority and save the settings and hit Enter.

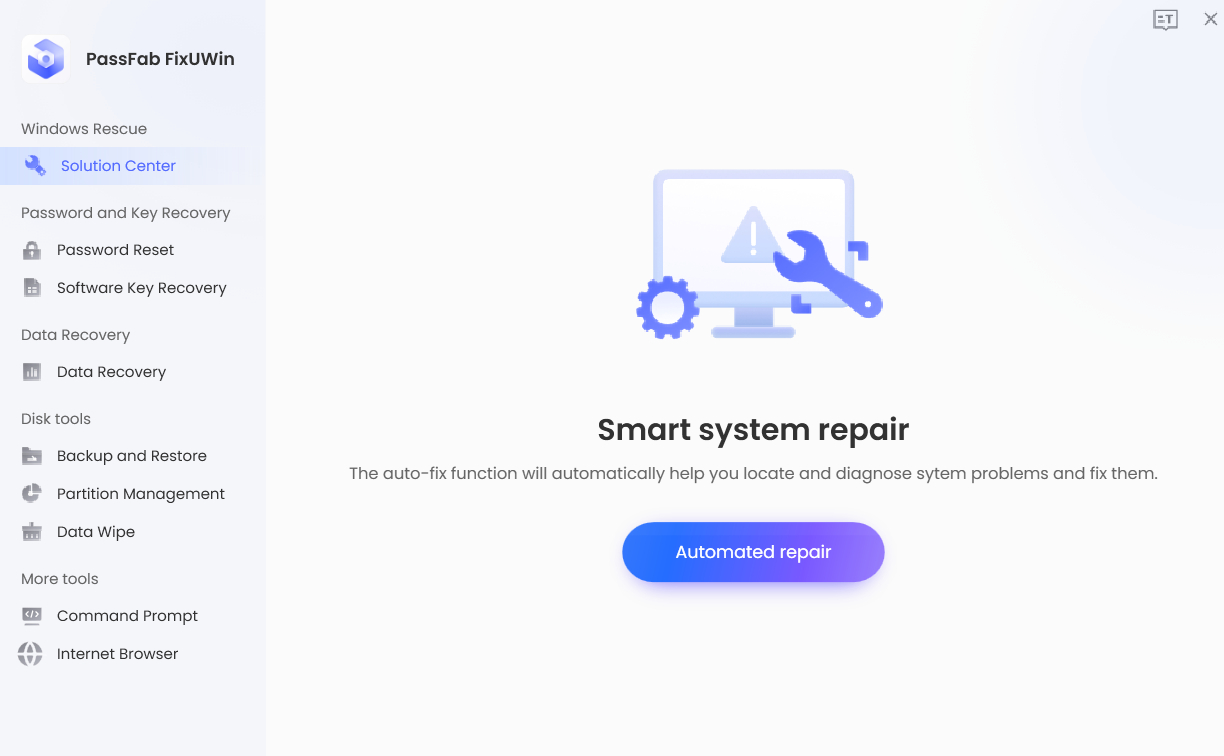
- Then select Automated repair to start repair automatically.

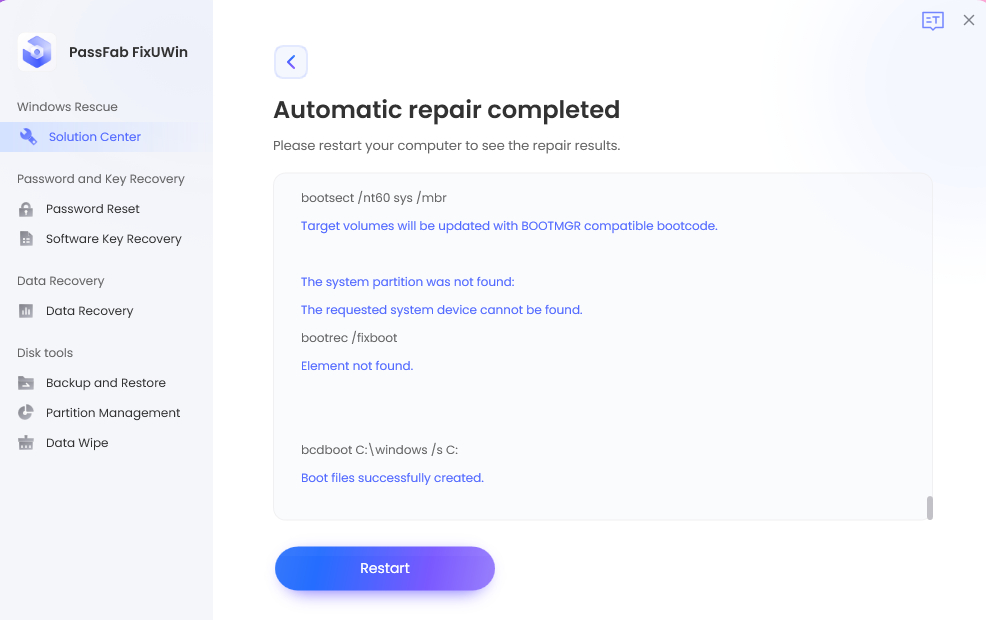
- Once all this is done, select restart. Your windows will be all good to use again.


Part 3: Fix UEFI Boot Windows 10 with Diskpart
One major cause of Windows boot manager UEFI corruption could be the UEFI partition not having a drive letter assigned. One way to repair UEFI boot Windows 10 is by using diskpart utility. This is available on Windows 8, 8.1, and 10. This way you can ensure that the UEFI partition letter is assigned to the boot.
Step 1: First insert the original Windows 10 installation USB/disc and boot it
Step 2: On your screen, a tab for install now will appear. There, click on “repair your computer”.
Step 3: Then click troubleshoot -> advanced options -> command prompt.
Step 4: Once the command prompt is done loading, type diskpart and select enter.
Step 5: Once the diskpart utility is loaded, type sel disk 0 and press enter.
Step 6: Then you will get a confirmation message “ Disk 0 is now the selected disk”. Once that appears, type list vol and press enter.
Step 7: Next, find the UEFI volume from the appeared list. Usually, the Fs column is FAT32 specified.

Step 8: Then type sel vol 2 and press enter.
Step 9: Then type assign letter= “n” (n being the unique drive letter being used) and press enter. Then a confirmation message will appear “DiskPark successfully assigned the driver letter” . Then type exit and press enter.
Step 10: Next, type “cd /d N:\Microsoft\Boot where n is the same as previous.
Step 11: Then type the bootrec command: bootrec/fixboot .
Step 12: Next, just for a backup, save the BCD record in this format “BCD BCD.bak”.
Step 13: Then you need to recreate the BCD using the following bcdboot command: Bcdboot C:\Windows /l en-us /s x: / or bootrec/rebuildbcd. Then press enter.
Step 14: Then type exit in the command prompt area and restart your computer. Your Windows 10 will boot again.
Part 4: Fix UEFI Boot Windows 10 with Command Prompt
In order to manually repair the bootloader configuration (BCD), you need to boot using the original Windows installation media.
Tips:
This can be done through a recovery disk or bootable UEFI USB flash drive. You need to boot it into the recovery environment and then open the command-line console.
The steps may be a little bit complicated, please follow the steps carefully:
Step 1:Select system restore -> Troubleshoot -> Command Prompt.
Even if you only have the Windows installation media on hand you can still run the Command Prompt. This can be done by pressing the shift and F10 key together. However, this is applicable on some laptop models.
Step 2: Now once the command prompt appears, click on diskpart to run the disk management tool. Then you need to select list disk to list drives on the computer.
Also ensure that you know which type of partition table you require on disk for your Windows (either MBR or GPT). In this case please note that EFI bootloader only works on disks that have GPT partition table.
Step 3: Next find the drive where your Windows are installed and type sel disk 0. Then look for the list of partitions on the disk by typing list partition -> list volume. Once the diskpart shows the list of volume, find the UEFI volume which is on Volume 2.
Step 4: Then type sel vol 2 -> enter. Set ID: c12a7328-f81f-11d2-ba4b-00a0c93ec93b -> enter. Next, assign the drive letter i.e., a unique letter which is not already in use to each and click enter.
Step 5: Now, repair the boot record by opening the command prompt as an administrator through “ cd /d G:\EFI\Microsoft\Boot\” where g is the drive letter (unique letter). Once done, enter exit. Then to repair the boot record, you need to enter bootrec/fixboot after opening CMD. then enter exit.
Step 6: The last step is to rebuild the BCD store. Here, first type the following command: “ ren BCD BCD.old -> enter -> bcdboot C:\Windows /1 en-us /s G /f ALL” (G being the drive where Windows is installed) . Lastly, type exit in the command prompt and then restart your computer.
Your bcdboot repair windows 10 process is completed and fixed.
Part 5: Fix UEFI Boot Windows 10 with Windows Build-in Tool
Another great option to fix windows boot manager is through the build-in tool or automatic repair system. Here’s how to do it:
Step 1: First, insert your Windows 10 installation disc and then restart your computer. Then boot from the installation USB/disc.
Step 2: Now an Install now screen will appear. From there, select repair your computer.
Step 3: Then from the choose an option tab on screen, select Troubleshoot. Then click Automatic Repair.
Step 4: Then choose an account from the list that appears on the automatic repair screen and wait for the process completion.
Step 5: Once done, restart your PC and your Windows will boot again.
Part 6: Fix UEFI Boot Windows 10 with Adding Disk Driver
Another reason why your UEFI bootloader can get corrupt is because of any replacement of RAID or original IDE disk with any new NVMe SSD. So, to fix this Windows boot manager UEFI issue, follow the steps:
Step 1: Open the Command Prompt as administrator. Then type cmd in the search box. Then right click on Command Prompt and select run as administrator.
Step 2: Then in the command prompt, enter the following: Dism /Image:H: /Add-Driver /Driver:”y:\z.inf” (where X denotes the disk character of boot partition)
Step 3: Once done, type exit and press enter to close the command prompt.
Part 7: Fix UEFI Boot Windows 10 with Changing Bios Setting
Another reason for UEFI bootloaders could be not choosing the right boot mode. In such a case, you need to ensure that you are choosing the correct mode depending on the disk type of your computer.
So if you are trying to work on an MBR system disk, you need to select Legacy support and not the UEFI in boot mode. Likewise, in the case of the GPT system, you need to choose the UEFI boot mode.
Conclusion
Wondering how to fix UEFI boot Windows 10 access denied? This ultimate guide on how to repair Windows 10 boot from USB is an all rounder.
From using PassFab FixUWin to doing an automatic repair, we got you covered. Moments like these are where one tends to panic and hence rather than solving the problem, they end up making a bigger mess. Go through these methods to make the journey easier.


