Can anyone guide me on how to turn off the "your organization requires that you change your pin" in windows 10?” is a question asked by many. Basically, this information demands you to create a new password. However, everybody has so much on their plate already that it is quite bothersome to remember another passcode. Therefore, in this article, we will guide you on what this command means and how you can get rid of it. So, without further ado, let’s get going!
Part 1. What Does It Mean “Your Organization Requires That You Change Your PIN”?
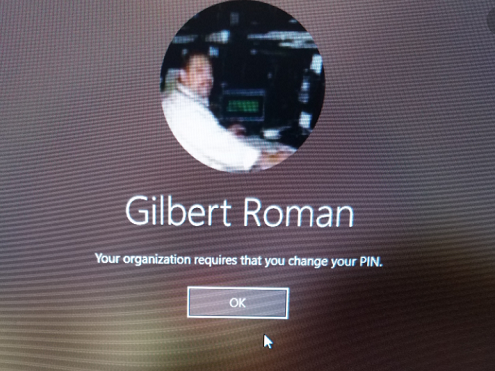
“Your organization requires that you change your pin” is a very common issue in Windows 10. You can experience this problem after updating your computer system, setting up a new email on your PC, etcetera. So, what is this issue exactly? Basically, Windows 10 gives users the authority to create an expiry date for their personal PIN.
Now, as soon as your PIN gets expired, you receive the “your organization requires that you change your pin” command on Windows 10 or any older version. This creates a few effects. For instance, you are advised to alter your PIN once every month, you do not get access to certain Microsoft Suite programs, and you are also unable to change your Windows update settings. All these issues are quite stressful to handle.
Moreover, many users get strained because they start wondering that their computer system is not owned by any organization, so why are they receiving this certain message? Well, there is no need to get confused. We are here to clear all the doubts in your mind and resolve this problem for good. Now, we will further learn how you can turn this option off successfully.
Part 2. How to Turn On/Off ‘Your Organization Requires That You Change Your Pin’ in Windows 10
It is definitely possible for you to turn this feature ON or OFF, as you like it. We have given two detailed methods by which you will be able to enable or disable windows 10 your organization requires that you change your pin option. You can choose whichever suits you the most. Let's look at how these methods work.
Method 1. Enable/Disable PIN Expiration Using Group Policy
The first method allows us to enable or disable PIN expiration with the help of using group policy. To further get the hang of this, read the following steps of instructions:
- 1. First and foremost, you are supposed to press the “Windows key + R” to open the run command. Then, type the “gpedit.msc” command and hit enter. This will open up the Group Policy Editor.

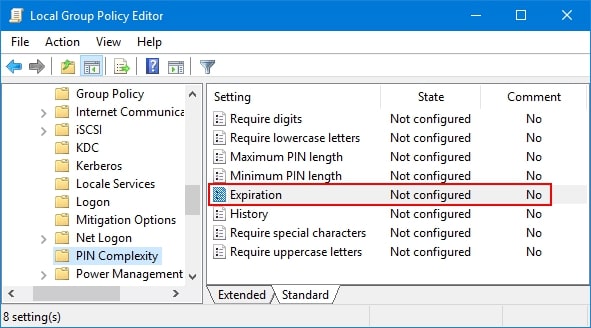
- 2. Now direct yourself to ‘Computer Configuration’ and from there, select ‘Administrative Templates’. From here onwards, go to 'System' and lastly 'PIN Complexity'. You will see 'Expiration' written in the list; just double click on that.

-
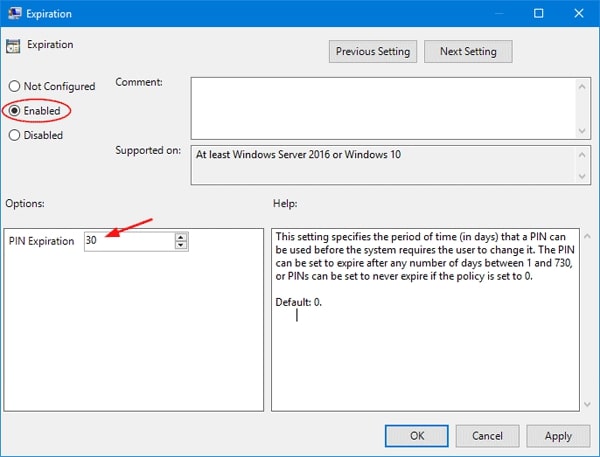
3. Now the ‘Expiration’ window will open up. If you wish to enable your PIN expiration, click on ‘Enabled’ and type in any number in the range of 1-730. This defines the expiration period.

- 4. Meanwhile, if you wish to disable your PIN expiration, then click on 'Not Configured' OR 'Disabled' and finally select OK. Just restart your computer system to finalize the process, and you are good to go!
Method 2. Enable/Disable Pin Expiration Using Registry Editor
Another method is to turn PIN expiration ON or OFF by using Registry Editor. This is also a really easy method if all the steps are followed carefully. So, let’s have a look at step-by-step instructions on how to enable or disable PIN expiration using Registry Editor.
- 1. First of all, you need to press “Windows key + R” to open the Run program. Type in regedit and press “Enter” to open the window of Registry Editor.

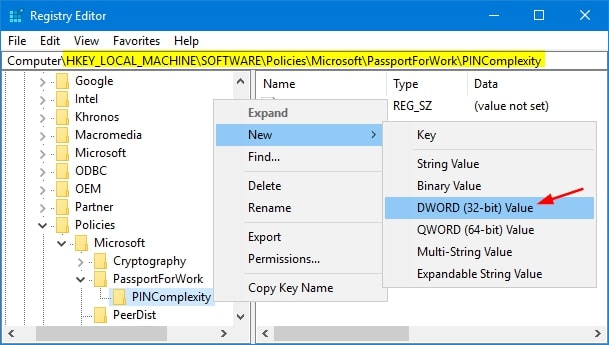
- 2. Now go to ‘Computer’ and then direct to ‘HKEY_Local_Machine’. After that, select ‘Software’ and go to ‘Policies’. Open ‘Microsoft’ from here and select ‘Passport for Work’. Lastly, click on ‘PIN Complexity’ from here.
- 3. Just right click on the ‘PIN Complexity’ feature and select ‘DWORD (32 bit) Value.

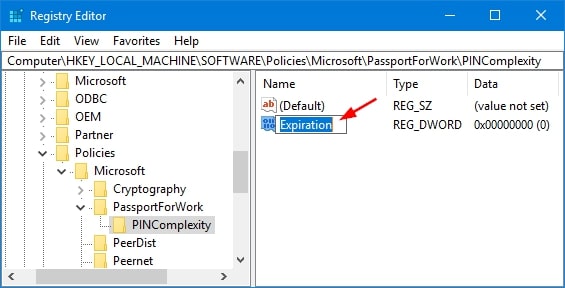
- 4. Rename this feature to 'Expiration' and double click on it.

-
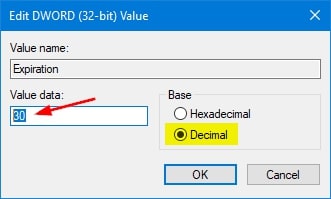
5. Now you need to select the option that says ‘Decimal’ and enter any digit from 1-730. Finally, click OK.

- 6. Furthermore, if you wish to disable PIN expiration, all you need to do is delete the Expiration option and reboot your computer system to complete the process.
Bonus Tips: How to Unlock Windows 10 Hello PIN Password
Of course, we have a little surprise for you. In this bonus tips, we will be learning how to unlock Windows 10 Hello PIN password. And for this purpose, we will be using an amazing tool called PassFab 4WinKey. PassFab has created many interesting software for you that help you in different ways. This software is no different. It tackles almost all the issues related to Windows passwords and PINs.
It gives you the option to reset and recover your PIN within no time. The best thing about this tool is that it supports all Windows versions, including the latest Win 10. Now, let's take a look at how to Unlock Windows 10 Hello PIN or Password using PassFab 4WinKey!
Step # 1: Create a Password Reset Disk
- 1. First of all, download PassFab 4WinKey from the official PassFab website. Then, install the program on a spare laptop or PC using the simple installation wizard. Now, launch the program with administrative privileges. Once you reach the main interface, you will see an option to create a password reset disk.

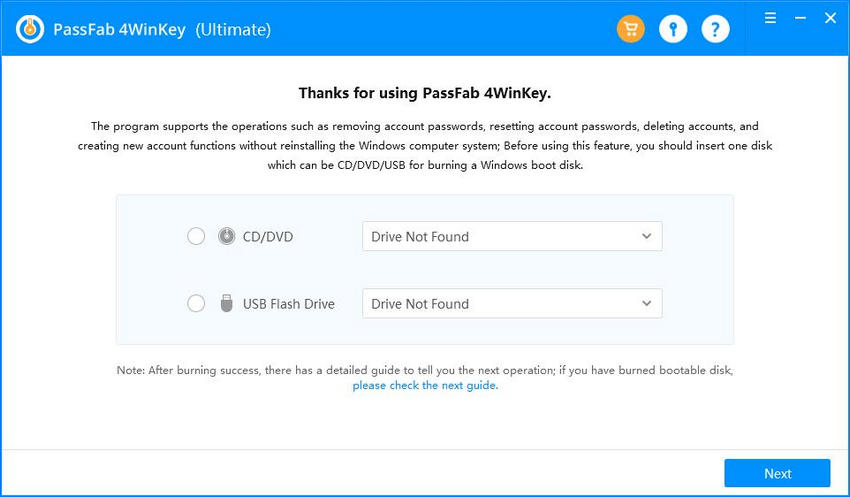
- 2. PassFab allows you to create a password reset disk on a USB as well as a CD/DVD. You can choose any option as per your feasibility. Simply make your choice and click the "Next" button to proceed further.
- 3. The program will now ask you to format the disk. Click on the “Next” button to proceed further. The program will now format the disk and start burning the software on it.

Step # 2: Boot PC using the Password Reset Disk
Once you have prepared the password recovery disk, it's time to use this disk on your locked computer and recover/reset/remove its PIN. For this purpose, you need to follow these simple steps:
- 1. Insert the password reset disk into the locked PC.
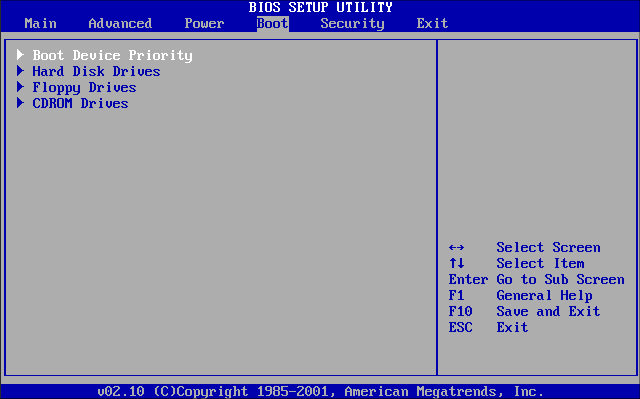
- 2. Now, restart your PC and enter into the BIOS Menu using the F12 or F9 key.
- 3. Then, you need to change the booting sequence from the BIOS Menu to boot the PC from the password reset disk successfully.

- 4. Finally, save the changes and restart the PC to boot from the reset disk.
Step # 3: Reset Windows PIN
- 1. After booting from the password reset disk, you will see the main menu of the PassFab 4WinKey from where you will be able to reset your account’s password/PIN.
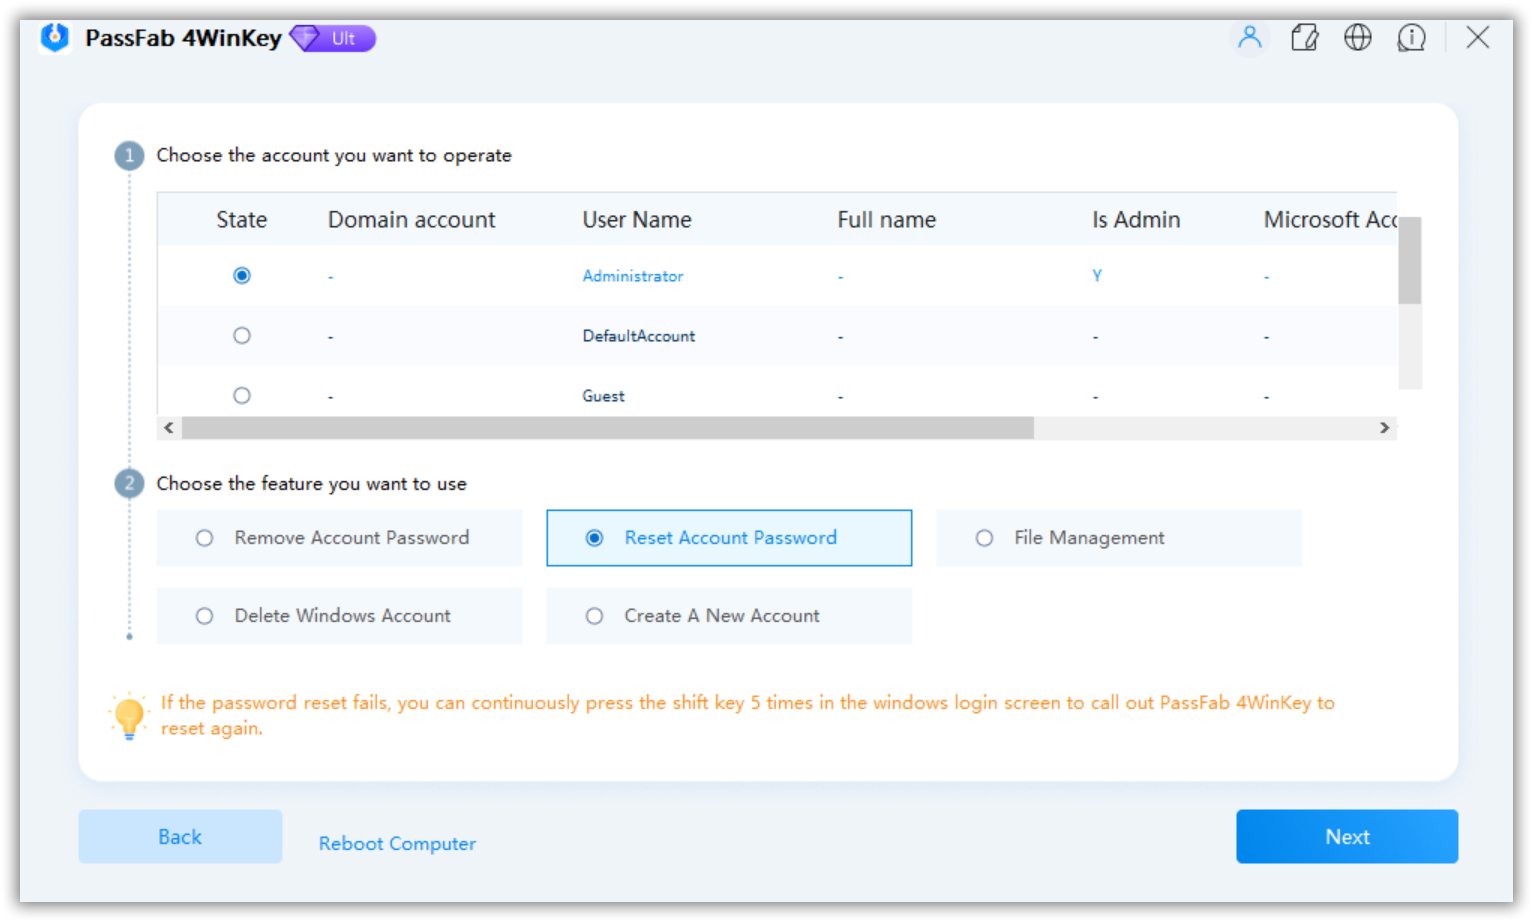
- 2. Once you are on the main interface, you need to select your Microsoft Account and the "Reset Account Password" option.

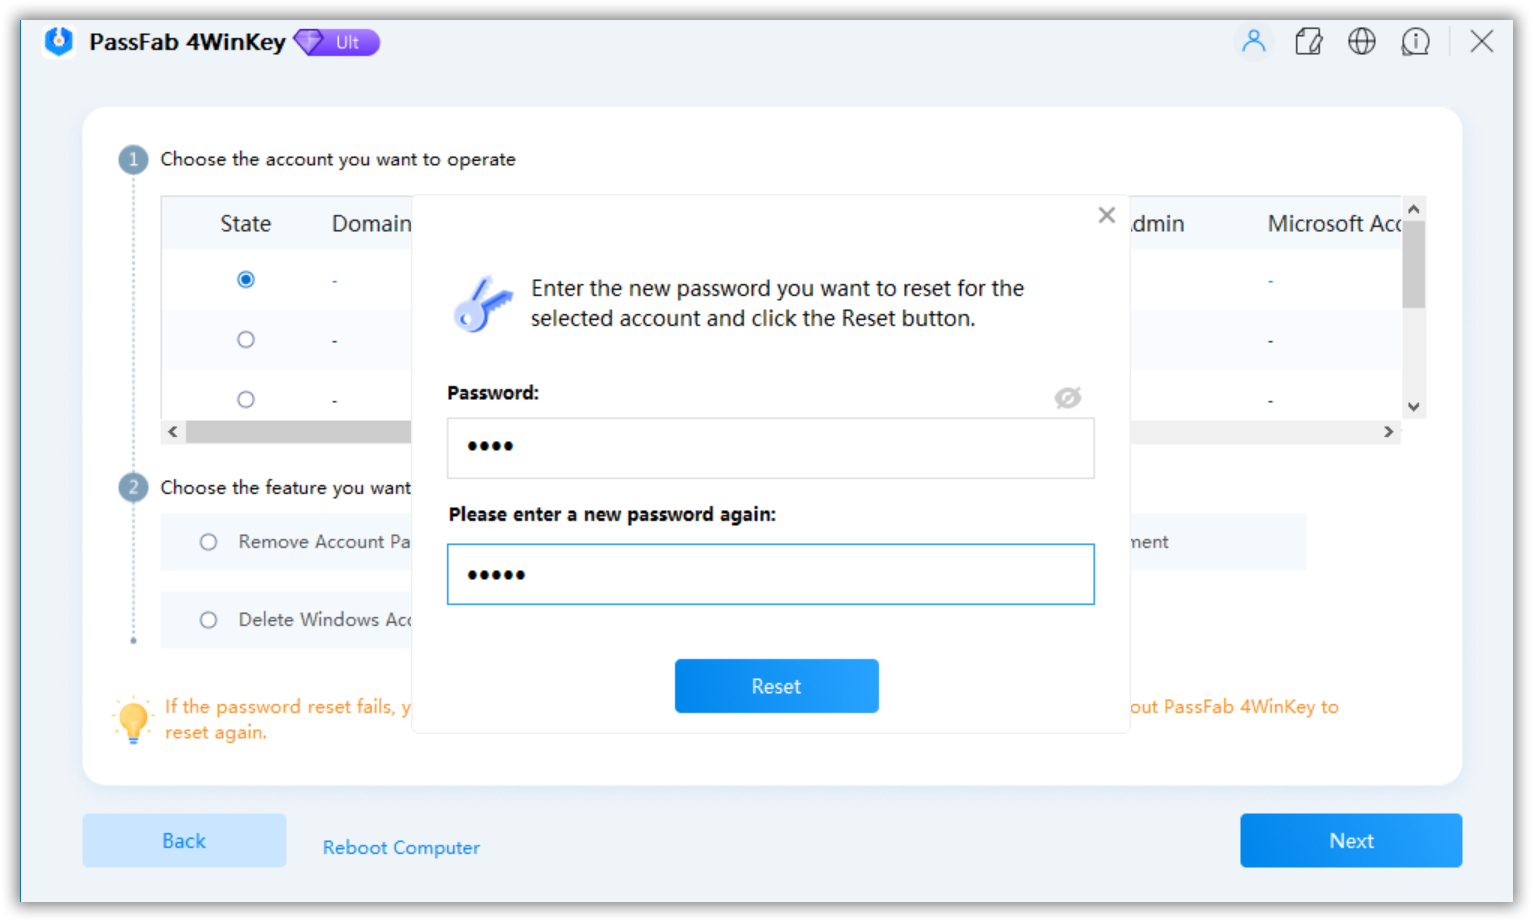
- 3. Now, the program will ask you to enter a new password for your selected account. Simply enter your password and click on the “Reset” button.

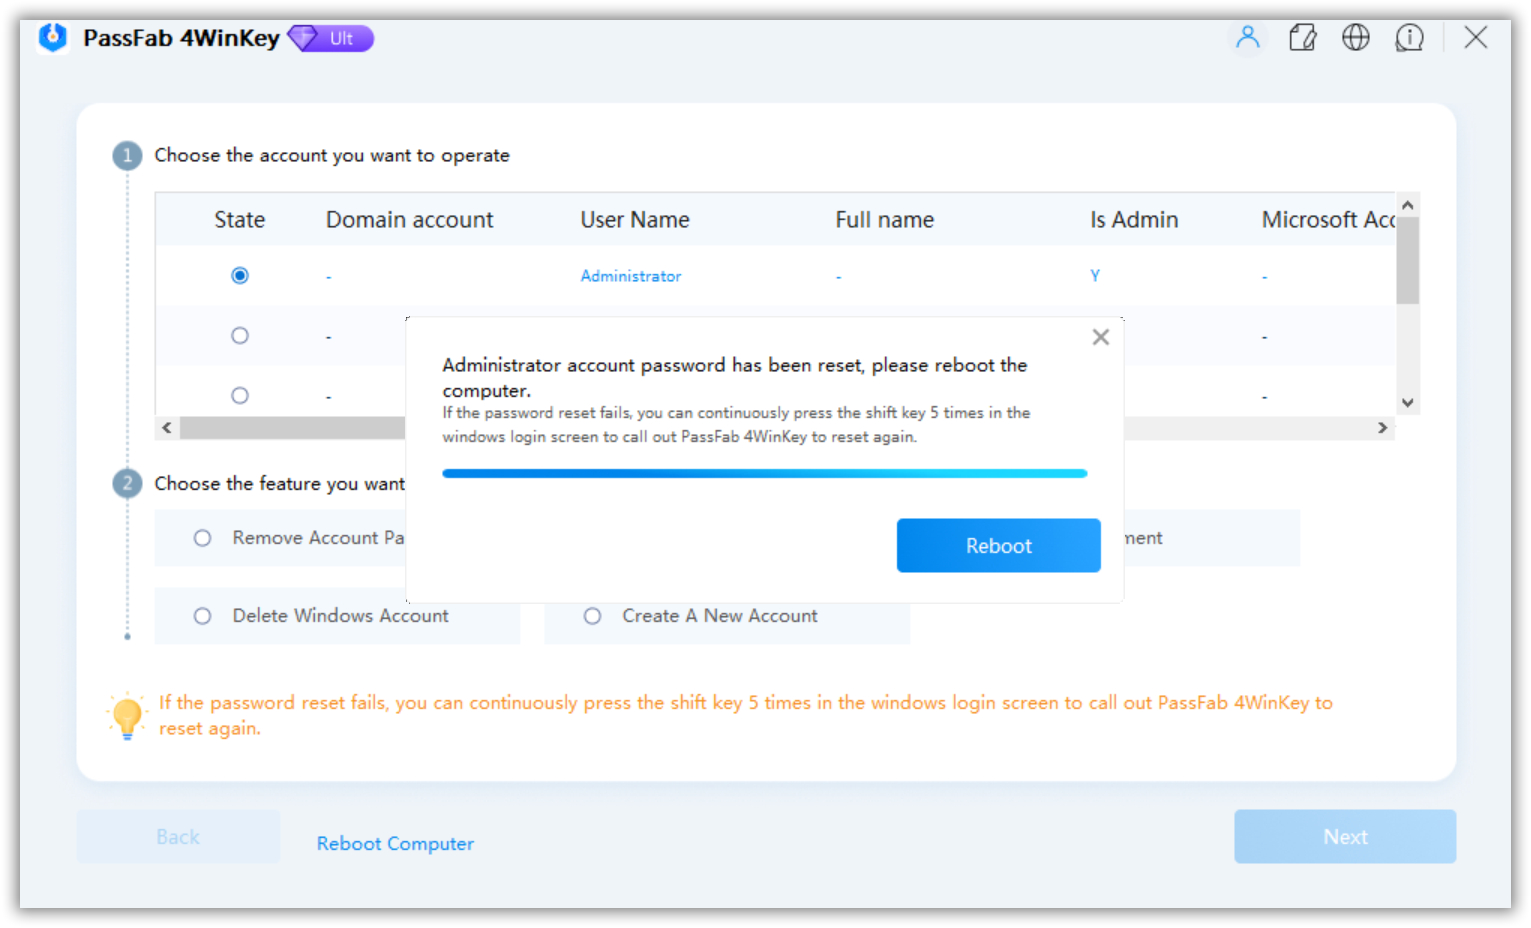
- 4. Wait for a short while until you see a confirmation message. When you are done resetting the password, click on the ‘Reboot’ feature and remove the reset disk.

That’s it! You can now successfully log in to your Windows account with the help of your newly set password. Just like that, you can completely remove your password as well.
Final Thought
This is it, guys! This article contains all you need to know about the “your organization requires that you change your pin” message on Windows 10. We have provided two detailed methods that can help you enable or disable this feature successfully. Furthermore, we also shared an amazing tool named PassFab 4WinKey in case you wish to reset your Windows password or retrieve it in little to no time. We hope this guide was helpful. Let us know if you have any questions in the comments section. We always try our best to answer all your quires as soon as possible.
