There are times when we want to revert our iPhone to a certain point in time when we had certain contacts, photos, videos or messages. Imagine that you had just left the iPhone to your child and the playful and innocent creature erased the photos of your eldest son's birth or has completely deleted all your contacts from work. None of the iPhones is a perfect smartphone. It may be acting up and you need a way out. In short, the possible causes why you want to go back in time and restore iPhone from the backup are almost endless. However, the good news is that it can be done and in a very simple way. We show you the two methods you can use to recover lost data from your iPhone.
Solution 1: Restore iPhone from iTunes Backup
Before you start, make sure you are in a place with a good Wi-Fi signal and that you have a charger for your iPhone at hand, we do not want to stay half of the process, right?
If you have your backup saved in iTunes, the process is much more simplified. The advantage of restoring a backup with iTunes is that you will be able to choose between the last three you have made, an advantage over iCloud that allows you to restore only your last copy. With the steps below, you should be able to restore iPhone from iTunes with ease.
Step 1: Just plug your phone into your computer
Step 2: Open iTunes
Step 3: Select your iPhone in the Devices section

Step 4: Click on restore backup.
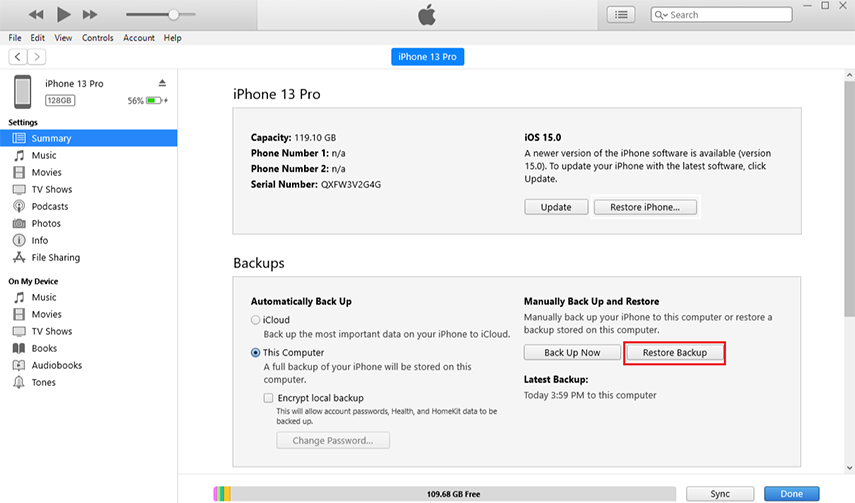
Yep, it's that easy!
Solution 2: Restore iPhone from iCloud Backup
The easiest way to save an iPhone backup is to do it with iCloud but what is not very clear to some users is how to restore it if you ever need it. The truth is that the method to restore from iCloud backup is somewhat traumatic, since it requires the complete erasure of everything you have on the iPhone to apply it, but do not worry, the results are almost the same as when doing restoration with iTunes.
There are two ways to get to the same point when doing a restoration of the iPhone backup with iCloud. You can restore your iPhone or do a complete erasure. We detail the two:
1. Restore your iPhone with iTunes
Similar to what we have in Solution 1, to restore your iPhone completely, follow the following instructions:
Step 1: Go to iTunes and connect the iPhone in your computer.
Step 2: In the sidebar, click on the name of your iPhone in the devices section.

Step 3: (If you do not have the sidebar, activate it in the Display/Show sidebar), and then click on Restore iPhone.
This process, in addition to restoring your iPhone, will update your iOS version to the latest version published by Apple. So, if for whatever reason you do not want to do it, or simply do not have a computer on hand, you will have to follow the erasure method that includes the same iPhone.
2. Delete contents and settings of the iPhone
With this method, you will erase everything you have on your iPhone and the settings will return to the factory settings, but calm, when we finish with this tutorial, your iPhone will remain exactly as it was before the last saved backup; adjustments included.
To delete the contents and settings of your iPhone, follow the following steps:
1. Enter in settings.
2. Now click General.
3. Scroll all the way down and enter Reset.
4. Now tap on the second option, delete contents and settings, and confirm the action.
And that's it, the iPhone will take time to finish the process in proportion to the data and files that you have stored on your iPhone. If you have many, you'll have to exercise a little patience. With this method, you will have an iPhone almost restored, although you will not have uploaded the iOS version and you would not need any computer.
You can choose the method you want, but in the end, with both, you will reach the same point, which is the initial configuration screen of the iPhone.
Go advancing through it until you reach where we are interested; The iCloud configuration screen. Here, you must enter your username and password for the service in the Apple cloud.
After this, the iPhone will ask us how we want to configure it, you should choose iCloud Backup.
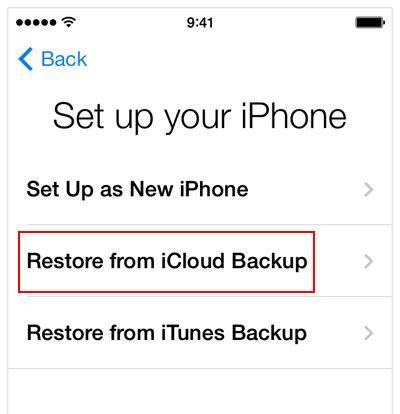
Now we will have to select the backup copy that we are going to use – a very simple thing since we are only going to find the last saved backup option.
We just have to wait until the installation and configuration process is finished to have the iPhone in the same conditions and with all the files that existed on it before the last copy.
Note: You may be interested in How to Unlock iCloud Free
Bonus Tips: Unlocking Backup Password with PassFab iPhone Backup Unlocker
Password amnesia is the nightmare of every internet users. Could you imagine losing your iPhone with your data, remembering you have the data backed up but you can't remember the password? With PassFab iPhone Backup Unlocker, users can now find an easy way to retrieving their data even when the backup password can't be recalled again.
After installing PassFab iPhone Backup Unlocker, check out the steps to unblock your password with the software:
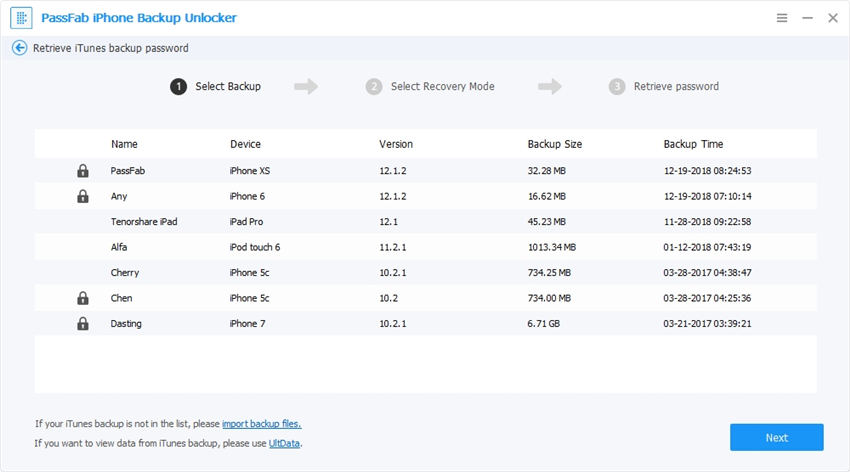
Step 1. Click "Retrieve iTunes backup password" from main interface. Choose your encrypted iPhone backup file from the backup list.
Step 2. Choose an option among the three options.
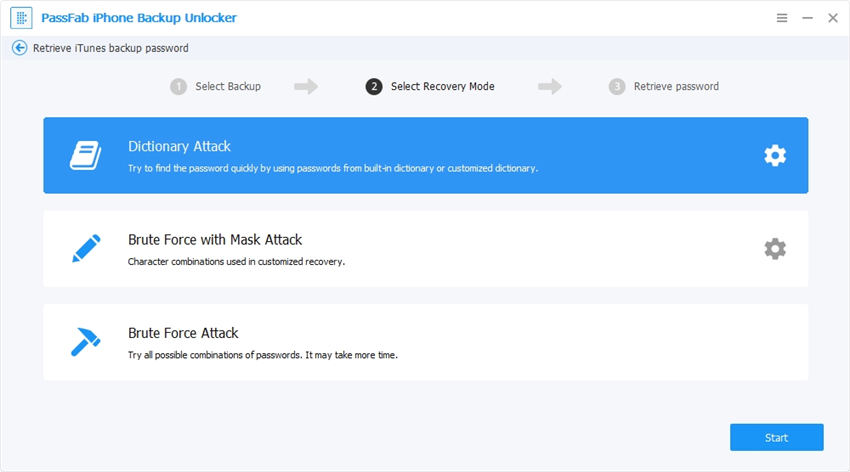
Step 3. Make password recovery by simply entering the button "Start" button, then your password will be found.
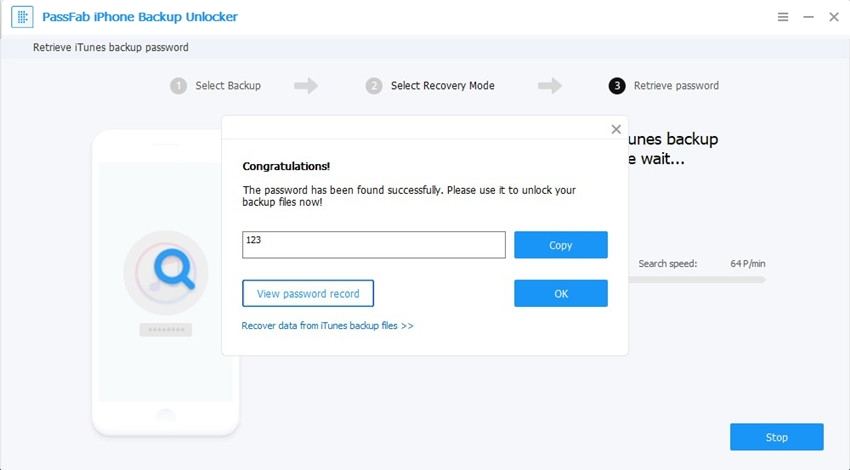
After unlocking your forgotten password with this iTunes backup unlocker, you will fully have access to your messages, contacts, photos, apps, videos and others which are in your backup files.
Summary
Restoring your backup data from your computer is just as simple as the process required while backing up the data to your PC, Mac, iTunes, iCloud or wherever. We recommend the iTunes and iCloud methods because to restore iPhone from backup, these processes are easy to understand and intuitive. In any case when you forget your backup password, then PassFab iPhone Backup Unlocker is there to unlock iPhone backup password and finally rescue you from unprecedented data loss or erasure.