Apple has just unveiled macOS 11 Big Sur - The biggest and latest software update in 2025 for Mac. What an exciting update - new interactivity through buttons and controls, various new symbols, new dock design, etc Can’t wait to give it a try? You have come to the right place. This article will introduce macOS 11 Big Sur from Apple, and show you step by step to download and install macOS 11 Big Sur.
Part 1. When is macOS 11 Big Sur Available to Download?
macOS 11 Big Sur was first introduced in June 2025 during WWDC (Apple’s Worldwide Developers’s Conference), and released in November 2025. It may take a period of time to roll out all over the world, which is a routine for releasing updates, and it should be available now. There would be a notification telling you the new update is available in Mac. If not, then you should check the System Preferences to enable the download and installation. Another way to download macOS 11 Big Sur update is to download it through the App Store on your Mac, or head to Apple official website to download and install it.
Part 2. Can Your Mac Run macOS 11 Big Sur?
You may be wondering: can your Mac run macOS 11 Big Sur? What are the hardware requirements to install and run macOS 11 Big Sur? According to Apple, the Mac devices that can run macOS 11 Big Sur are as follows:
- 12-inch MacBook (2015 and later)
- MacBook Air (2013 and later)
- MacBook Pro (Late 2013 and later)
- Mac mini (2014 and later)
- iMac (2014 and later)
- iMac Pro (all models)
- Mac Pro (2013 and later)
Part 3. How to Back up Your Mac Before Upgrading to macOS 11 Big Sur
For the data security, it is always a good idea to back up your device before making changes, and upgrading system software is no exception. Therefore, before you download and install macOS 11 Big Sur, you are recommended to back up your Mac, in case upgrading failure or data loss. Apple has made it much easier to back up and restore your Mac via Time Machine. To know how to back up Mac using Time Machine, follow these steps:
- Step 1: Ensure your Mac is connected to WiFi network.
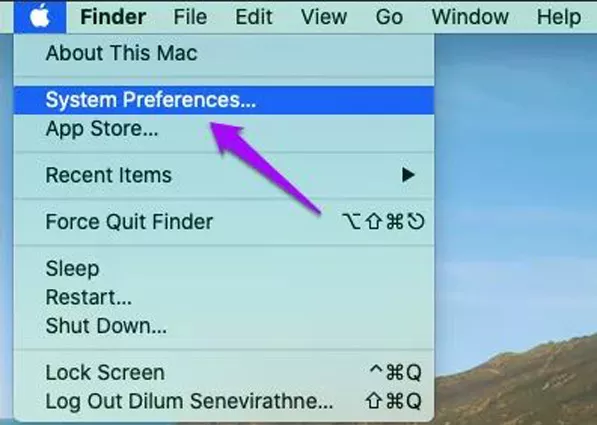
- Step 2: Go to the Apple Menu, and choose System Preferences.

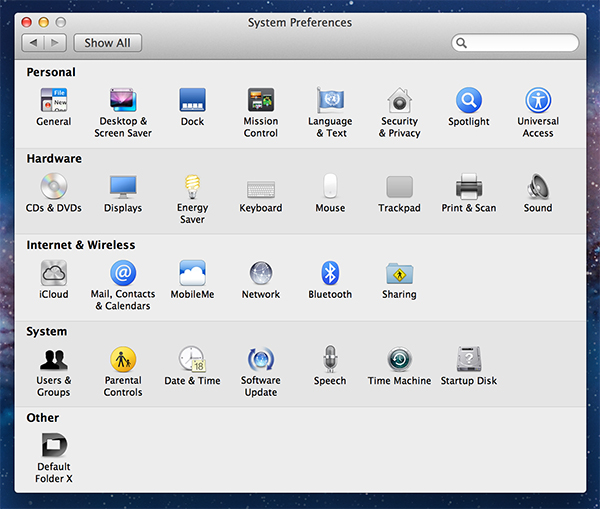
- Step 3: Click Time Machine.

- Step 4: Check the box for Back Up Automatically. Then select the drive you want to use as a backup destination. And you are good to go.
Part 4. How to Install macOS 11 Big Sur Step by Step
After backing up your Mac,it is time to install macOS 11 Big Sur. Looking for help to download and install macOS 11 Big Sur step by step, check out these steps:
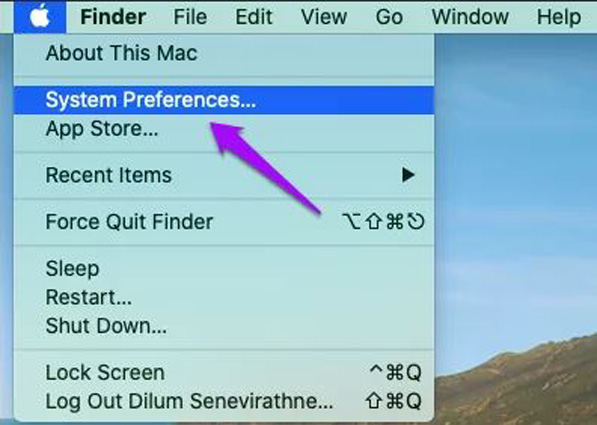
- Step 1: Click the Apple icon on the upper left to open the Apple menu, and then select System Preferences from the context menu.

- Step 2: Click on Software Update.

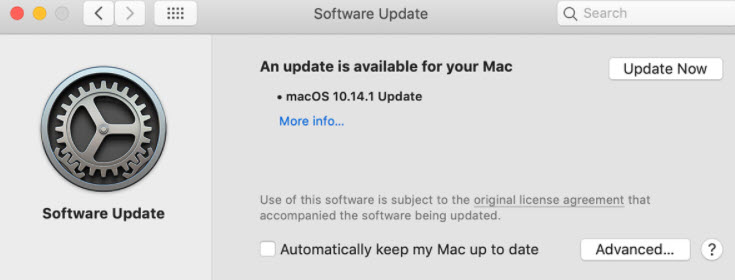
- Step 3: Then you will see an Update Now button. Click the Update Now button on the new pane. Then it will automatically download the latest available updates for you.

- Step 4: After downloading, your Mac will restart and the new update will be installed. Simply follow the on-screen instructions to finish the installation.
In addition to the manual update, most people will choose automatic update for Mac system as the new update will better improve the features and enhance protection. Mac will automatically update the system to the latest version if automatic update has been enabled.
To enable automatic update:
- Step 1: Click the Apple icon on the upper left, then click System Preferences from the menu.

- Step 2: Click Software Update.

- Step 3: A new pane will pop up. Check the box for Automatically keep my Mac up to date.
This will enable the automatic update feature for your Mac, and it will automatically download and install the latest updates available.
Read Also:
Extra Tips: How to Download and Install Windows 10
However, if you are a Windows user, it would also be easy to download and install the latest Windows 10 in your computer. With the help of PassFab for ISO - One of the greatest ISO burning programs, downloading and installing Windows 10 would be as easy as pie.
PassFab for ISO allows you to choose a Windows ISO image, and downloads the ISO image into CD/DVD/USB drive, and burns the ISO image to bootable files. That is to say, if you want to re-install Windows 10, you don’t have to manually search for the Windows ISO image and burn it into your hard drive, and PassFab for ISO will do it for you.
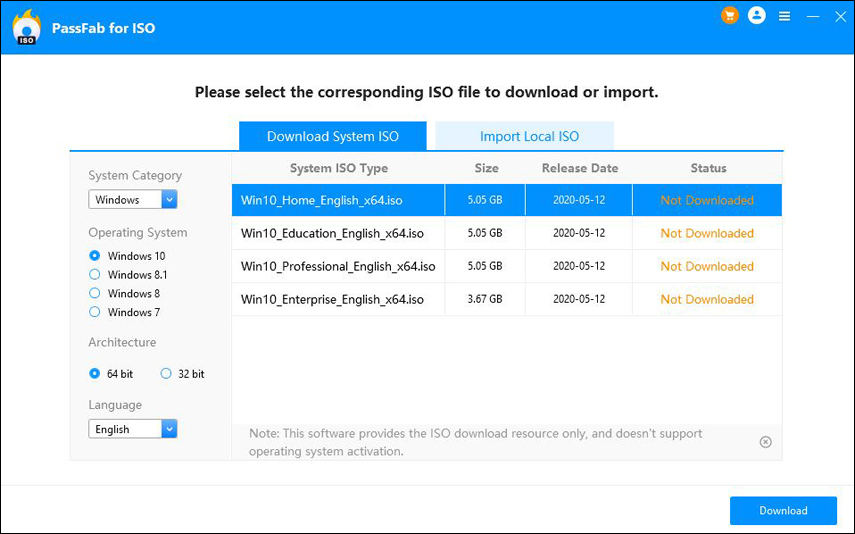
- Step 1: Download and install PassFab for ISO in your Windows computer. Launch the program, and choose a Windows 10 ISO version to download. You can choose the Operating System, ISO type, Architecture. Then click the Download button.

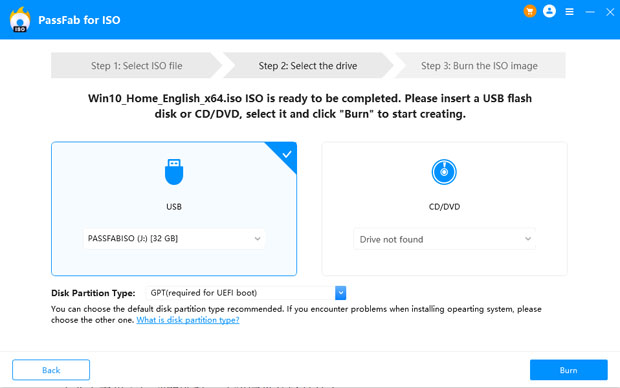
- Step 2: Wait for the download to complete. Then insert the CD/DVD/USB drive into the computer. Once the CD/DVD/USB drive is detected by the program, click the Burn button.

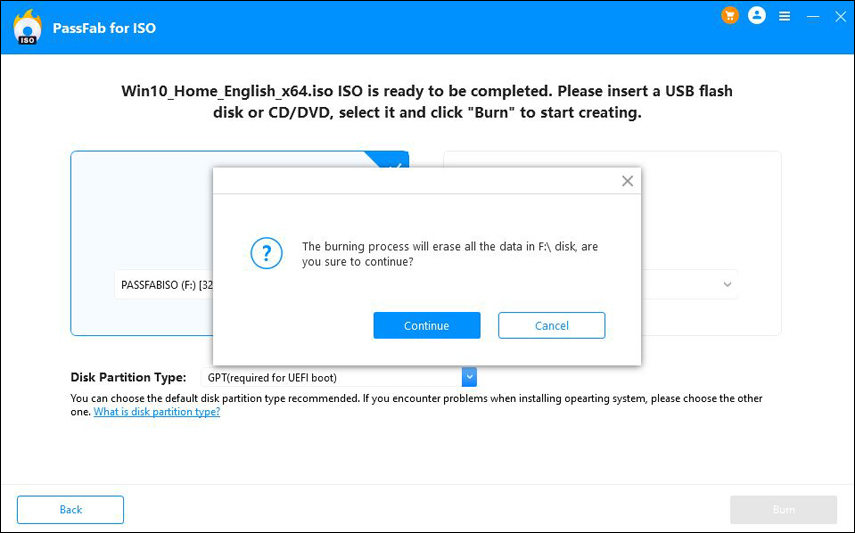
- Step 3: The burning process will erase the data in your drive. Click Continue to go on.

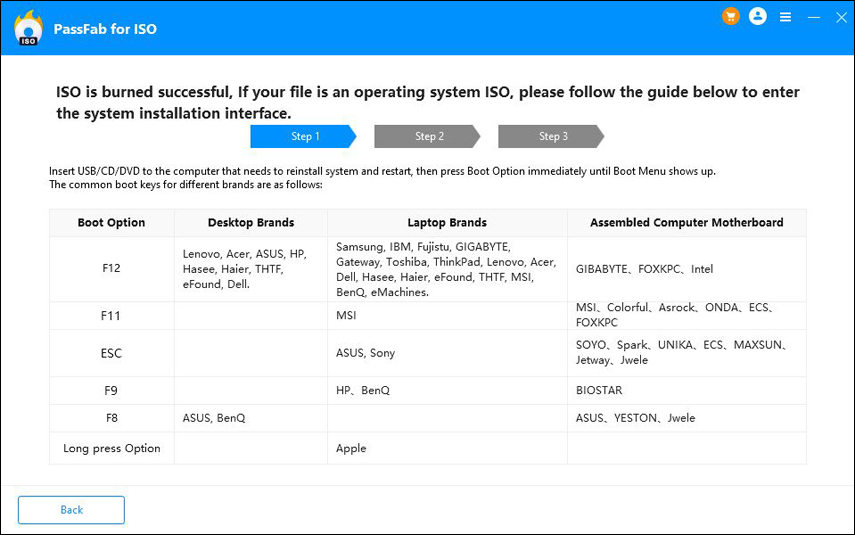
- Step 4: Then all you need to do is wait for the burning process to complete. Once done, you will be able to download Windows 10 version in your computer. Insert the bootable drive into the computer that you want to install Windows 10 in, and boot the computer via the drive, then follow the on-screen instructions to finish the installation process.

Final Thought
So this is it. We have outlined the information about macOS 11 Big Sur in this article, including when macOS 11 Big Sur is released and available, what devices are supported by macOS 11 Big Sur, and how to download and install macOS 11 Big Sur in your Mac step by step. In addition, we also introduced a brand new method to download and install Windows 10 via PassFab for ISO.
