In this article, you will be able to find the easiest possible way to create bootable USB MacOS on Windows which is something you might have to do because of several reasons; the most common one of them being the unavailability of another Mac computer when you need it to reinstall or upgrade the Apple OS in your Mac device which is not functional at the moment.
- Part 1. Common Reasons for Installing MacOS from USB on Windows
- Part 2. Things to Prepare Before Proceeding
- Part 3. Step-by-Step Process to Create MacOS Bootable USB on Windows
- Part 4. What If Your USB Drive Does Not Work?
- Part 5. Bonus Tip on How to Reinstall Windows System
Part 1. Common Reasons for Installing MacOS from USB on Windows
You may have to face a situation where your macOS device refuses to start because of reasons like failure of hardware, some bug that gets installed with a new update and the like. You can use a macOS bootable USB to repair your device in such a case but what if you don’t have another Apple device to create it? Fortunately, you can also use a Windows device to make USB bootable installation media which will help you to reinstall the operating system in your Mac device. Any Windows PC including the devices with Windows 7, 8 or 10 installed in them can be used for this purpose.
Part 2. Things to Prepare Before Proceeding
There are a few things that you will need for this procedure including a non-functional Mac computer that has macOS, a copy of software called TransMac (trial copy would work just fine), a USB drive with at least 16GB of storage and lastly, a DMG file copy of Apple’s operating system.
Part 3. Step-by-Step Process to Create MacOS Bootable USB on Windows
Step 1: You need to download the software “TransMac” on your Windows device. You can use the free trial version for this process. After that, connect your flash drive with the PC. Remember that this is the drive you are using to repair your Mac so make sure that it is formatted and you have its backup already.
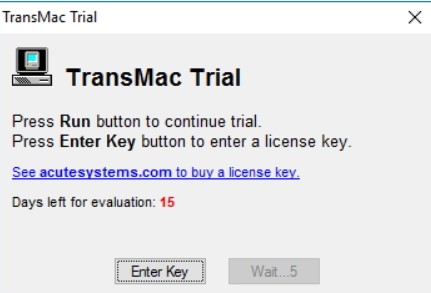
Step 2: Select TransMac and click on the option “Run as administrator”. Select “Run” option after waiting for fifteen seconds.
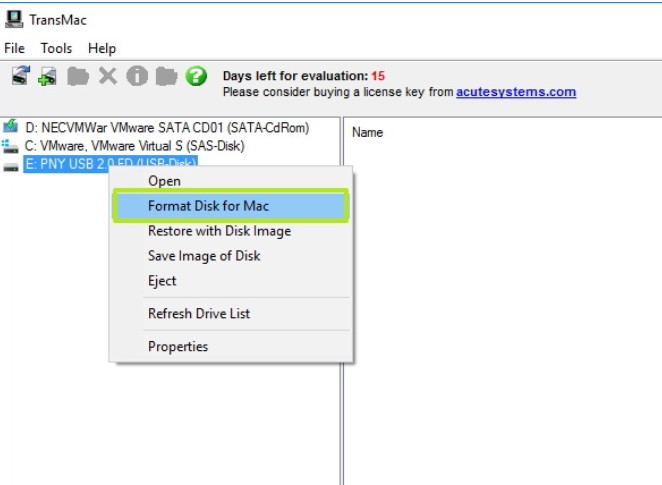
Step 3: Right Click the name of your USB flash drive appearing on the left side and click on “Format Disk for Mac”. You have to do this step even if the drive was formatted using a Windows device.
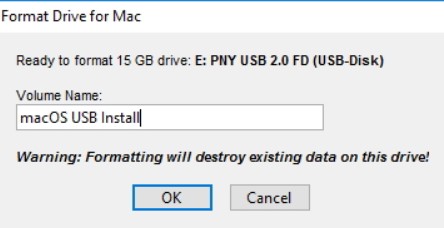
Step 4: A warning message will pop up. Select “yes” and enter a name for USB drive in the window that shows up. As soon as you click “OK”, another warning message will show up on your screen. Click on “yes” again.
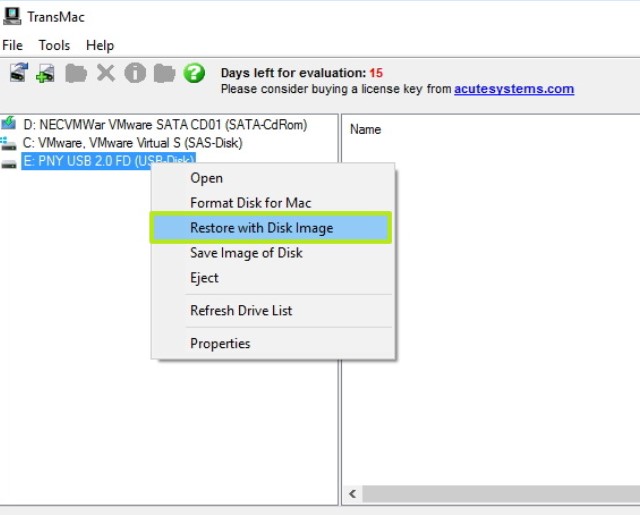
Step 5: After the formatting is done, select your USB drive from the menu in the left bar again and click on “Restore with Disk Image” this time. Choose “yes” when the warning shows up.
Step 6: Another window will pop up from where you can locate the above mentioned .dmg file that has the installation files for macOS. Click “OK” on this window and “Yes” on the next warning window.
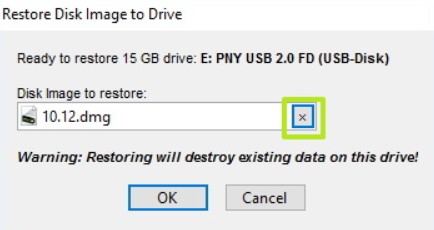
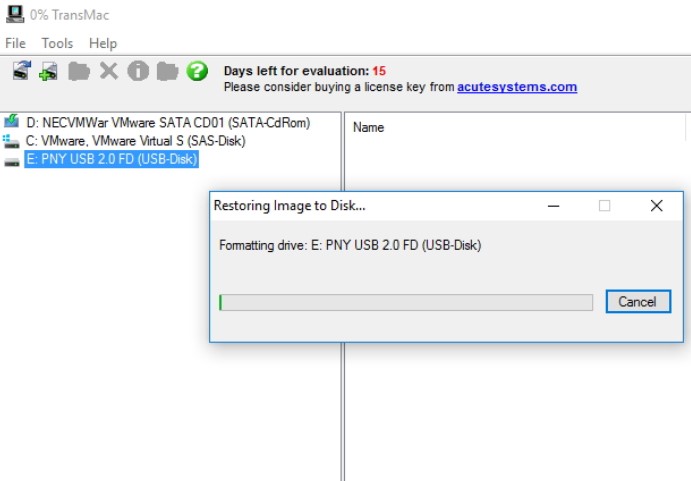
Step 7: The restoring process will start and once it is completed, you can use this USB flash drive to upgrade, reinstall or repair the operating system on your Mac device.
Part 4. What If Your USB Drive Does Not Work?
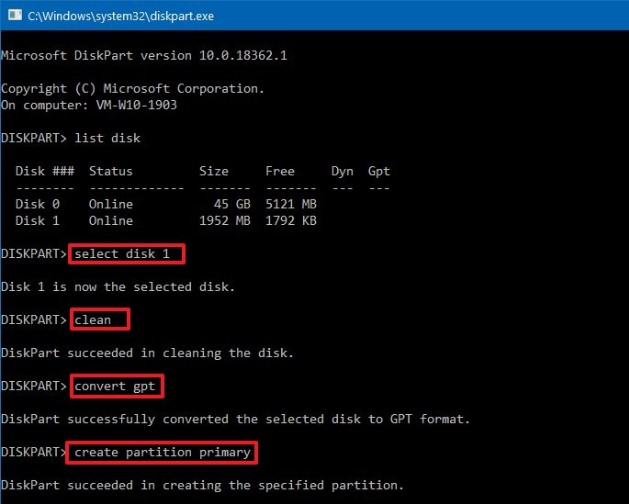
If this process does not work for you then it could be a partition problem. You would have to repeat the whole process but with the use of Diskpart command-line utility that is available on windows, this time. This would help you to create the required GPT partition. The step-by-step process to create it is mentioned below:
1. First, click the “start” button and right-click the result that appears on top after searching for Command Prompt and allow it to “Run as Administrator”.
2. Click on Enter after typing in “Diskpart” command. In order to check what drives are connected to your PC, Enter the “list disk” command.
3. Press Enter after typing the “select disk” command and the number given to the USB drive. Press Enter again after going for the “clean” command.
4. Type in “convert GPT” and click on enter. Go for the “create partition primary” command and click on Enter again.
Just repeat the same procedure except the steps to “Format Disk for Mac”.
Also Read: How to Create A Bootable Windows 10/8/7 USB on Mac with or without Bootcamp
Part 5. Bonus Tip on How to Reinstall Windows System
If your Windows computer has crashed while installing and you don't care about the data, you have come to the right place because we are going to tell you how to reinstall Windows system with USB by using a tool named PassFab for ISO. You will be able to start your system with a newly computer again very easily.
Not all of us are geeks who can find a way to fix the computers and even if you can manage to do that, it will still take a lot of time but you can just use this effective tool to save yourself the trouble and get access to your computer as usual quickly. In this section, you will see a detailed step-by-step guide about how to use this tool to effectively fix your crashed computer.
Step 1: A simple interface will show up as soon as you launch this ISO burner on your laptop or PC. Now you can download Windows ISO file or import it.
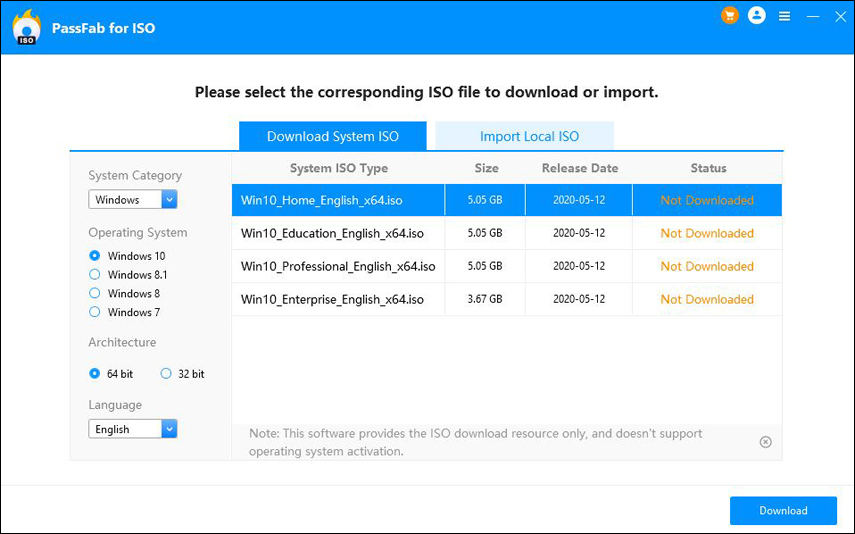
Step 2: You want to create a bootable disk now and for that, you have to click on “Burn” after choosing some boot media which could be a CD, DVD or USB. It will get formatted so it is recommenced that you create a backup of it beforehand.
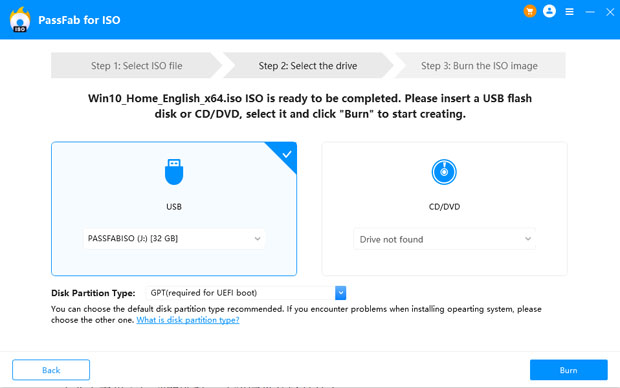
Step 3: After a while, your ISO file will be burned successfully.
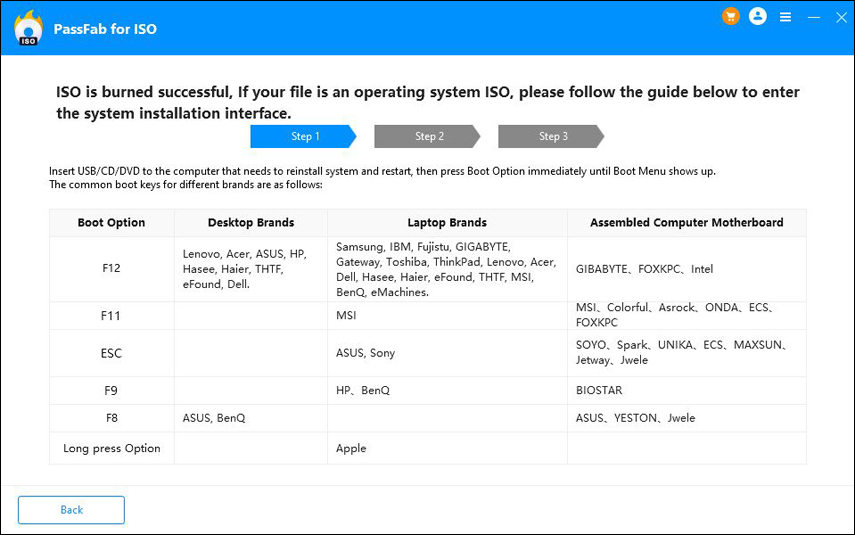
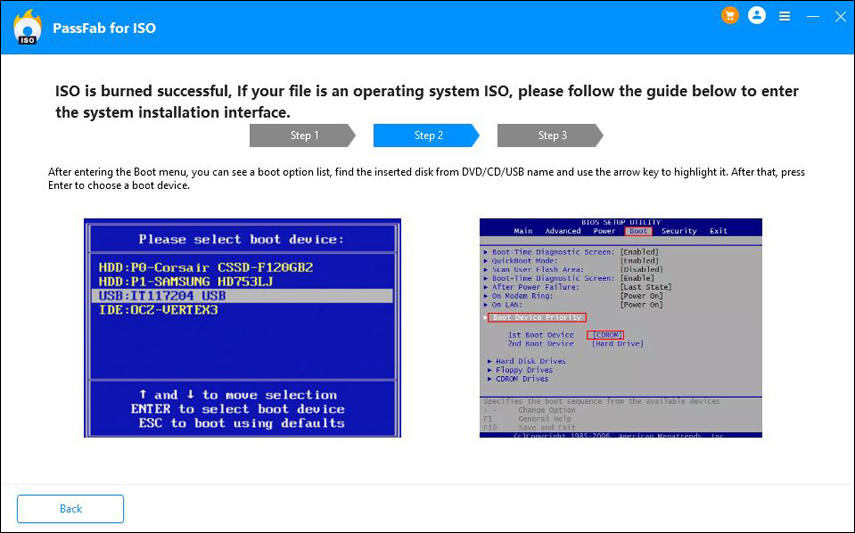
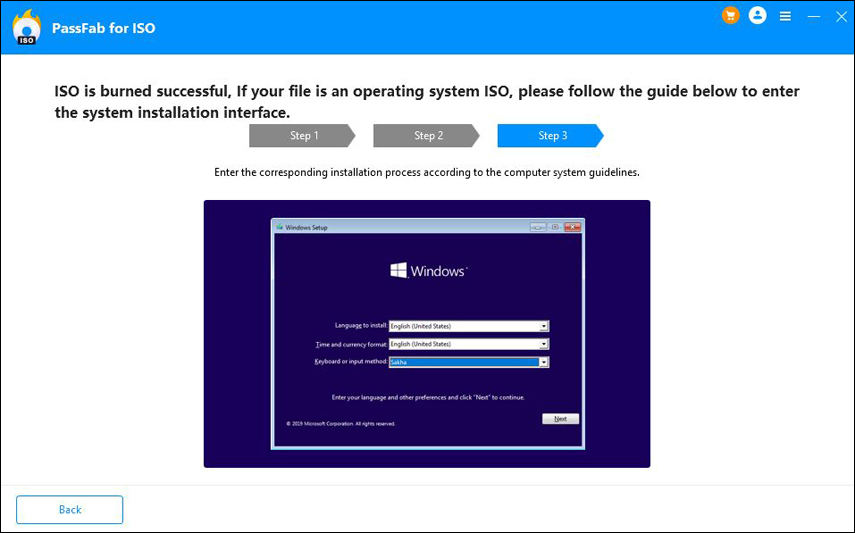
Step 4: Now you can follow the on-screen instruction to reinstall Windows system.
Summary
By following the method stated in the article, you can easily install macOS from USB in Windows and repair your operating system. Even if your system is working just fine, it is recommended to create USB bootable installation media so you can easily repair it without much effort when it stops working. Finally, if you need to reinstall Windows system, PassFab for ISO is highly recommended.