Is cloning Windows 11 to a new drive complicated? If you aim to upgrade your storage or replace a failing drive, learning how to clone Windows 11 to new drive is essential. This process ensures you can seamlessly transfer your entire Windows 11 setup to a new drive without reinstalling the operating system or losing any of your data.
Our comprehensive guide will walk you through each step, providing clear instructions to make the cloning process as straightforward as possible. By the end, you'll be equipped with the knowledge to successfully clone Windows 11 to new drive and enjoy the benefits of your new storage device. Let's dive in and explore this process step-by-step.
Part 1: Preparing before You Clone Windows 11 to New Drive
Part 2: How to Clone Windows 11 to New Drive? HOT
Part 3: How to Boot From the New Cloned Drive?
Final Thoughts
Part 1: Preparing before You Clone Windows 11 to New Drive
Before you begin the process of cloning Windows 11 to new drive, it's essential to prepare to ensure a smooth and successful transition properly.
Gather Necessary Tools
To get started, you'll need to gather the following tools:
- The new drive (SSD or HDD): Choose a solid-state drive (SSD) or hard disk drive (HDD) that suits your needs and offers adequate storage capacity.
- SATA-to-USB cable or an external drive enclosure: If you're using a laptop, these tools will help you connect the new drive externally.
- Cloning software: Reliable cloning software is crucial for accurately copying your existing data to the new drive.
Check System Requirements
Before proceeding with the cloning process, it's essential to verify the following system requirements:
- Sufficient space on the new drive: Make sure the new drive has enough storage capacity to accommodate all the data from your current drive.
- Compatibility with your system: Ensure the new drive is compatible with your computer's hardware and software to avoid potential conflicts during the cloning process.
By gathering the necessary tools and checking system requirements, you'll be well-prepared to clone Windows 11 to a new drive successfully.
Part 2: How to Clone Windows 11 to New Drive?
For a seamless and efficient cloning process, we highly recommend using PassFab 4EasyPartition, a reliable and user-friendly tool for cloning disks.
PassFab 4EasyPartition to Clone a Disk

PassFab 4EasyPartition is a highly effective tool designed specifically for cloning Windows 11 to a new drive. Its intuitive interface simplifies the cloning process, making it accessible even for users with minimal technical expertise. The software ensures that the entire cloning operation is smooth and hassle-free.
Features of PassFab 4EasyPartition
PassFab 4EasyPartition
- Clone Disk with Ease: PassFab 4EasyPartition allows you to clone your entire disk effortlessly. The software's step-by-step guidance makes the process straightforward, ensuring you can clone your disk without complications.
- User-Friendly Interface: The software boasts an easy-to-navigate interface that helps users quickly understand and utilize its features. Even if you are not tech-savvy, you can easily follow the instructions and complete the cloning process.
- Fast and Reliable Cloning Process: PassFab 4EasyPartition is designed to perform cloning operations quickly and efficiently. The software minimizes downtime by speeding up the cloning process, ensuring you can return to using your computer as soon as possible.
- Supports Various Drive Types and Sizes: Whether you are cloning to an SSD or an HDD, PassFab 4EasyPartition supports a wide range of drive types and sizes. This flexibility ensures you can use the software with virtually any storage device.
PassFab 4WinKey has Recommended by many medias, like macworld, makeuseof, appleinsider, etc.


Important Considerations Before Cloning
- Data Loss on Target Disk: When you clone a disk or partition to another, all existing data on the target disk or partition will be erased. It is essential to back up any critical data on the target disk or use an empty disk.
- Avoid Additional Operations: Refrain from executing any additional operations on your computer during the cloning process. This ensures that the process is not interrupted or slowed down.
- System Performance: If your computer has low specifications, it might run slowly during cloning. In some cases, this can cause the target disk to revert to its original format or go offline, leading to potential data loss on the local disk.
Steps to Disk Cloning with PassFab 4EasyPartition
*An OTG cable is required
-
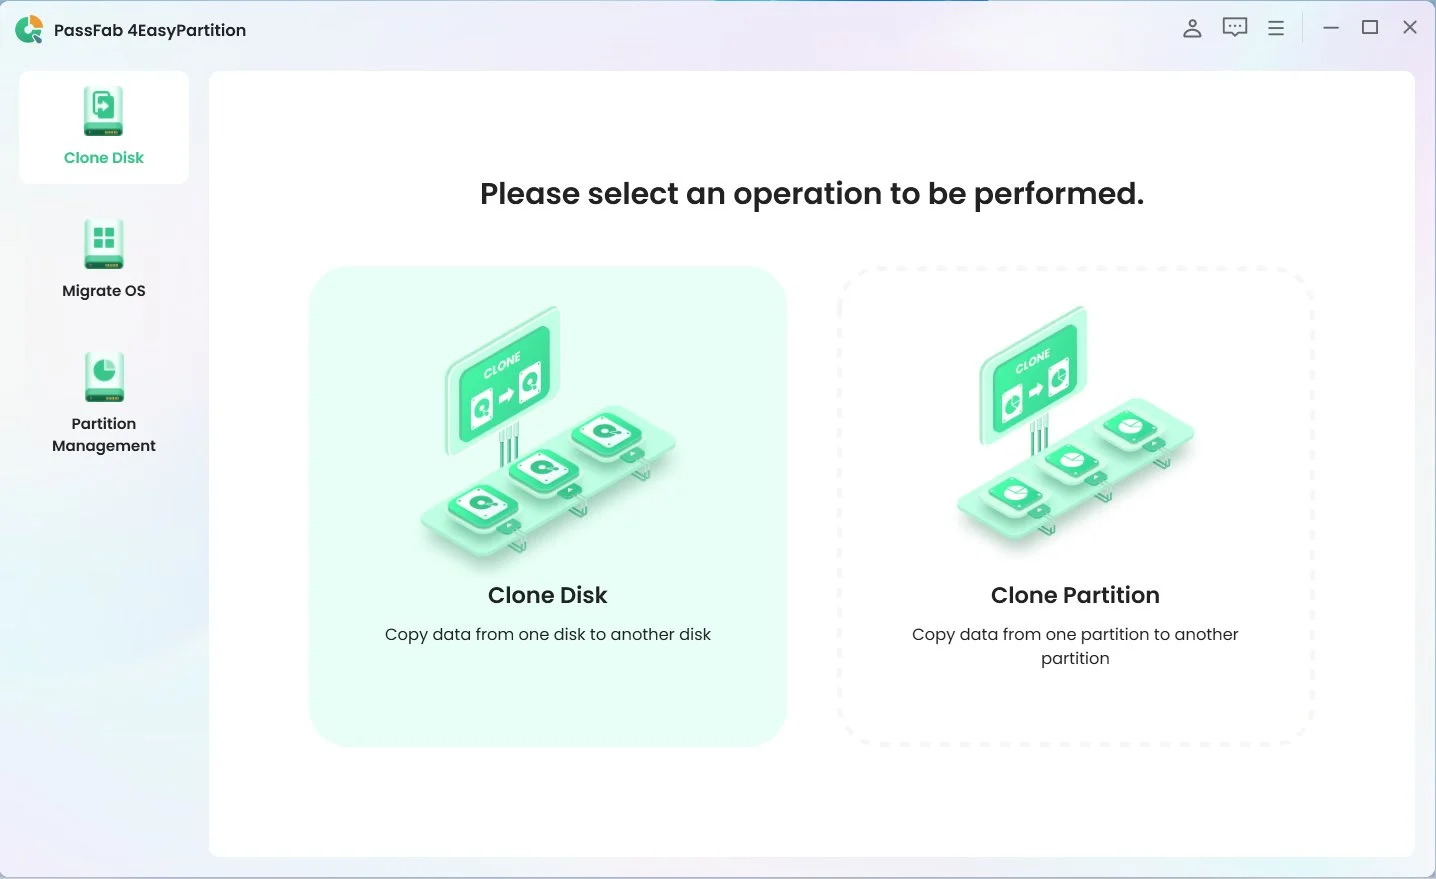
Download PassFab 4EasyPartition and click "Clone Disk" to start the process.

-
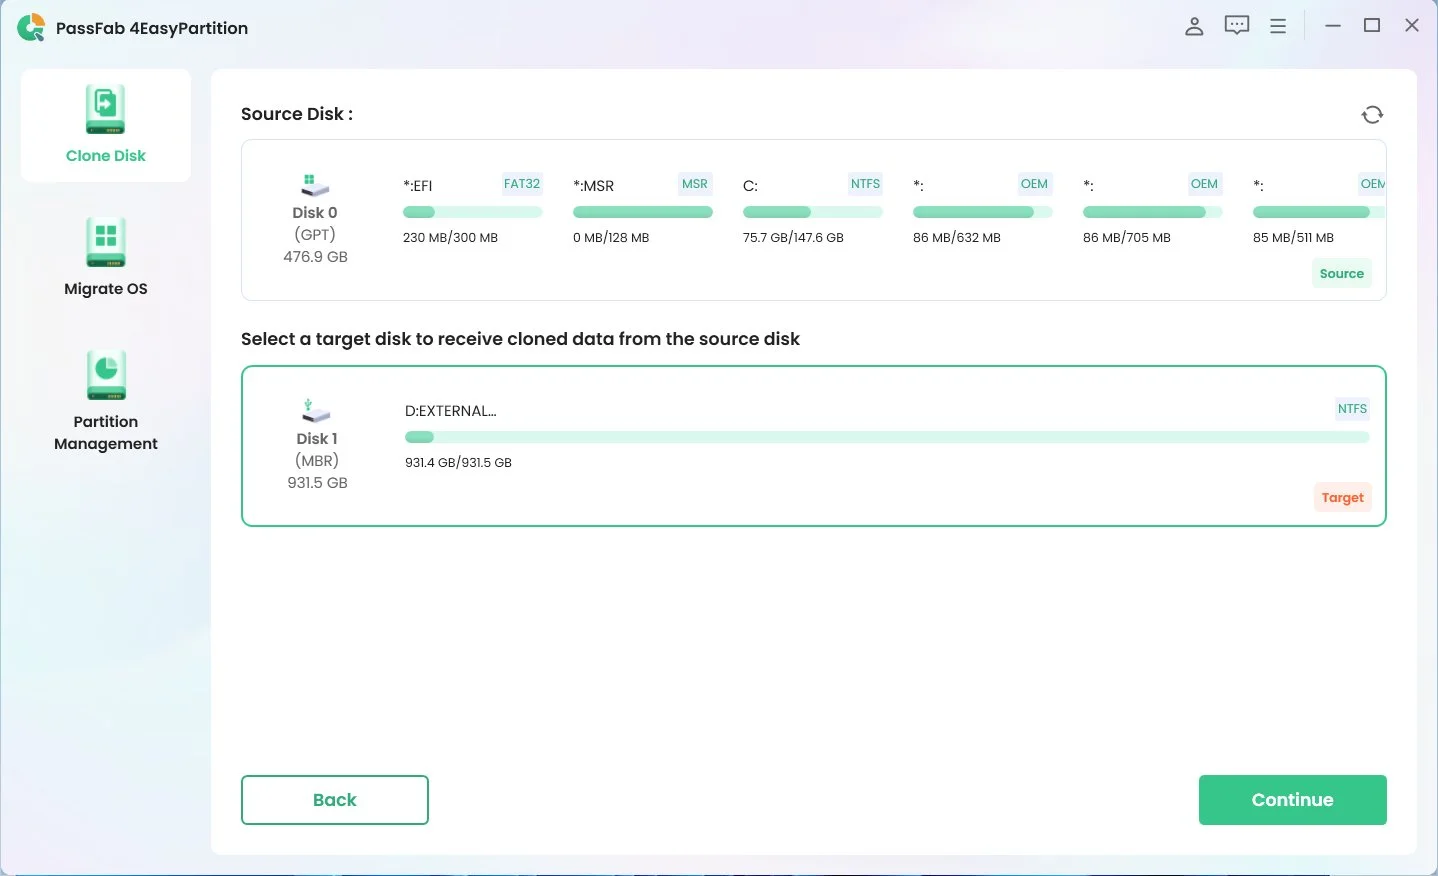
Select the target disk you want to clone to, and then click "Continue" to proceed.

-
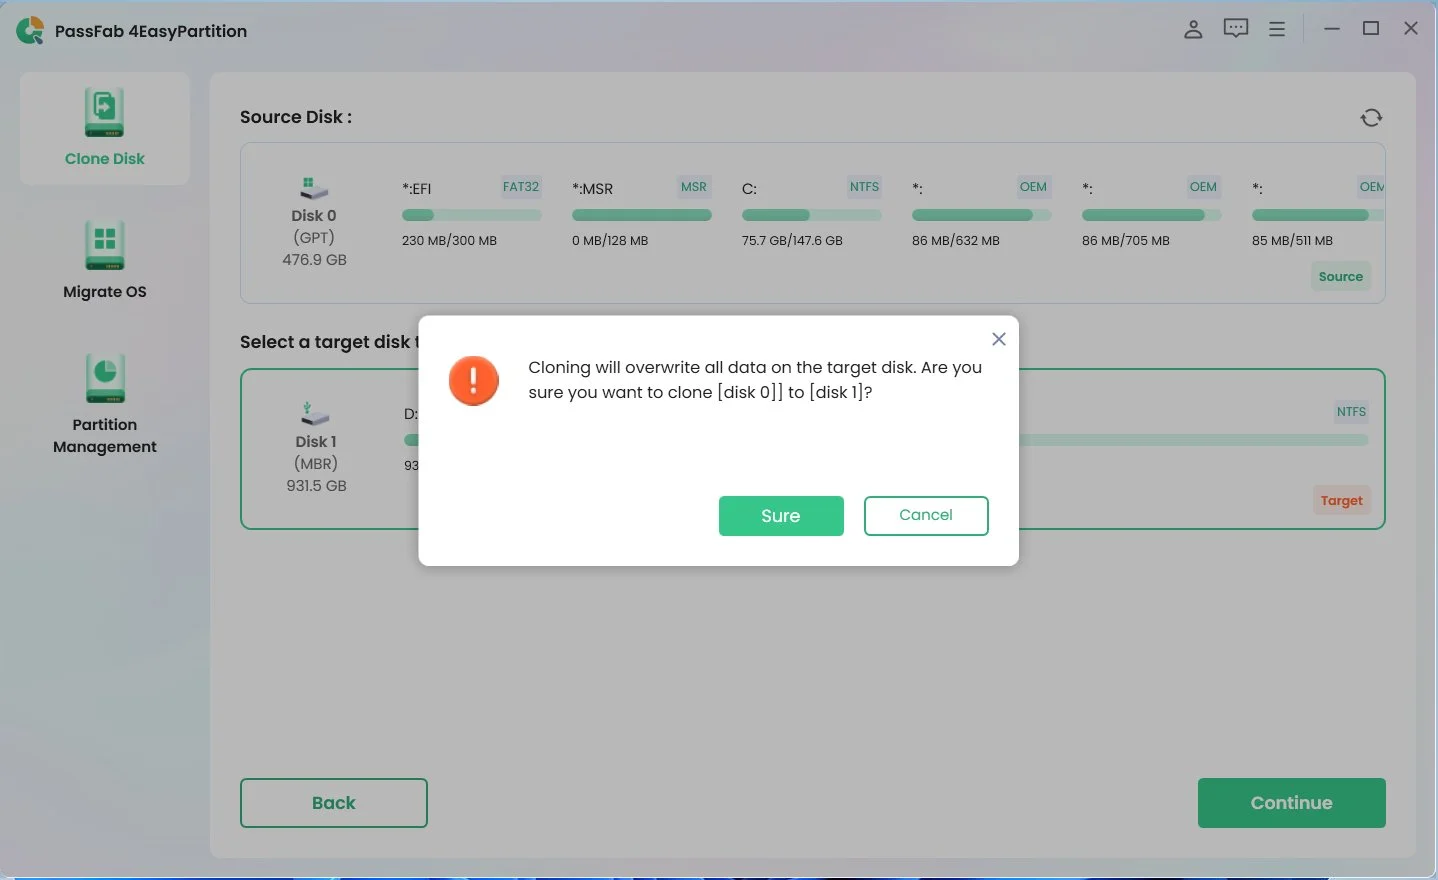
A risk pop-up window will be displayed. Click "Sure" to proceed to the next step.

-
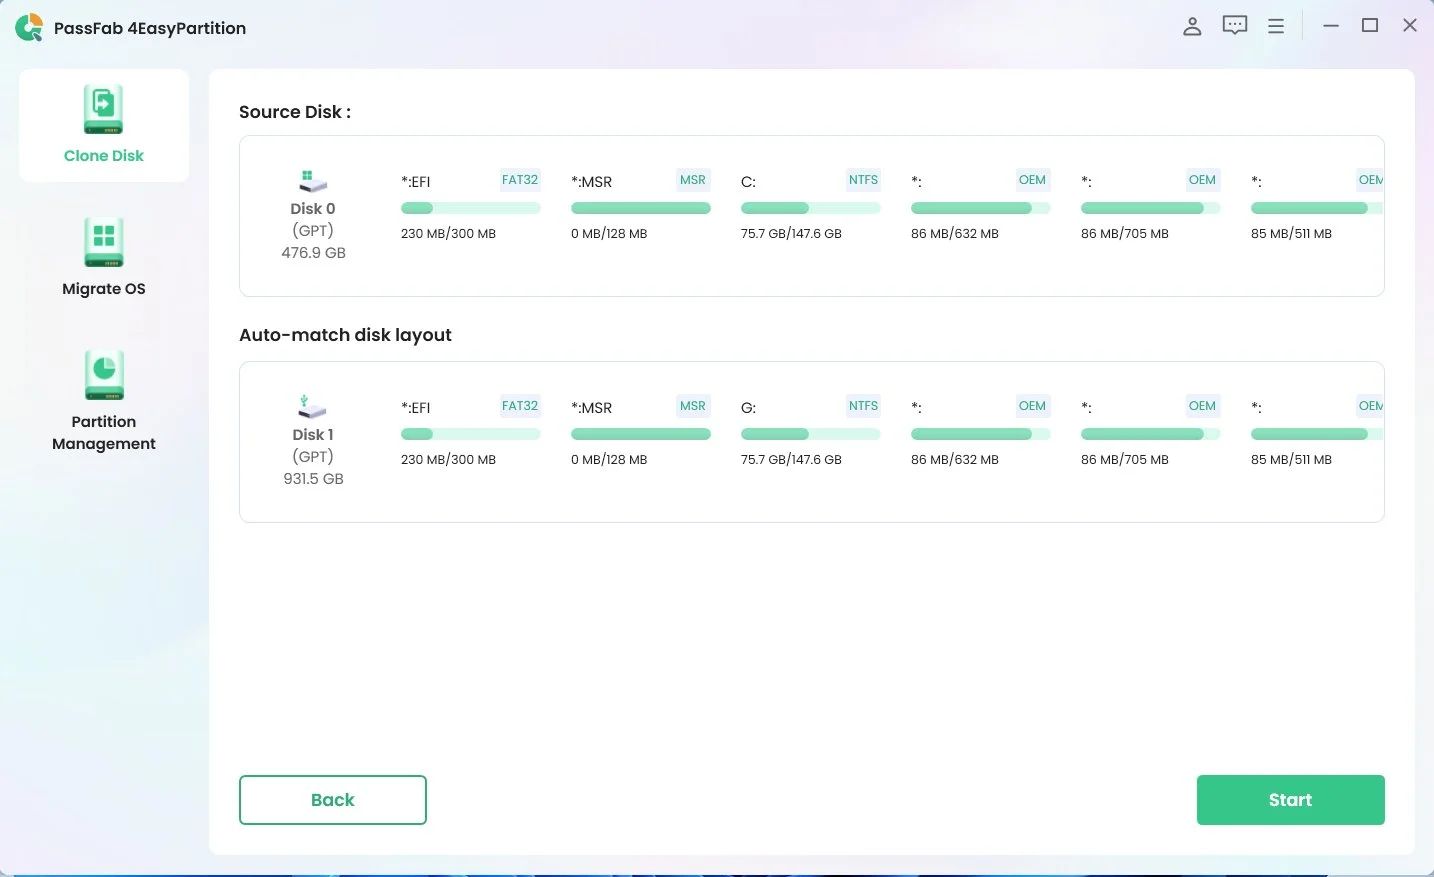
In the preview interface, check the source and target disk information, and click "Start" to perform disk cloning.

-
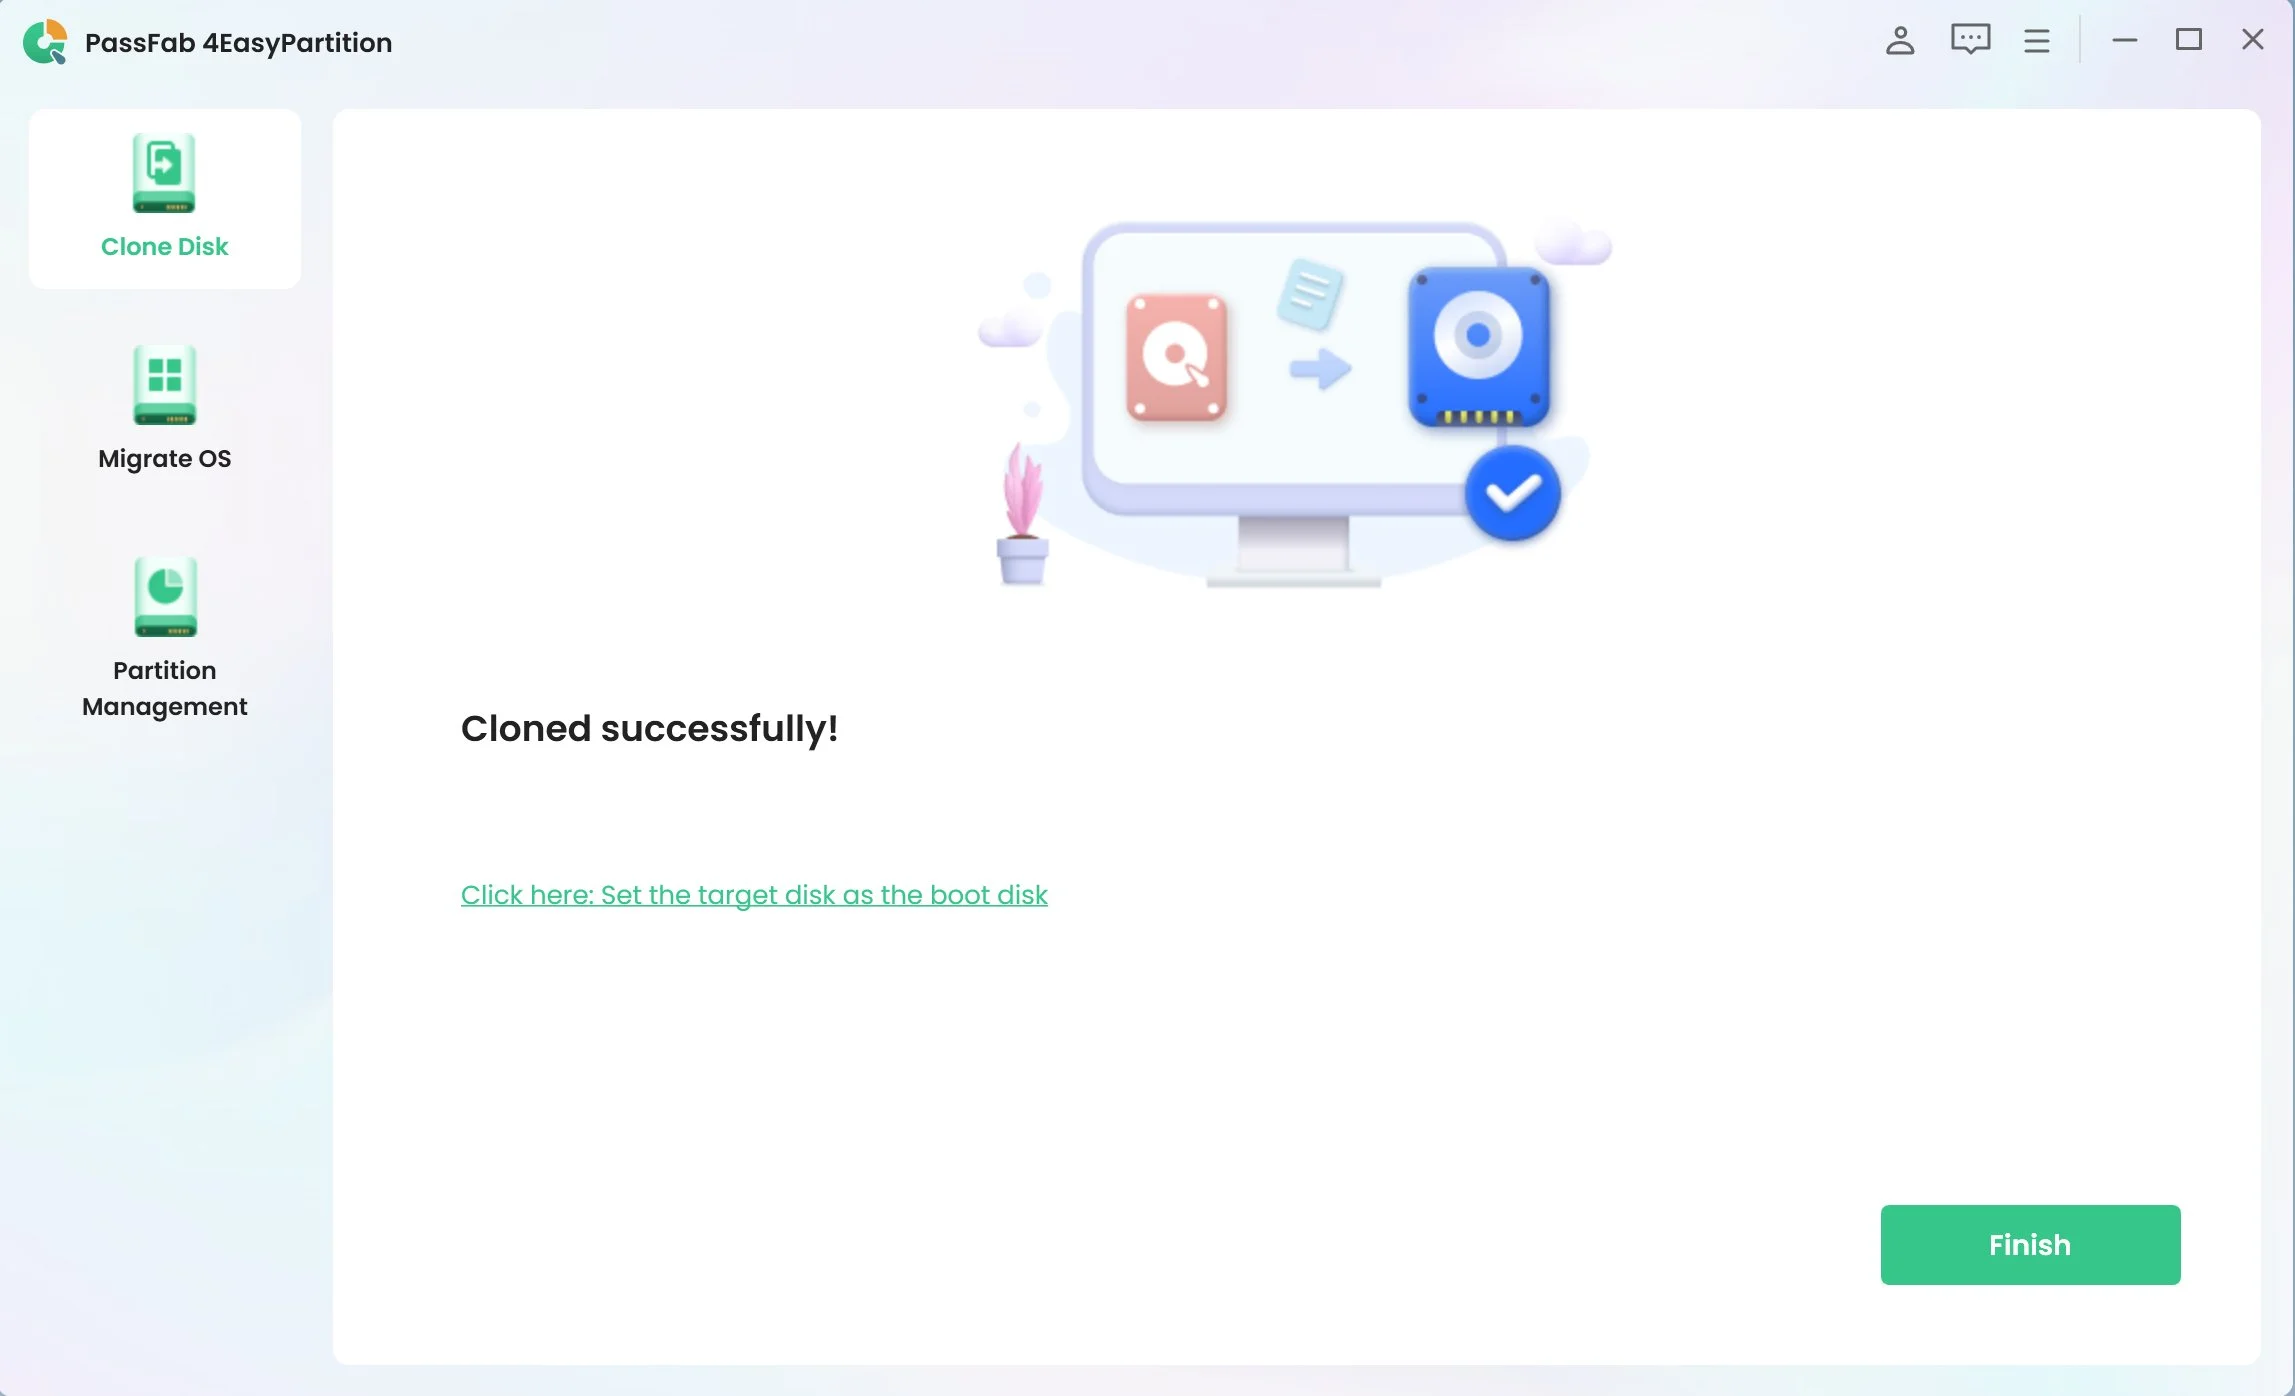
The disk cloning operation is in progress. Please wait for a while. Once cloning is successful, a risk pop-up window will be displayed. Click "Reload" and then "Finish" to complete the process.

Part 3: How to Boot From the New Cloned Drive?
Once you have successfully cloned Windows 11 to the new drive, the next step is to boot your computer from the newly cloned drive. Here’s how you can do it:
Boot PC from New Hard Drive in Windows 11
- Insert the New HDD/SSD into the Computer
First, you need to install the new drive physically into your computer. If you use a desktop computer, open the computer case using a screwdriver. Locate an available drive bay and use a SATA cable to connect the cloned disk to the motherboard and the power supply. If you are using a laptop, you might need a SATA-to-USB adapter or an external drive enclosure if your computer does not have an extra drive slot. - Restart the PC and Enter the BIOS
Once the new drive is connected, restart your computer. Press the appropriate key (usually F2, F8, or Del) to enter the BIOS setup as the computer boots up. The specific key varies by manufacturer, so you may need to refer to your computer’s manual. - Set the New Drive as the Boot Drive
In the BIOS setup, use the arrow keys to navigate to the boot options menu. Locate the list of bootable devices and select the new HDD/SSD as the primary boot drive. Save the changes and exit the BIOS. This action tells your computer to boot from the new drive instead of the old one. -
Boot from the New SSD
After saving the changes, your computer will restart. If everything is set up correctly, your PC should boot from the new SSD, loading Windows 11 from the cloned drive. You should see your familiar desktop, files, and applications precisely as they were on the old drive.
By following these steps, you ensure that your computer successfully boots from the new cloned drive. This allows you to enjoy the benefits of your new storage device without losing any data or settings.
Final Thoughts
Successfully cloning Windows 11 to a new drive ensures that you retain all your settings, applications, and data without the hassle of reinstallation. Using reliable software like PassFab 4EasyPartition makes this process straightforward and efficient.
Ensure you follow each step carefully to avoid any data loss.
If you’re looking for a hassle-free way to clone Windows 11 to a new drive, PassFab 4EasyPartition is an excellent choice for its ease of use and reliability.
*An OTG cable is required
