Do you want to know how to move Windows 11 to another drive? If your answer is a resounding YES, you've come to the right place. You can transfer Windows to another drive without violating your licenses--both OEM and Retail licenses. And surely, your data and system files stay intact too. Migrating Windows 11 to another drive, for any reason, is a tricky task for most regular users of the operating system. However, following our guidance and third-party software recommendations, the task can be much easier and faster to accomplish. Let's get right into it then!
Part 1: How do I choose a Hard Drive for Windows 11?
Part 2: Why I Need to Move Windows 11 to another Drive?
Part 3: Three Proven Ways to Move Windows 11 OS to another drive
Part 4: Move Windows 11 to another Drive with PassFab 4EasyPartition
Part 5: FAQs about Moving Windows 11 to another drive
Part 6: Conclusion
Part 1. How do I choose a Hard Drive for Windows 11?
Moving Windows from one drive to another involves a little groundwork and your first point of call is sorting out the new home for the OS. When it comes to picking an SSD for Windows 11, the two most important things to consider are the disk size and disk capacity.
1. Disk Size
The physical dimension of the disk is very important when you're trying to install an internal SSD into the hard drive slot of a laptop. More often than not, a 2.5-inch SSD is the standard disk size for modern PCs. Also, there's likely going to be room for a traditional HDD to sit alongside the SSD. Although you may have to make do with a smaller battery size in some compact laptop models.
The M.2 SSDs most modern laptops often come with a vacant M.2 slot that is designed for smaller form SSDs. The M.2 SSDs are very small and ideal for when you're short on motherboard space and bay options.
Tips:
Getting an M2. SSD can be the best way to maximize your bay options -- you just have to make sure you get one that matches the connector on the motherboard.
2. Disk Capacity
The disk capacity is the only other thing you need to worry about when choosing a hard drive for Windows 11. To determine which capacity is right for you, first, find out how much data is stored in your current hard disk.
Open Windows Explorer and click This PC to see how much data is stored on your primary drive. Don't forget to add up all the numbers for disks that have several partitions.
Tips:
Ideally, you want an SSD that is bigger than your current set of data with ample space to spare for more. In essence, the bigger the hard drive, the better. The only matter is that with SSD capacities, the higher you go, the get disproportionately more expensive.
Part 2. Why I Need to Move Windows 11 to another Drive?
There are a few reasons why you might want to move Windows 11 to another drive, here are a few of them:
- Free up Space on the Existing Drive
- Improved System Performance
- Improved System Performance
When the current boot drive is full, the system becomes slow and frustrating to operate. Hence, moving Windows 11 to a new drive with enough storage space solves the problem.
It is no longer news that booting Windows from an SSD offers better and faster system performance compared to an HDD.
There's always that possibility that technology might fail us which is a good reason to make a backup of the operating system so they can be recovered easily should a crash occur.
Part 3. Three Proven Ways to Move Windows 11 OS to another drive
There are three proven ways to transfer Windows to new hard drive or SSD, they are clean install, built-in backup and restore utility, and making use of third-party software. In this section, we will take a deeper dive into the first two methods.
Preparations: Clean Up and Back Up your PC
Before moving Windows to another drive, it's important to back up any important data and applications in case something goes wrong in the process. The best way to do a backup is to create a system image that saves all the data and setting on the current drive.
- To create a system image, right-click on the Start Menu and select “Settings”
- Then select ‘Update and Security’
- From here, select ‘Backup’ and follow the instructions to create a system image.
Method 1: Clean Install
Performing a clean install is the least cumbersome solution to transfer windows to another drive. A clean install of Windows 11 simply installs a fresh copy of the operating system and some basic applications.
Even though it solves issues related to performance, memory, startup, and shutdown, the disadvantages of this method are quite painful.
How to Clean Install via Windows 11 Installation Assistant
There are several ways to clean install Windows 11, but leveraging the Windows 11 Installation Assistant is the easiest.
-
Download the Windows 11 Installation Assistant from Microsof's official download pages and click on the Download Now button.
-
Locate the just downloaded file in your folders and run the executable file.
-
Click Accept and Install on the Terms of Agreement window.
Windows 11 will start downloading automatically.
After the downloading is complete, your PC will restart after 30 minutes to install Windows 11. You may wish to restart immediately.
On the restart, Windows 11 will be installed and configured automatically.
warning:
The obvious one is you'd need to reinstall all the apps and configure the settings you'll use in the immediate future -- this is time-consuming.
Method 2: Windows Built-in Backup and Restore
The built-in backup and restore creates a mirror copy of everything on the system partition, including the existing OS, applications, user settings, and personal data, which allows you to create a system repair disc for whenever the PC fails to boot Windows. Hence, with this system repair disc, you can move Windows to another drive without reinstalling programs, violating licenses, or losing data.
How to create a system repair disc
-
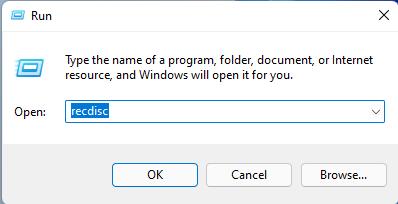
Open the Run Window (hold Windows + R keys) type rec disc, and hit enter.
-
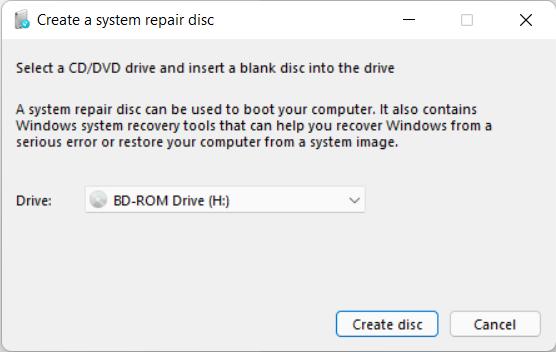
Insert a blank, writeable disc into your DVD or Blu-Ray drive after starting the Repair Disc Wizard. Make sure the correct drive is selected and click Create disc.
-
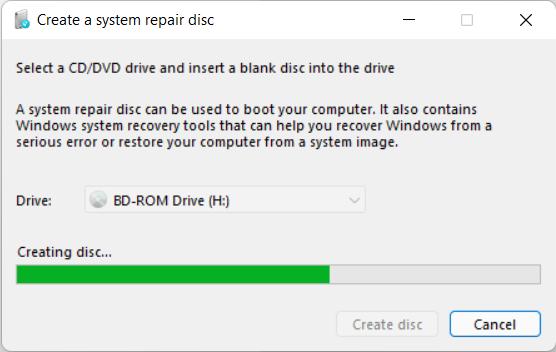
Wait for Windows to write the system repair disc. The process only takes a few minutes.
-
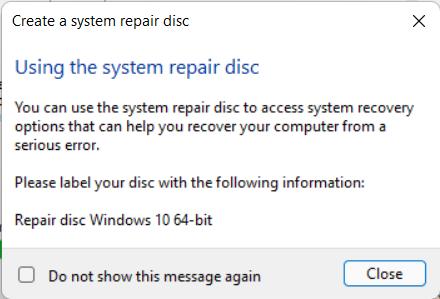
Once the process is complete, you are greeted with a similar window to the one below. Tap close to continue. You can boot from this disc and install Windows on another drive.
warning:
The only major problem is that the backup image you created on a larger disk using this method cannot be restored to a smaller partitioned disk.
At this junction, let's bring you up to speed on how to move windows from one drive to another using third-party tools.
Part 4: Move Windows 11 to another Drive with PassFab 4EasyPartition
Want to know how to move Windows 11 to another drive easily? Disk cloning with third-party software such as PassFab 4EasyPartition eliminates the shortcomings associated with both the clean install method and the built-in backup and restore feature. Let's get started with moving Windows 11 with 4EasyPartition.
1. Preparations before the Windows 11 Migration
Before the Windows 11 migration, we must ensure the target disk is installed and configured for use with the PC. Follow these simple steps to prepare your disk for cloning Windows 11.
Initialize the new HDD/SSD Storage
To initialize disk: Go to Disk Management, right-click on the new drive, and select "Initialize Disk". Then set the disk as GPT or MBR.
Tips:
For new hard drives, you have to start an initialization for it to make it usable and recognizable by your PC.
After Initialization, you can now begin cloning Windows 11 to your new SSD or HDD. Always ensure there is enough storage space on the destination drives otherwise the migration will be uncompleted.
2. How to move Windows 11 to another Drive with PassFab 4EasyPartition
-
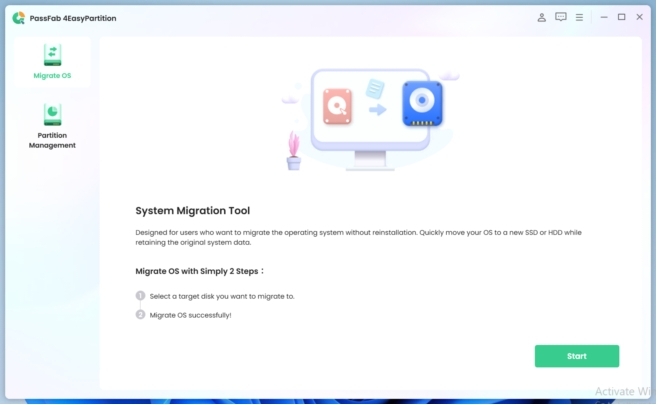
Download and launch PassFab 4EasyPartition Windows 11 migration tool, click the "Start" button to begin the process
-
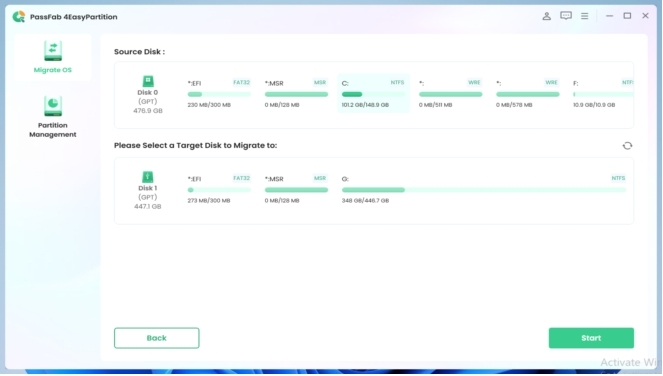
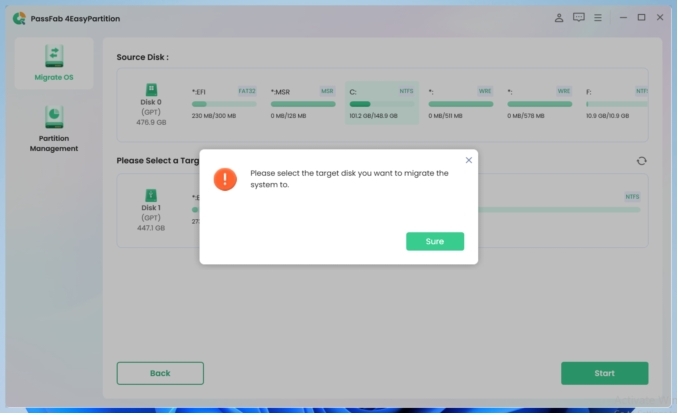
Select the source disk from where to Move Windows 11 and the target (new) disk. Click the Start Button to continue.
-
Preview your selection of source and destination disk and confirm your choices. When satisfied, click Start to begin migration.
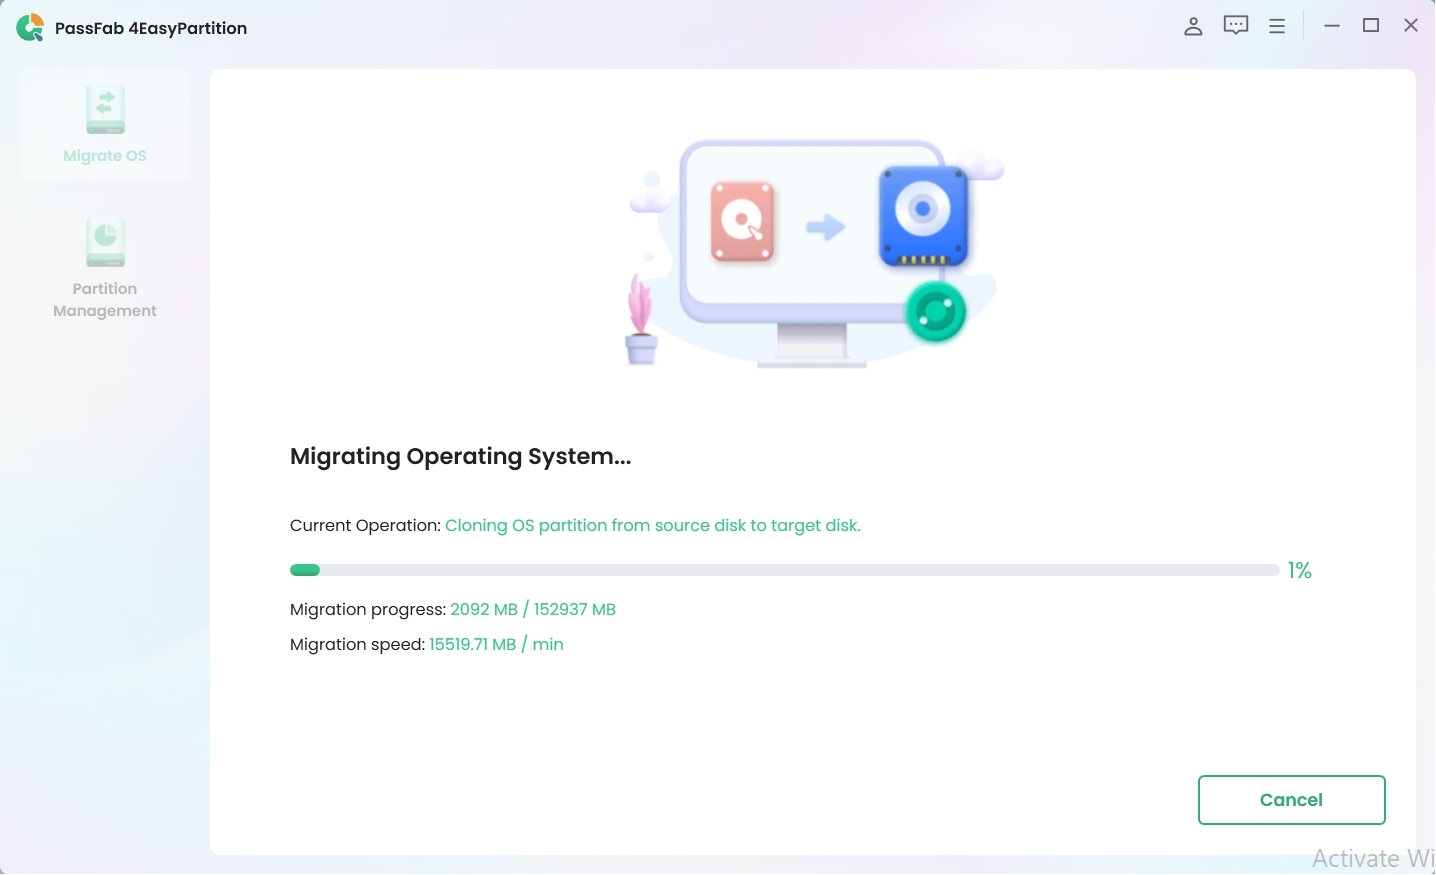
The system migration will take a while, please wait for the process to complete
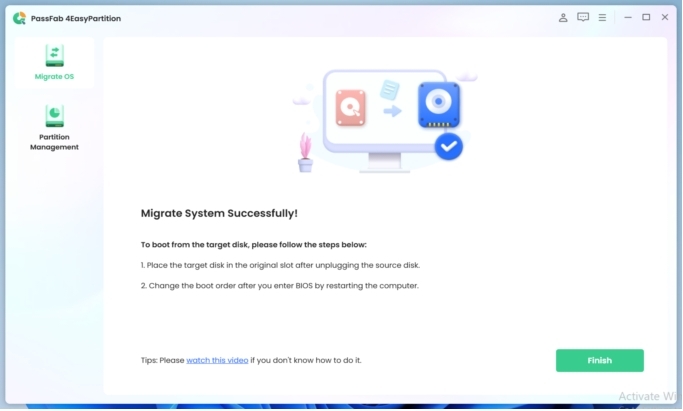
"Migrate system successful". Click Finish to complete the process.
Part 5. FAQs about Moving Windows 11 to another drive
Q1: Can I Transfer Windows 11 to another Drive without Reinstalling the OS?
The answer is yes. And while you can achieve this with the built-in backup and restore, the process can take considerable time to complete. Using third-party tools is much faster and simpler to understand.
Q2: How do I Transfer Windows 11 to a USB Flash Drive?
This is the same thing as creating a Windows 11 bootable USB. Download and launch the media creation tool from the Microsoft website. Select the USB flash drive option and continue with the on-screen instructions to transfer Windows 11 to a USB Flash Drive
Conclusion
By now, you've learned how to move Windows 11 to another drive. We discussed a few methods to achieve this, including using third-party tools which make the migration process intuitive and simple. We gave a step-by-step guide on how to carry out Windows 11 migration with PassFab 4EasyPartition. 4EasyPartition is a system migration tool that makes the process 4 times easier! Even for computer novices.