As our digital world becomes ever more connected, we all know that SSDs have quickly gained importance. Unfortunately, partitioning can be complex and mistakes could result in permanent data loss or performance degradation. Let's walk you through the necessary processes and precautions to ensure safe and successful SSD partitioning in 2025. By reading this article, we hope that you can fully utilize and protect the capabilities of an SSD. Let's get going!
Part 1: How Partitioning SSD Helps You Run Your Computer More Efficiently?
Part 2: What You Should Know Before Partitioning SSD?
Part 3: Check The State of Your SSD
Part 4: How to Partition SSD in Windows?
- Method #1: SSD Shows Not Initialized - Initialize SSD (Partition SSD with Disk Management)
- Method #2: SSD Shows Partitioned - Resize/Create SSD
Part 5: Bonus Tip: Myths About Partitioning SSD
Part 6:FAQs About how to Partition SSD
- Q1: Does SSD Partitioning Have Disadvantages?
- Q2: How to Partition SSD in Windows 10?
- Q3: Is it Good to Partition Your External Hard Disk?
- Q4: How to Partition a SSD from BIOS?
- Q5: Which Partition is Best for SSD?
- Q6: Should I Split my SSD Into Partitions?
Conclusion
Part 1. How Partitioning SSD Helps You Run Your Computer More Efficiently?
Partitioning your SSD can significantly improve computer efficiency by delivering benefits other than storage organization.
Obtain faster data access
By partitioning the SSD for the operating system, programs, user files, and temporary data separately, you can obtain faster data access. That's because the drive pulls information from many partitions at the same time.
Reduce possibility of unintentional deletion or corruption.
Partitioning also separates system files from user data, which reduces the possibility of unintentional deletion or corruption.
Make data backups and system recoveries easier
Partitioning SSD also makes data backups and system recoveries easier by allowing you to target selected partitions while leaving others alone.
Improves speed
When you partition SSD, it improves speed, streamlines productivity, and ensures that the system runs smoothly.
Part 2. What You Should Know Before Partitioning SSD?
Before you begin the process of partitioning your SSD, there are several important elements you should be aware of to ensure a smooth and successful partitioning.
- To begin, you must back up all of your critical data as partitioning can result in data loss if not done appropriately.
- Understanding the restrictions of your operating system and partitioning software is also critical as certain operating systems have unique requirements regarding partition sizes or the number of partitions that can be created.
- It's also a good idea to plan ahead of time for the partitioning procedure, especially if you're working with a huge SSD or a complex partitioning scheme.
- Finally, having a clear understanding of your storage demands and partition architecture that you want. It'll allow you to make smart partitioning decisions.
Part 3. Check The State of Your SSD
Notes
Before you begin the process of partitioning your SSD, there are several important elements you should be aware of in order to ensure a smooth and successful partitioning.
- Start by properly connecting the SSD to your computer with the necessary connection cable. Restart your computer.
- Then choose “Manage” by selecting “This PC/My Computer” from the right-click menu.
- To evaluate the condition of your SSD, select “Disk Management”.
Your SSD will be in one of the following states:
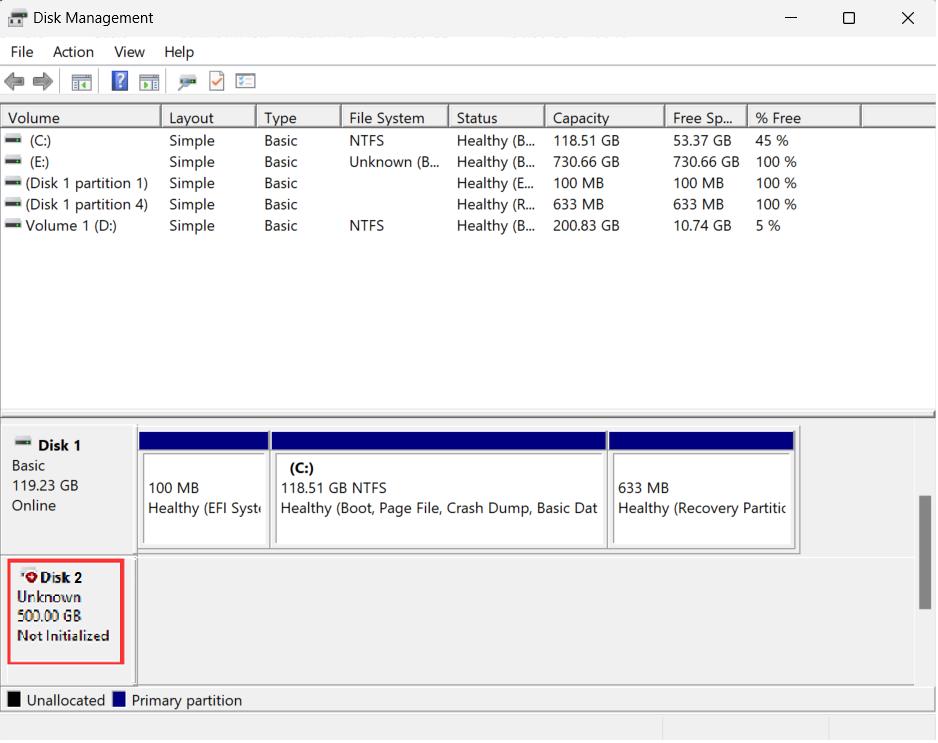
- Not Initialized: Meaning that the SSD needs to be initialized before partitions can be created on it.
- Unallocated: Your SSD is initialized and prepared for direct partition formation when it displays this message.
- Partitioned: You might need to resize or repartition your SSD if it already contains partitions.
After assessing the condition of your SSD, you may start the partitioning procedure by following the detailed instructions in the sections below.
Part 4.How to Partition SSD in Windows?
Method #1: SSD Shows Not Initialized - Initialize SSD (Partition SSD with Disk Management)
-
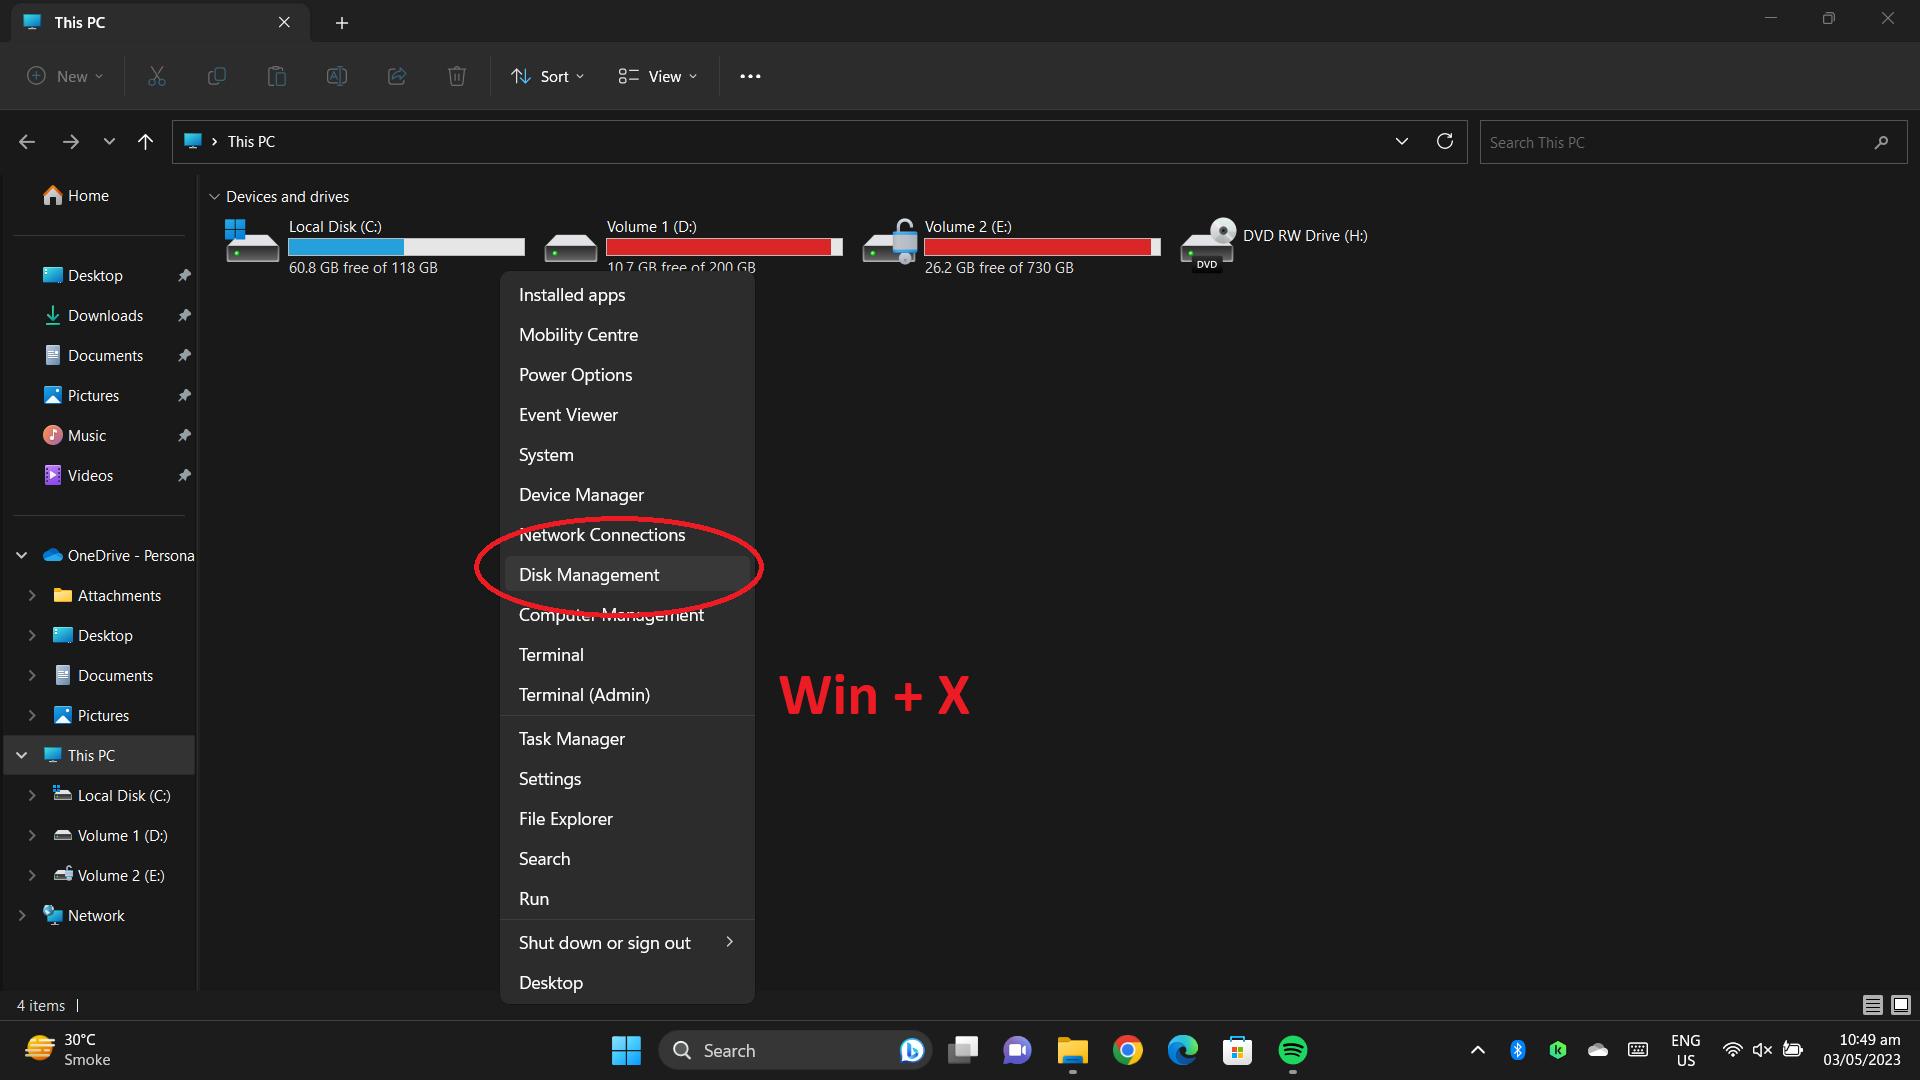
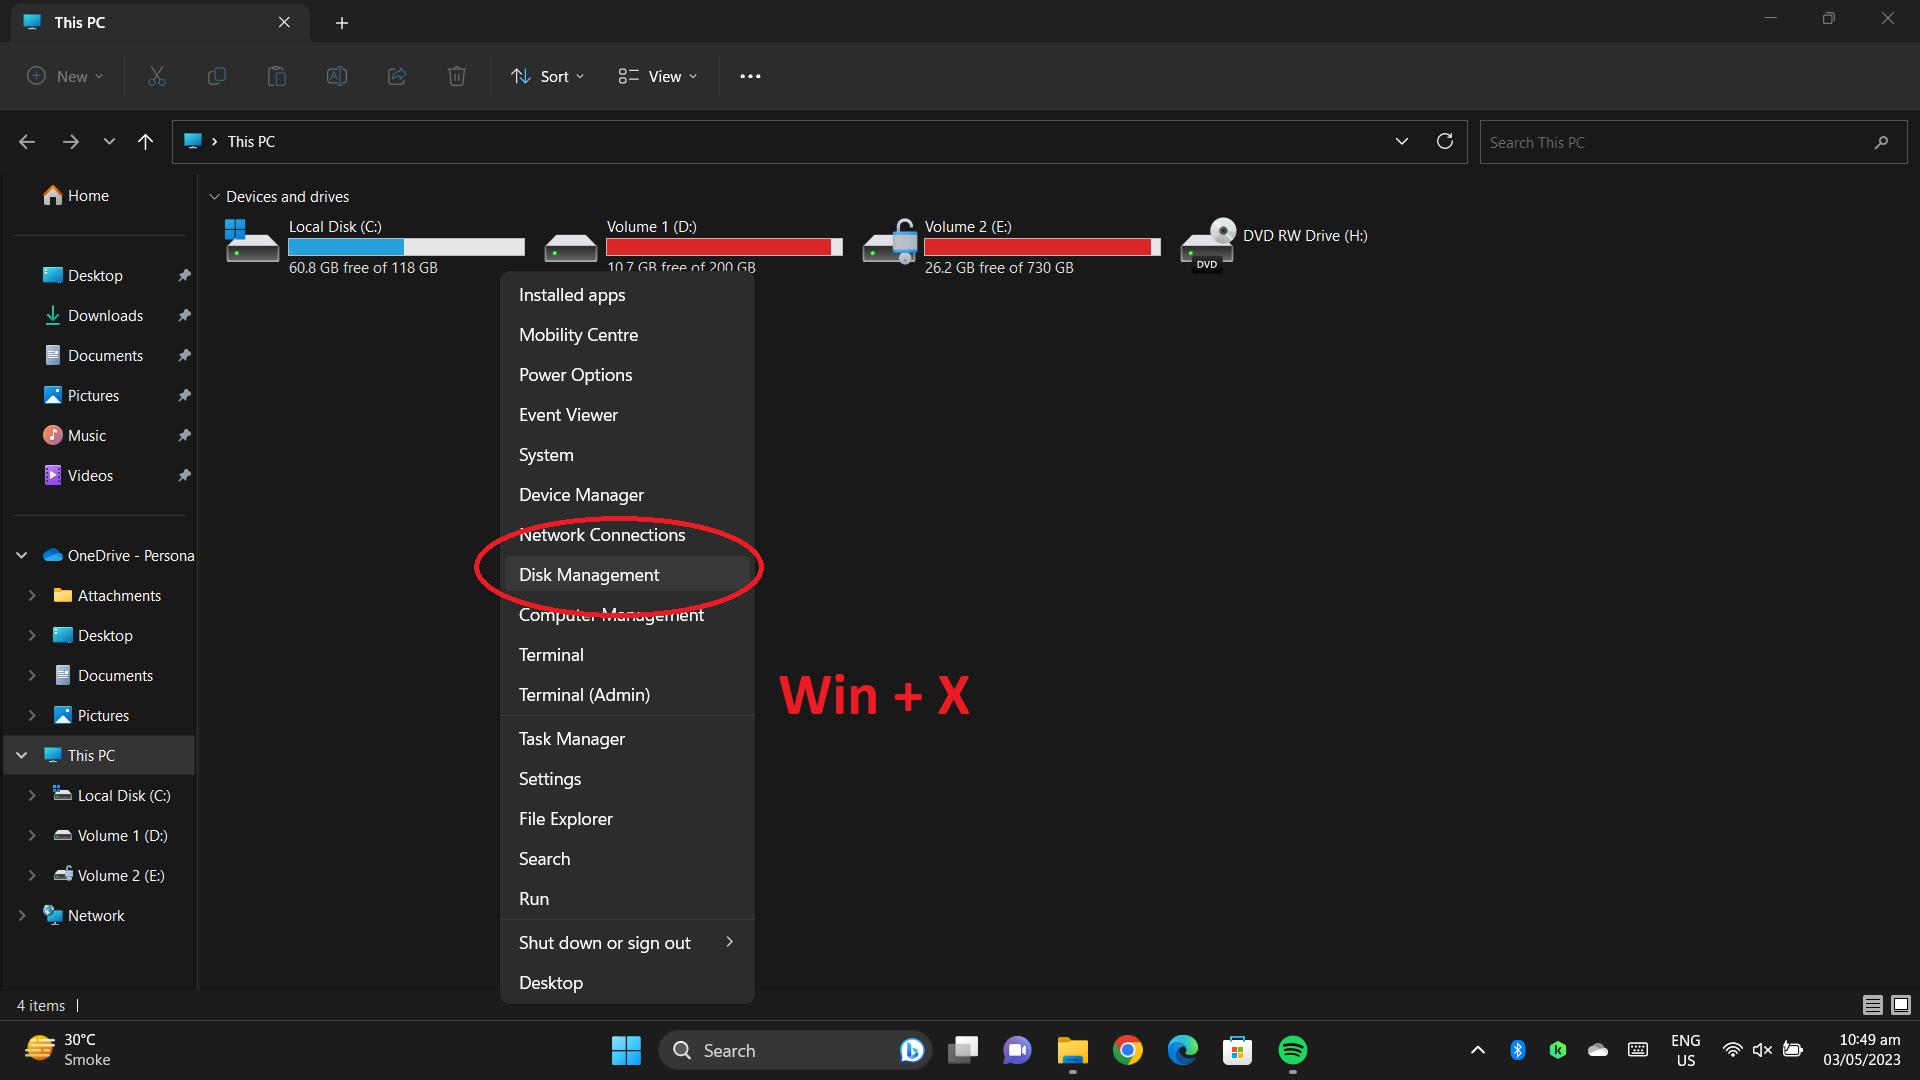
Open “Disk Management” by pressing “Windows Key + X”.

-
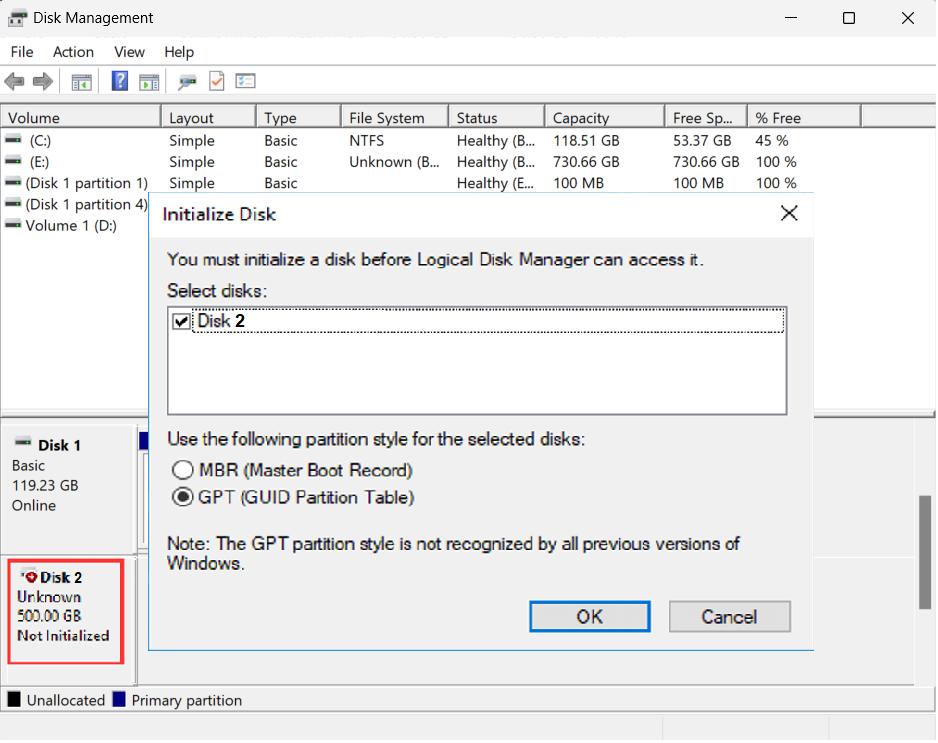
If your new disk is unknown, right-click and select “Initialize Disk”. GPT is suggested if you're using Windows 10/11.

-
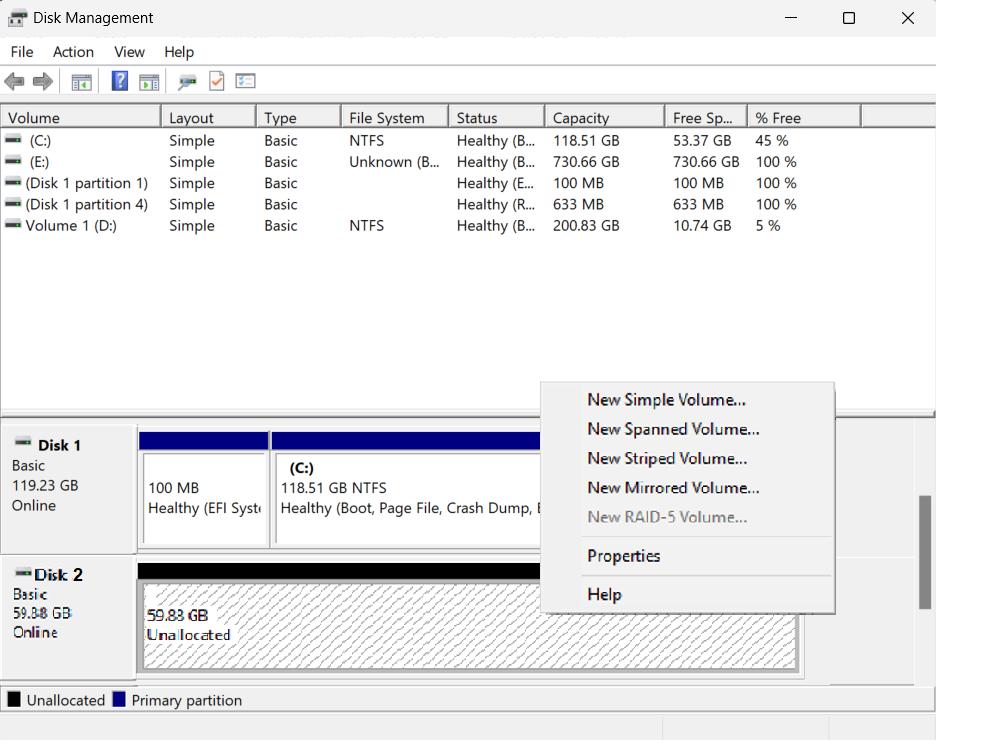
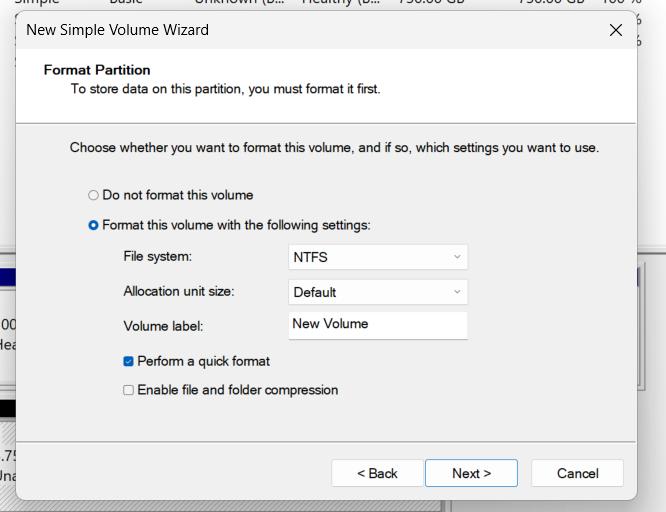
After initialization, right-click “Unallocated” and choose “New Simple Volume” to make a partition.

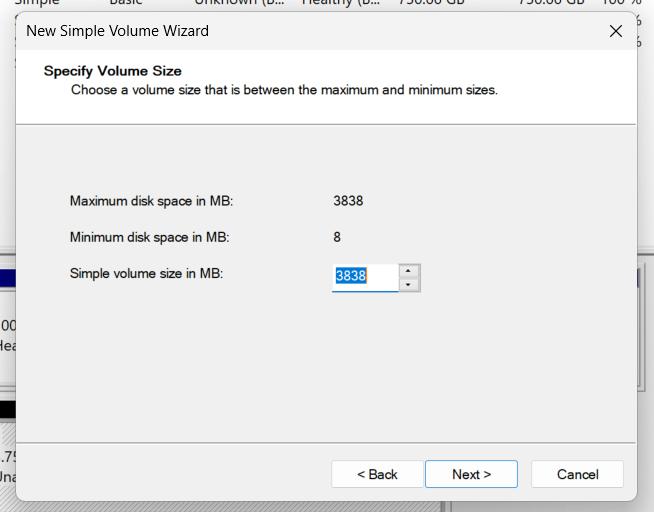
Determine the partition size in MBs.

Choose a drive letter and file system.

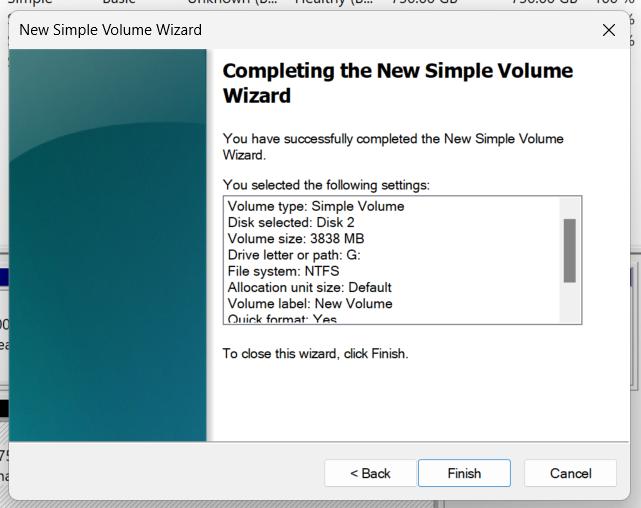
Finish the wizard by pressing the “Finish” button.

Method #2: SSD Shows Partitioned - Resize/Create SSD
Way 1: Partition SSD with PassFab 4EasyPartition
-
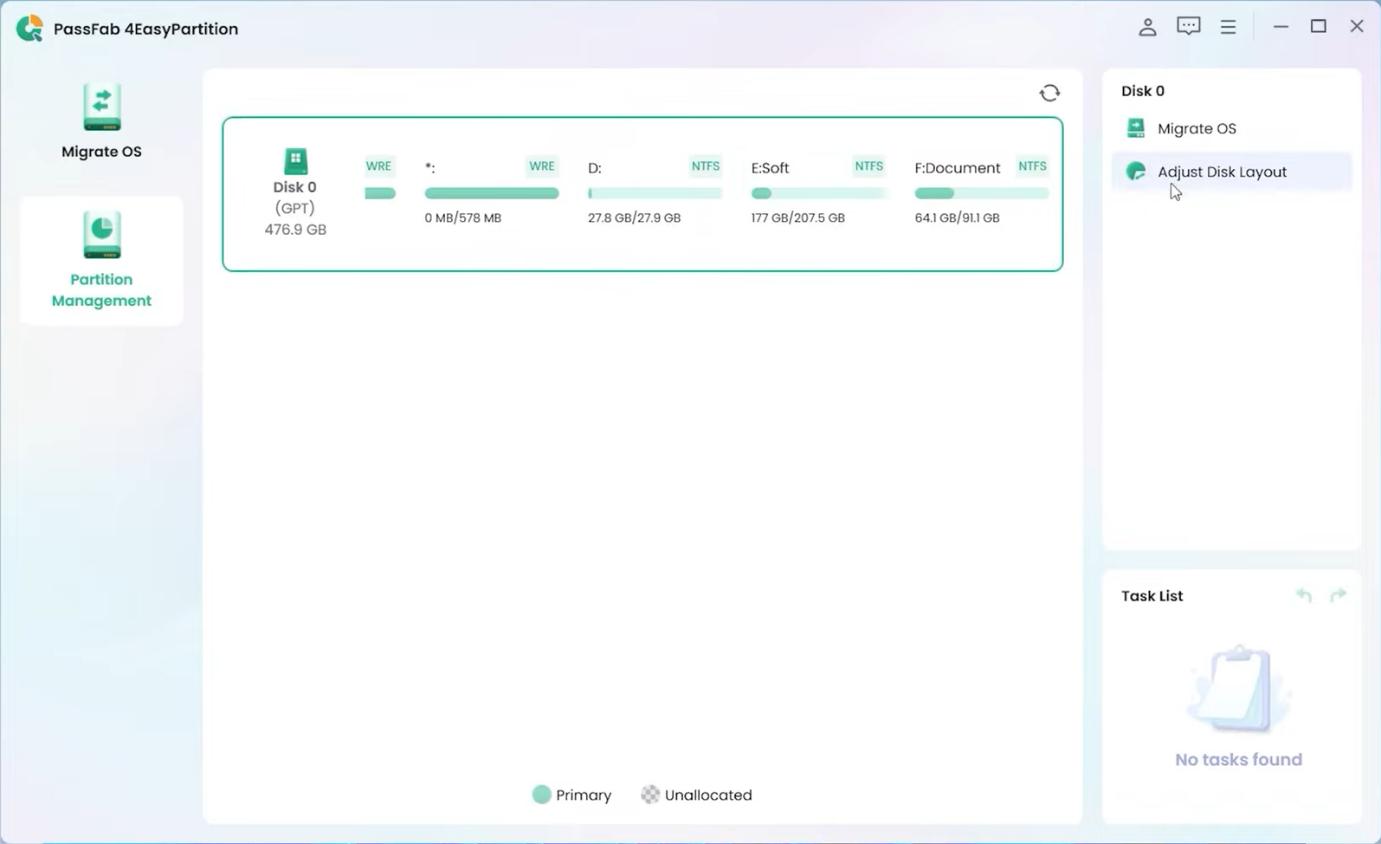
Open PassFab 4EasyPartition, then right-click on the SSD partition you want to resize and choose "Adjust Disk Layout" from the top-right menu.

-
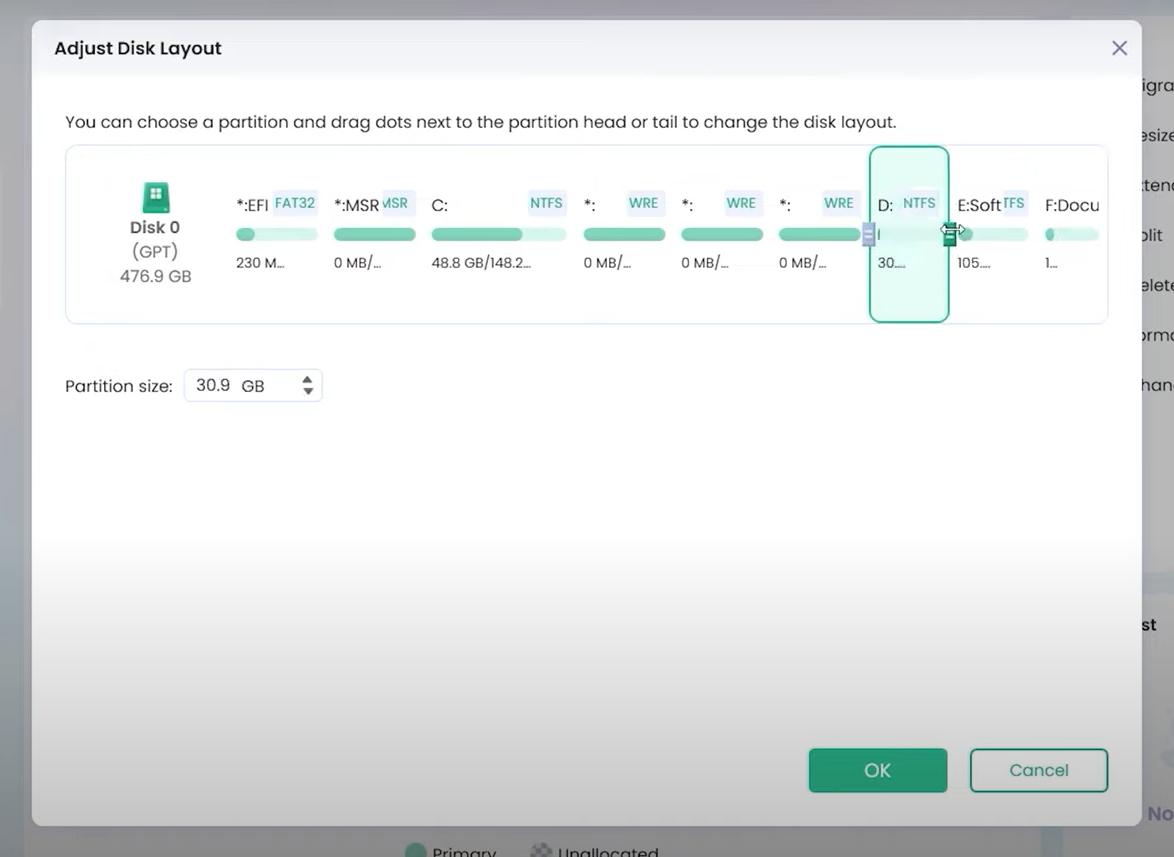
In the pop-up window, you will see the current size of partitions as well as sliders to adjust it. Adjusting is simple by moving its bar. Once finished, click "OK" to keep the adjustments and preview them.

Way 2: Partition SSD with Disk Management
-
Press Windows + X and launch “Disk Management”.

-
Right-click on the partition that you want to create and choose New Simple Volume from the context menu.

-
The New Volume Wizard will ask you about the space you want your partition to be.

Choose a drive letter and file system.

Click “Finish” to Finish the New Simple Volume Wizard

Way 3: Partition SSD with DiskPart Command
-
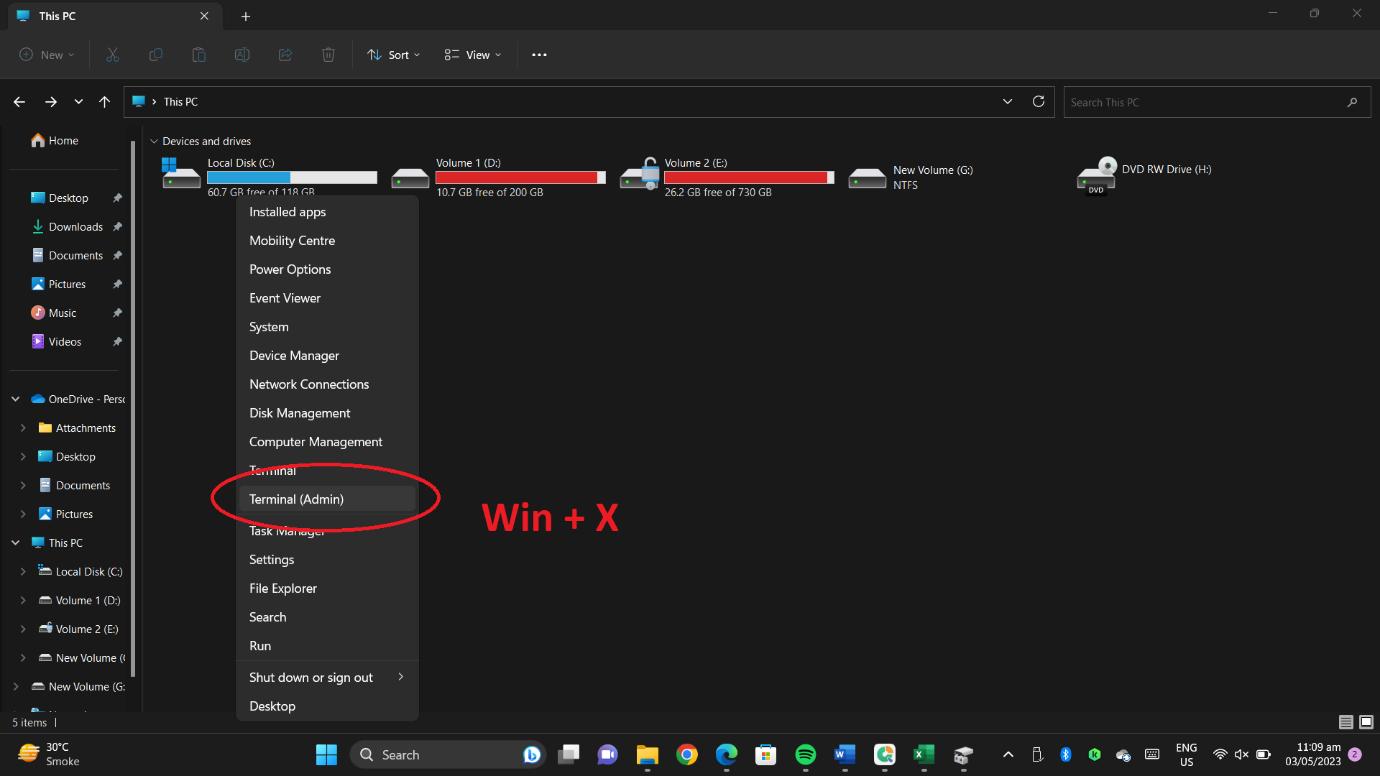
If you’re wondering on how to partition SSD windows 10 CMD or Terminal, press Windows + X and launch “Terminal (Admin)” or “Command Prompt (Admin)”

-
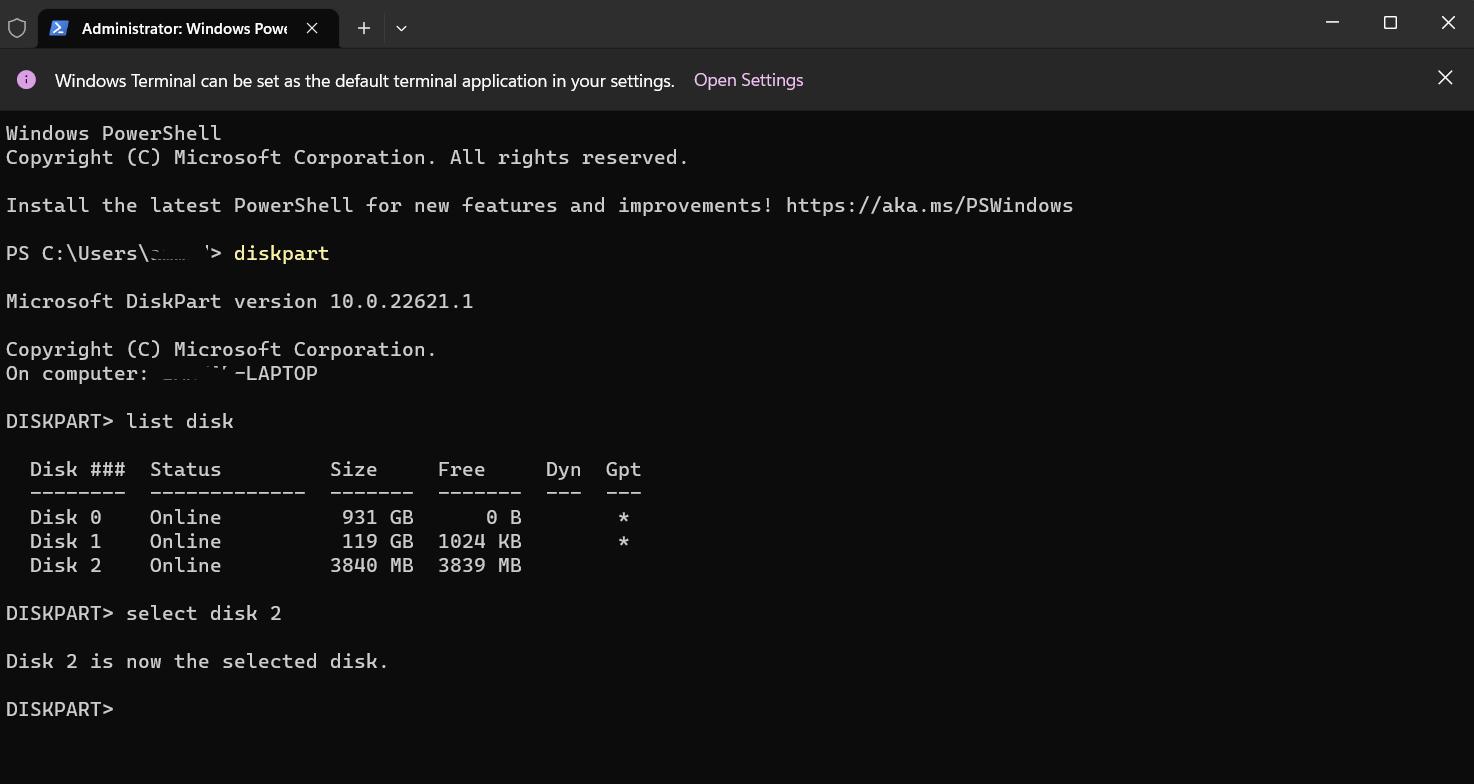
Type "diskpart" and hit Enter.

-
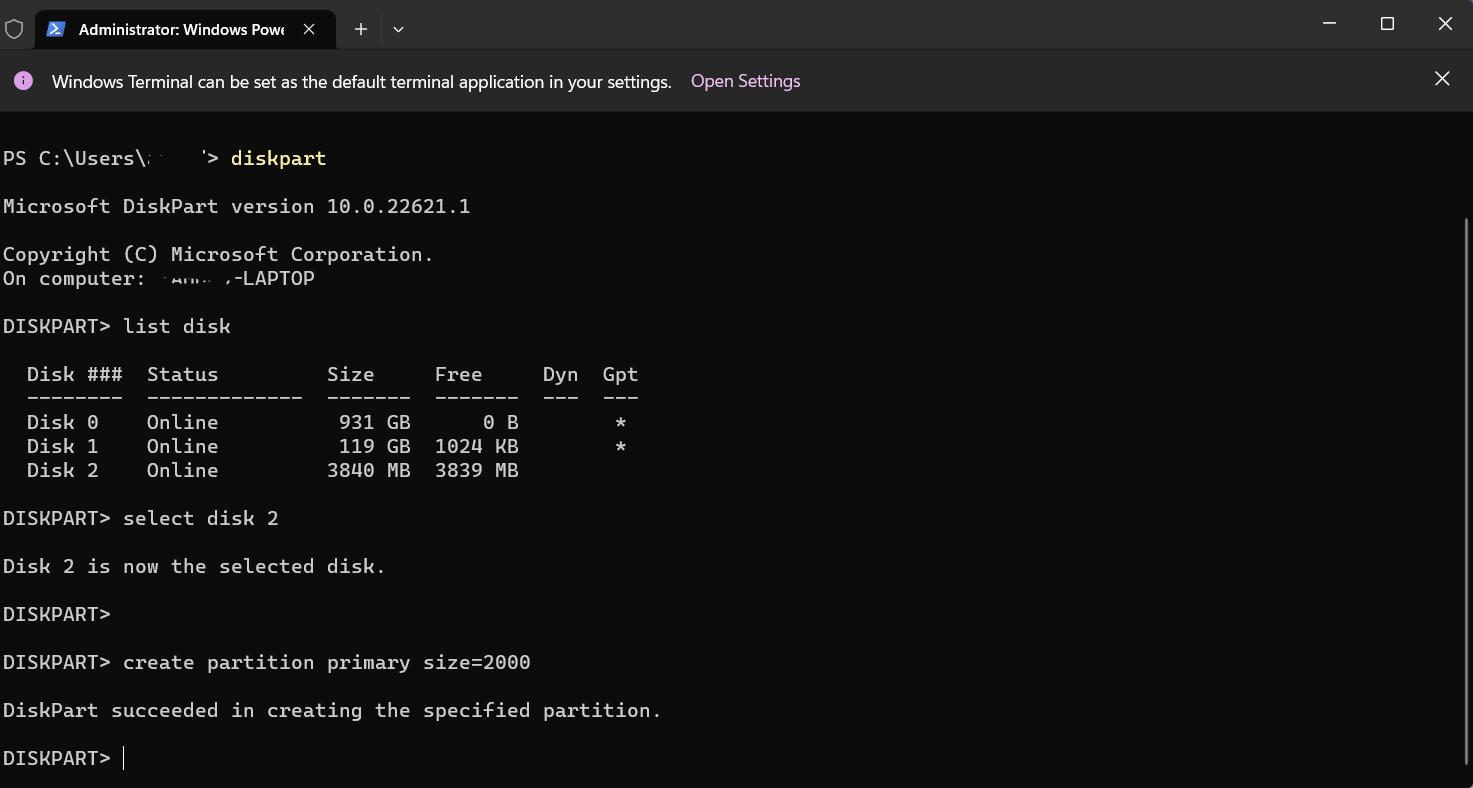
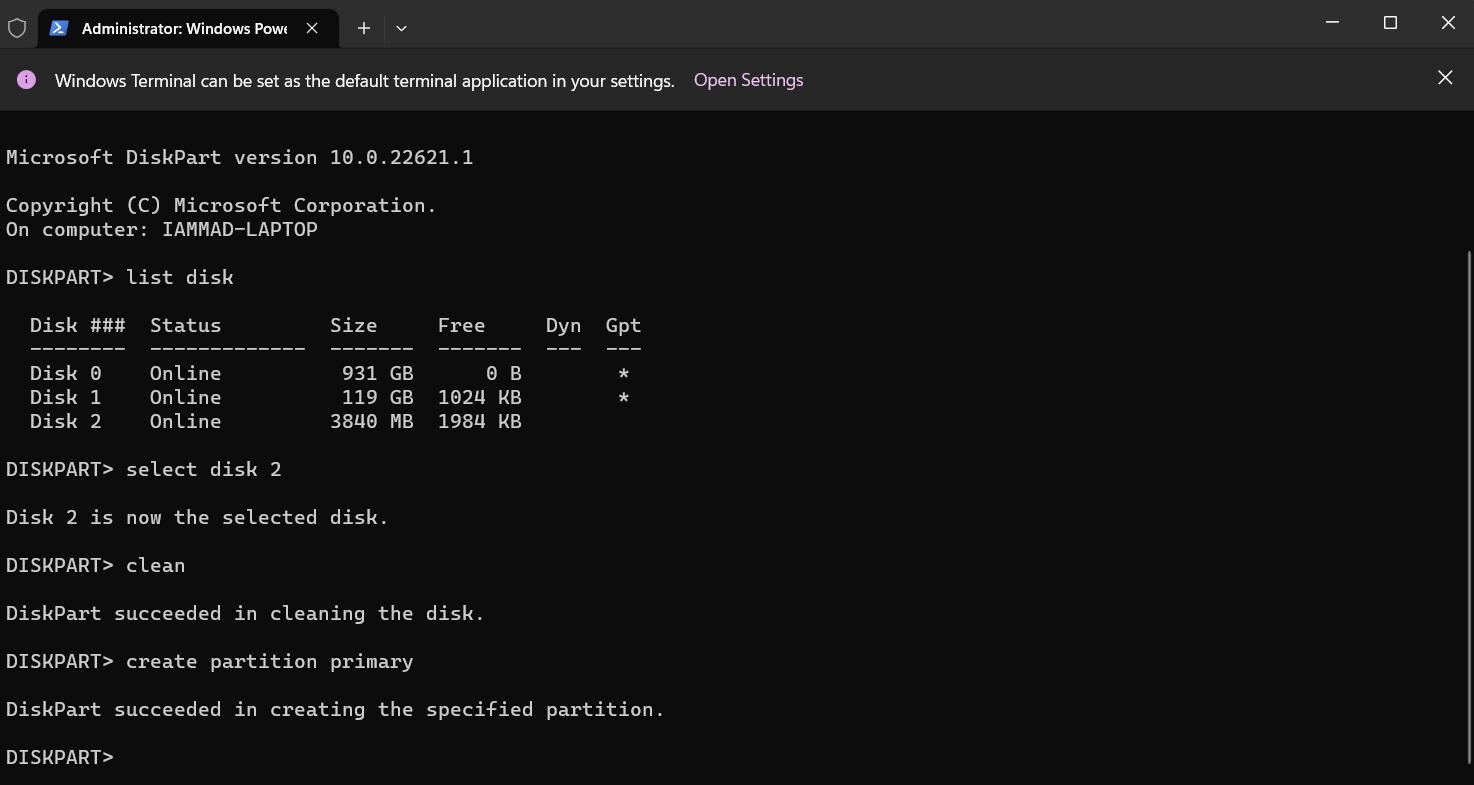
Type "list disk" and hit “Enter”. You’ll see the list of disks on your computer. Identify your SSD in that list.

Type "select disk x" (replace "x" with disk number of your SSD) and hit “Enter”.

Type "clean" and hit Enter to delete all partitions and data from the SSD (do this step only if needed as it’ll delete everything on the SSD).

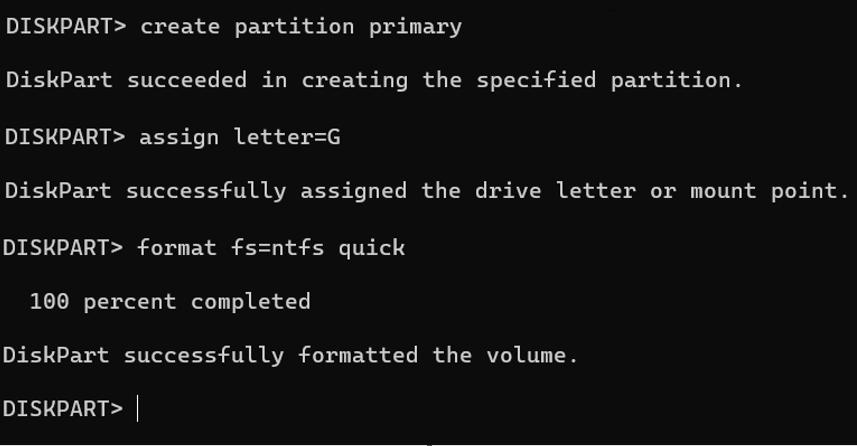
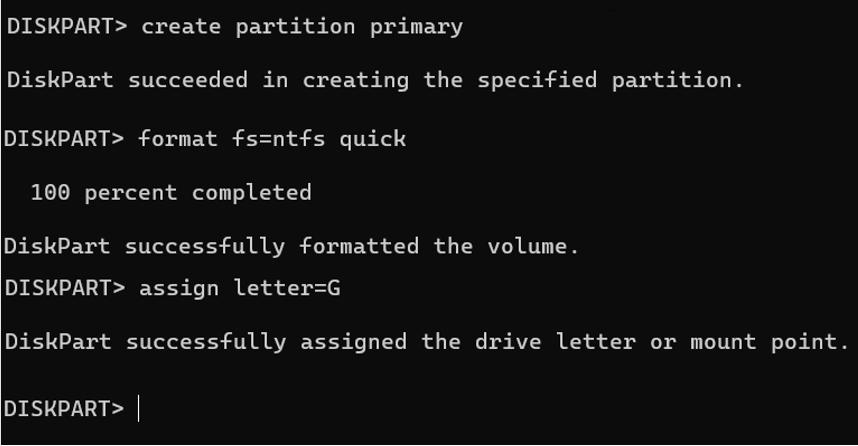
Enter "create partition primary" and press “Enter” to create a new partition on your SSD.

Type "format fs=ntfs quick" and press “Enter” to format this new SSD partition in the NTFS. You can also replace "ntfs" with "exfat" or "fat32" if you want.

Type "assign letter=x" (replace "x" with the drive letter you want to give to your new SSD partition) and press “Enter”.

Type "exit" and hit “Enter” to close DiskPart.
Way 4: Partition SSD with Windows Media Creation Tool
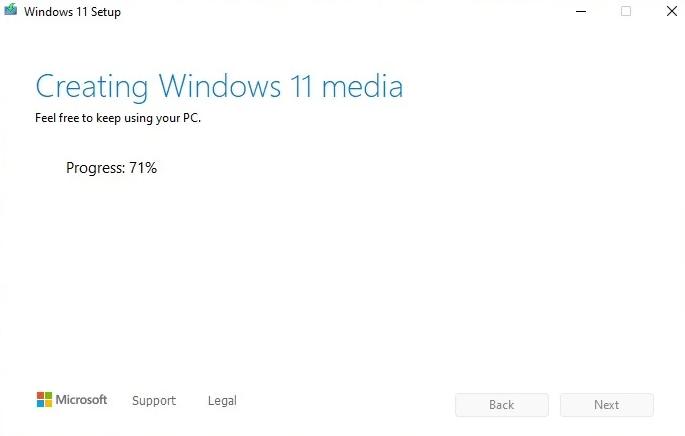
You can create partitions easily from the installation screen by using Windows Media Creation tool. This method is important if you’re looking for ways on how to partition a new SSD and install Windows on it.
-
Download and installed the Windows Media Creation tool and plug in a USB to create bootable Windows installation USB.

-
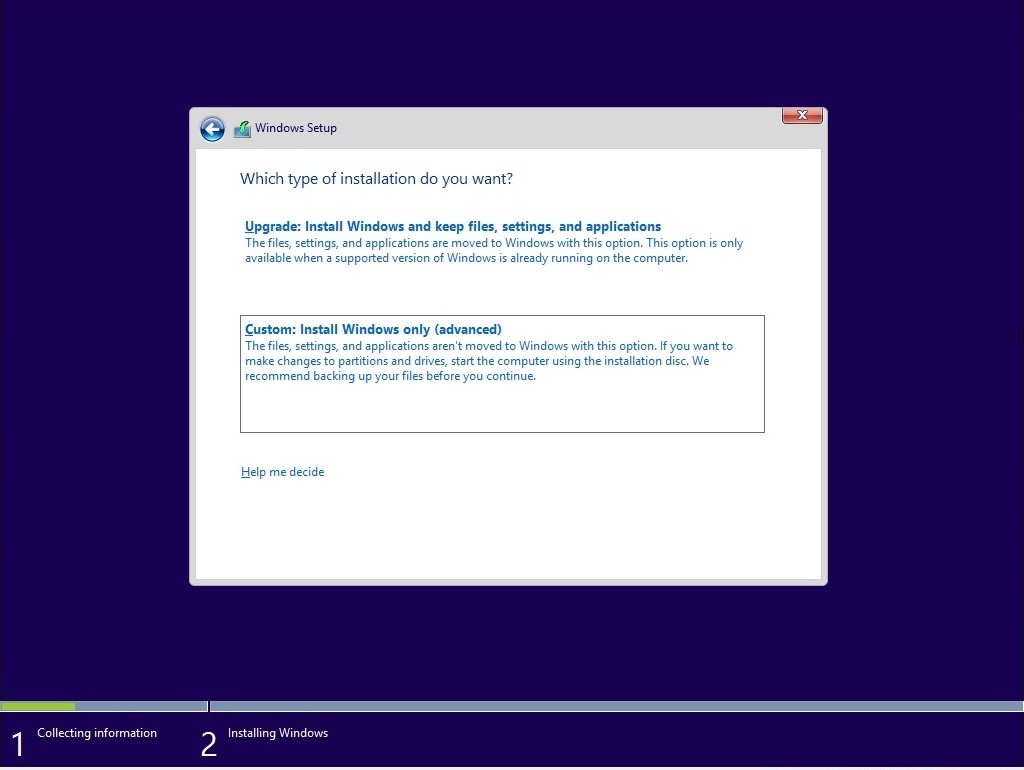
Boot using this new bootable USB to enter the Windows Installation Setup. Navigate all the steps until you reach the installation type. Here, select “Custom”

-
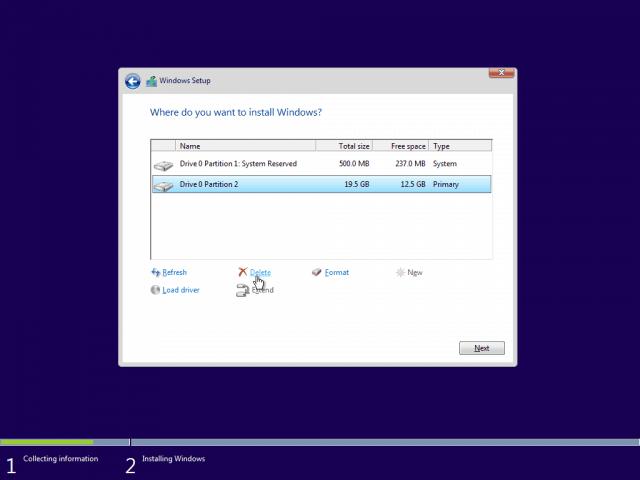
If there are any existing partitions, delete them

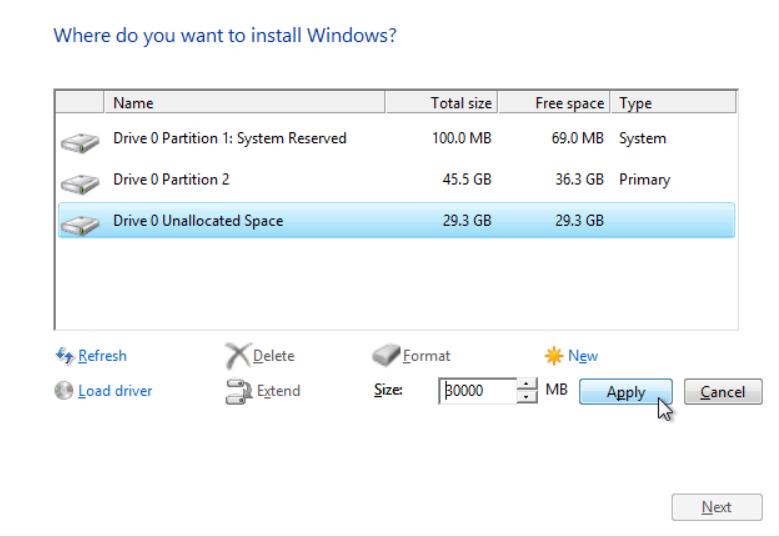
Create New partition from the unallocated space and click Apply.

Hit “Next” button and proceed with the Windows Installation.
After the Windows starts, you can follow Method #2 from above to manage your SSD partitions.
Part 5. Bonus Tip: Myths About Partitioning SSD
Partitioning SSDs has become a popular practice, but it is also loaded with myths that can lead to misunderstanding.
- One common misconception is that partitioning an SSD will improve its overall performance. In truth, partitioning does not immediately improve the speed or longevity of an SSD.
- Another common misunderstanding is that splitting may safeguard data from failure. While partitions can isolate certain data, they do not guard against hardware failures or data loss.
- According to some, partitioning can also improve the lifespan of an SSD by decreasing wear on specific partitions. SSDs, on the other hand, distribute write operations across all memory cells, reducing wear independent of partitioning.
- Another common misperception says that resizing or merging partitions is risk-free. While modern partitioning technologies are trustworthy, there is still the possibility of data loss, therefore regular backups are still essential.
Part 6. FAQs About how to Partition SSD
Q1: Does SSD Partitioning Have Disadvantages?
Yes, there are some potential drawbacks of SSD partitioning to take into account. Due to partition overhead, the total storage capacity may be reduced. Errors that happen during partitioning run the danger of causing data loss. It can be more difficult to manage files and folders while using numerous partitions. Partition resizing or modification can take some time. However, with careful planning and precaution, you can lessen these problems and still make use of SSD partitioning.
Q2: How to Partition SSD in Windows 10?
Start by pressing the Windows key + X and choosing “Disk Management.” Right-click on any unallocated space or your SSD and select “New Simple Volume.” To set the partition size, assign a drive letter, and select a file system, follow to the on-screen instructions.You can also use third party software such as PassFab 4EasyPartition to partition your SSD.
Q3: Is it Good to Partition Your External Hard Disk?
Partitioning an external hard drive allows for simpler management, system compatibility, and selective backup. However, keep in mind that the overall storage capacity can decrease, and regular data backups are necessary to prevent data loss.
Q4: How to Partition a SSD from BIOS?
It is not possible to partition an SSD from the BIOS. To create and manage partitions on your SSD, use the operating system's disk management tools, such as Disk Management in Windows or Disk Utility on macOS.
Q5:Which Partition is Best for SSD?
The optimal SSD partition is often the operating system's native file system, such as NTFS for Windows and APFS for macOS. These file systems are SSD-optimized, providing enhanced performance and durability. Additionally, ensure that partitions are properly aligned for efficient data access.
Q6: Should I Split my SSD Into Partitions?
The decision to partition your SSD depends on your requirements and preferences. Partitioning can provide various advantages, including greater organization, easier data management, and increased system performance.
Conclusion
Finally, partitioning an SSD can provide numerous benefits such as greater organization, easier data management, and higher system performance. However, potential drawbacks such as reduced overall storage capacity and greater file management complexity must be considered. Understanding the consequences and taking precautions such as regular data backups will help guarantee that the partitioning process goes smoothly.
