How often are you watching a video or playing a game on your PC and want to capture the screen for posterity? I bet too often. Luckily, the internet is awash with tools and techniques you can fall back on to record anything on your Windows. But not all of them are efficient or considered reliable to capture screen in HD.
Worry not as we have done comprehensive research and come up with the most sought-after methods to get the job done.
Read on to find out how to screen record on PC quickly and easily.
How to Screen Record on PC?
You need a third-party software to capture videos and games on your PC. Without any further ado, let us discuss a step-by-step process of how to record screen on PC Windows 10.
Best Free Screen Recorder: Record Video on PC Screen with Sound
If you want to record your screen in HD along with high-quality sound, then PassFab Screen Recorder is your ideal choice. Equipped with all the stellar features that a top-premium screen recorder offers, this simple yet powerful tool makes it exceptionally easy to record whole or a specific part of screen.
What’s more, its real-time drawing feature allows users to highlight important details.
Features of PassFab Screen Recorder
- No upper time limit
- Records both speakers and microphone voice容
- Works with all existing devices
- Record both Windows screen and webcam simultaneously
- Offers advanced picture-in-picture mode
- Provides real-time drawing
- Scheduled recording
Text Guide
-
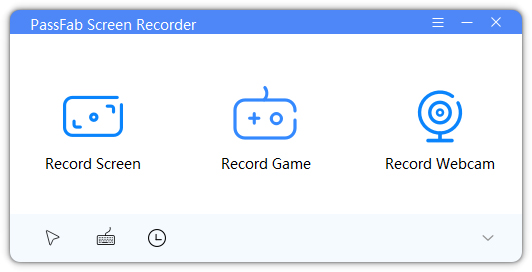
After installing, launch PassFab Screen Recorder on your computer.
-
Now, hit the Record Screen option on the Home interface.

-
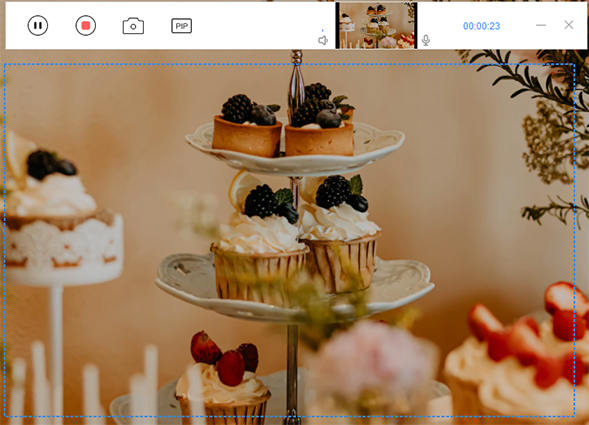
Now, choose the recording area by aligning the rectangular box.

-
Then, hit on the Start icon to start recording.

-
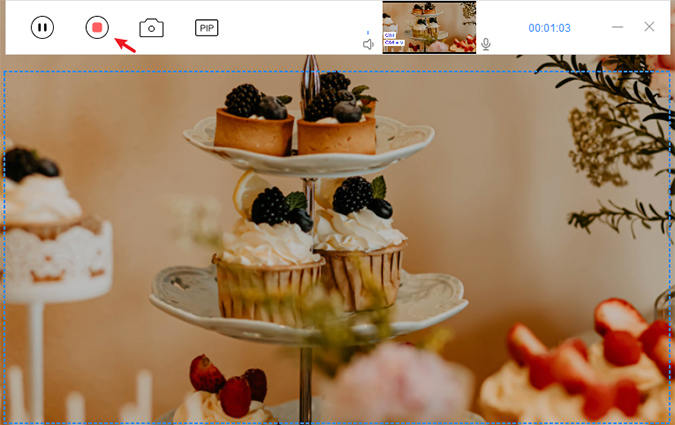
When you’ve recorded, click on the Stop icon to finish recording. The captured video will be automatically downloaded on your computer.

-
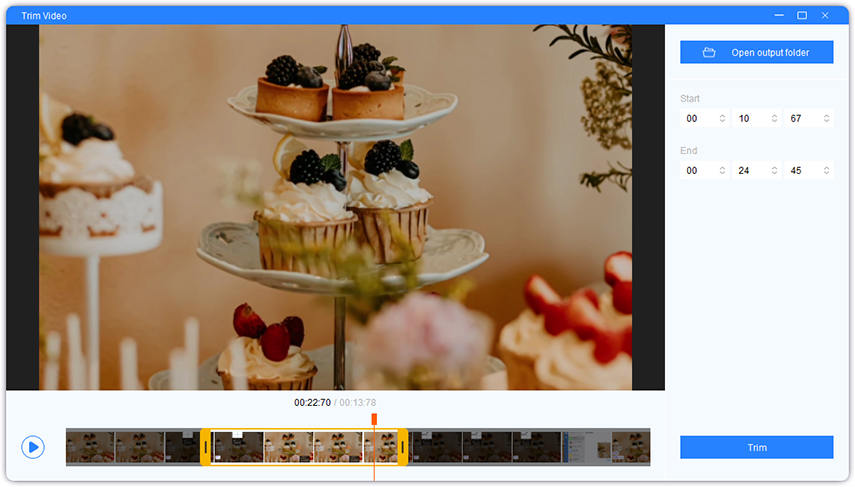
Users can also remove the unnecessary parts using the built-in Trim option.

5 Tool for Screen Record on a PC
Now that you know how to record videos on PC screen using PassFab Screen Recorder, let us deep dive into a list of 5 top software to capture everything on your PC.
Tool 1: OBS Studio
OBS is a powerful, open-source software for screen recording a PC. It comes loaded with a range of advanced features to help users set up multiple screens. However, this tool is difficult to use and doesn’t come with a built-in feature.
-
Launch OBS and select the "Display Capture" option.

-
Now, hit on Start Recording option to get going.

-
Finally, click on Stop Recording and your file will be saved in the Videos folder in Windows library.

Tool 2: Bandicam
Another top-ranked software to capture your Windows screen in high-quality. It offers three recording modes, namely: “Gaming Mode”, “Screen Recording” and “Device Recording.” What makes it featured on our list is its real-time drawing feature for users.
However, it generates low-quality output files and crashes too often. Follow the below steps to capture a particular area of the screen using Bandicam:
-
After installing Bandicam, launch it on your computer.
-
On its Home interface, navigate to Video > Settings and tick the Record Sound option. Hit OK.

-
Now, use the drop-down arrow option to select the 'Rectangle on a screen' mode and select the recording area. Hit F12 key to start recording.

-
Use the same F12 key to stop and start recording. When it’s done, save it to your computer.

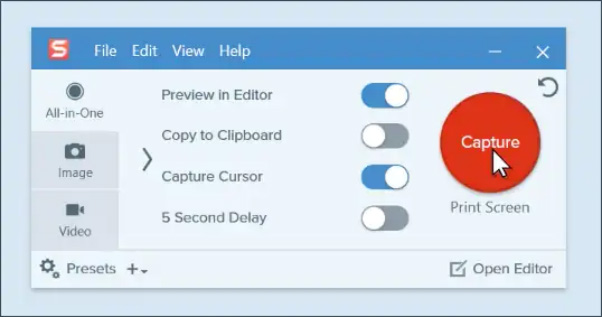
Tool 3: Snagit
Snagit is one of the most popular software for screen recording anything on a PC. Thanks to its ease of use, intuitive interface, and impeccable features, Snagit is a preferable choice for both professionals and newbies.
-
After installing Snagit, launch it on your computer.
-
Hit on the Capture option and select the recording area to get started.

-
Now, click on the record button to start recording. After recording the screen, click on the stop option and save it on your computer.
Tool 4: Free Cam
Another top-ranked screen recorder that empowers users to capture Window’s screen easily. It offers a straightforward and simple procedure to record any specific recording area as well as system sounds. What’s more, it has a built-in video editor to refine the captured video.
-
After downloading Free Cam, launch it and hit on the Red button at the lower-left tab.

-
Select the recording area.

-
The program will start recording. User can also add background music as well as highlight the important details with the mouse cursor.

-
When you’re done recording, hit on the Red button again. Here, you can edit the video as needed.

Tool 5: Windows Game Bar
This method is viable for Windows 10 users because the X-box app features Game Bar, a built-in tool to screen record your PC. Apart from screen recording, this app also allows users to record both microphone and external sound devices as well as take screenshots. You can capture screen for up to 4 hours. Here’s how to record screen on PC Windows 10 via Windows Game bar.
-
Launch Game Bar and hit Windows key + G on your keyboard.

- To start screen recording, press Windows + Alt + R and you’ll see a small recording bar at the top-right corner.
- Press Windows + Alt + R again when you want to stop recording. The program will save the output file in the default folder.
Final Words
To wrap it up, this article has walked you through some of the best tools to screen record anything on your Windows. What’s best is that most of these tools are completely free to use.
As far as our recommendation goes on how to record screen on PC, install PassFab Screen Recorder which is the most comprehensive software to capture Window’s screen in high-quality.
