The login screen and lock screen on your Windows 10 computer serve different purposes. A lock screen appears right after you turn on your Windows 10/8.1/8 computer and then comes the log in screen. The lock screen contains information like date, time, etc. Whereas the log in screen would show user accounts with user ID and password field to log in. though, it is recommended to keep the lock screen enabled, few users want to disable lock screen on Windows 10. In case you want the same, we have the right solution for you.
In this article, we are going to explain you, how to disable lock screen in Windows 10 computer.
Part 1. How Disable Lock Screen on Windows 10
When you remove the lock screen, your computer becomes vulnerable to third-party security threats. Anyone can easily access your computer and play with your data when you are not around your device. They can then get your personal data, emails, social media and pose a threat to you. For applying Windows 10 disable lock screen you have the following options at hand.
Disable Lock Screen on Windows 10 via Local Group Policy Editor
The login screen shows up even when your Windows PC wakes up from sleep mode. You need to turn off the lock screen, in case it's not possible to disable the login screen.
Step 1: Launch "Run" on your Windows and key in "gpedit.msc" followed by "Enter" key. You will land up at "Windows Group Policy Editor".
Step 2: Get into your "Computer Configuration" > "Administrative Templates" > then "Control Panel" > hit "Personalization".
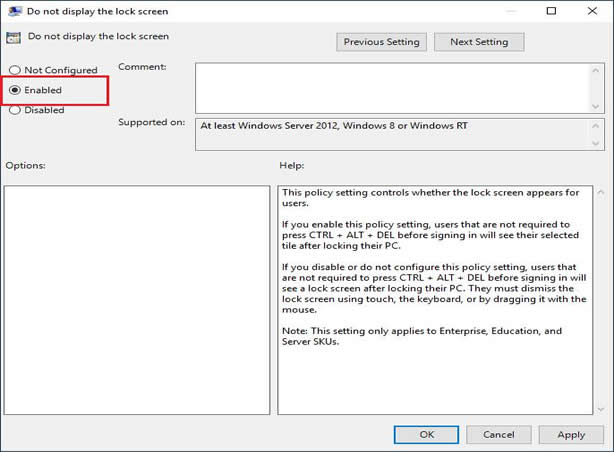
Step 3: Double tap the "Do not display the lock screen". Select "Enabled" followed by "OK" and restart your Windows PC.
Disable Password Option
This is an alternative for understanding how to disable lock screen on Windows 10. If your Windows 10 PC is connected to your Microsoft account and you don't desire to use a local account, you can keep your Microsoft account connected, even if you disable the login screen.
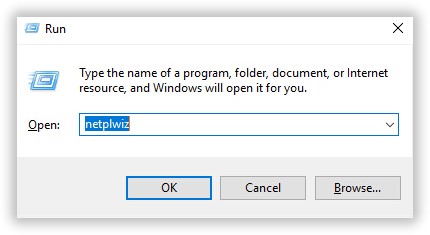
Step 1: Launch "Run" by tapping "Windows" + "R" keys together on the keyboard. Key in "netplwiz" followed by "OK" button and "Enter" afterwards.
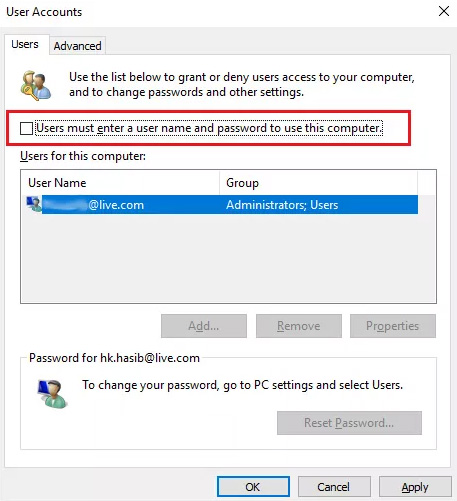
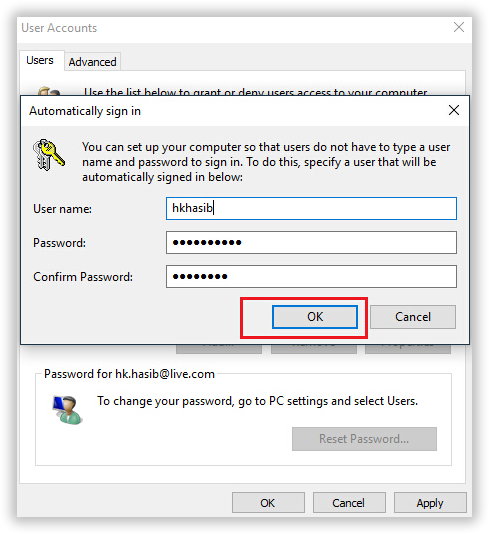
Step 2: Now that the user account window is open, uncheck the "Users must enter a user name and password to use this computer". Click "OK" and navigate to a new window.
Step 3: Enter appropriate login credentials and tap "OK". Restart your Windows 10 PC and forget about facing the login screen again, as well as the lock screen will be vanished.
Disable Lock Screen Using Local Account without Password
Though, this process is pretty lengthy some Windows 10 users might like to follow it. Let's get through the detailed process.
Step 1: To migrate to a local account from your Microsoft account on Windows 10, you need to know that afterwards, it'll not be possible to set a password for your local account and you must use a single user account.
Step 2: Hit the "Windows" + "I" keys simultaneously to open the settings window.
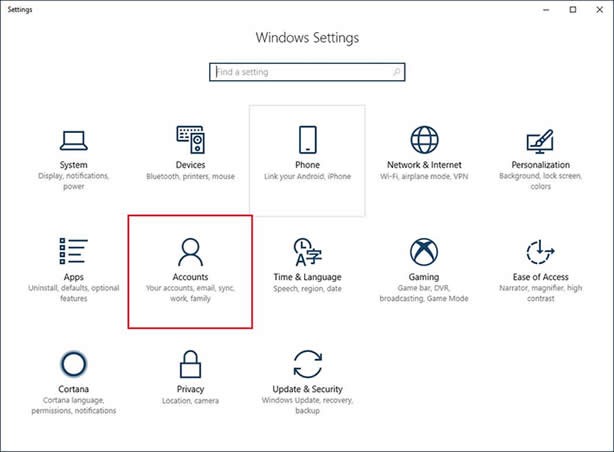
Step 3: Visit "Settings" and then from the start menu click "Accounts". Tap on the "Sign in with a local account instead". Verify with your MS office password.
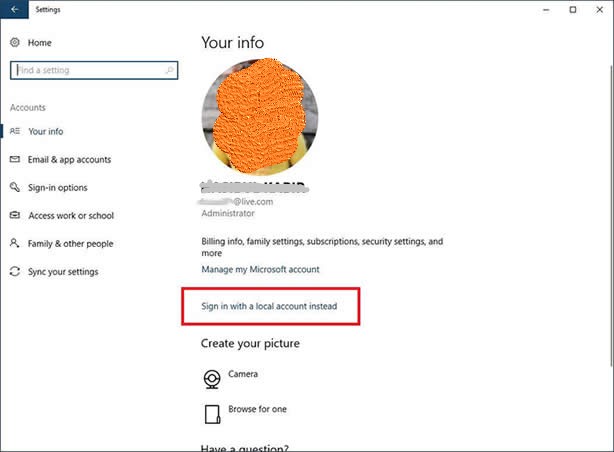
Step 4: Enter the local user account details, i.e. only the user name. You will be signed out from your MS account to create a local administrator account. There won't be any login screen afterwards.
Part 2. What Should Do If Forgot Windows 10 Password
The above methods were helpful, but some of them need you to enter administrator account for disabling lock screen on Windows 10. What if you have forgotten the password and are clueless to go ahead? You will need a third-party tool like PassFab 4WinKey for resetting the password. Apart from that PassFab 4WinKey can reset, remove, create or change Windows passwords for a local or domain computer. With a remarkable pace it can recover the password for your Windows 10 PC.
Here is how to create a reset disk to help Windows 10 disabling lock screen
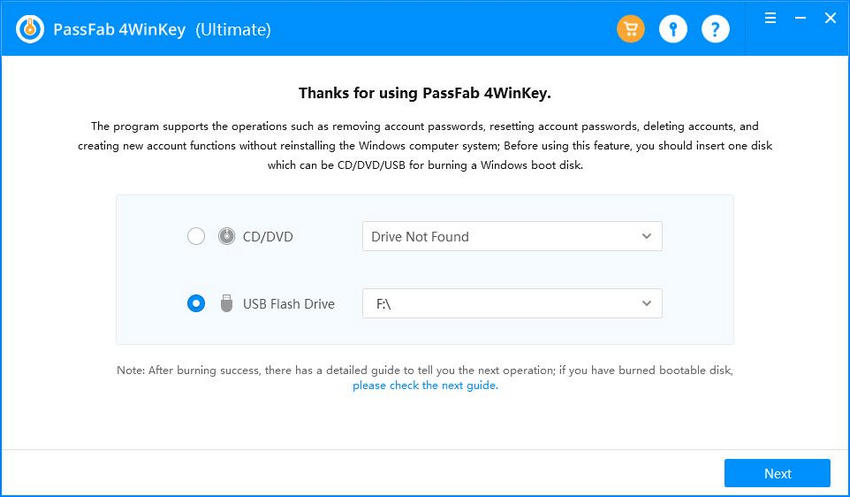
Download, install and launch PassFab 4WinKey in your computer. Connect your clean USB flash drive with the computer and hit the "Burn" button. Press the "OK" button and eject the USB after burning it.
Reconnect the USB flash drive to the locked PC and reboot it. Click the "F12" ("Boot Menu") key followed by selecting the USB drive and hitting "Enter".
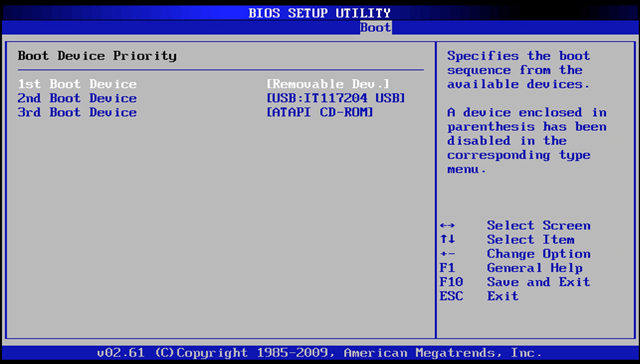
PassFab 4WinKey will launch on your screen. You now need to select the preferred operating system from which you wish to disable lock screen on Windows 10.
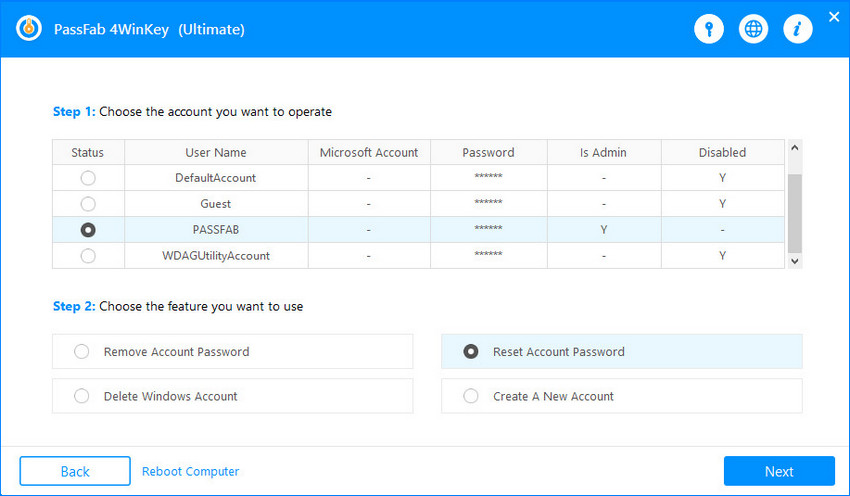
Now, you need to tap on the preferred User account and then select the checkbox next to "Remove the password" and hit "Next".
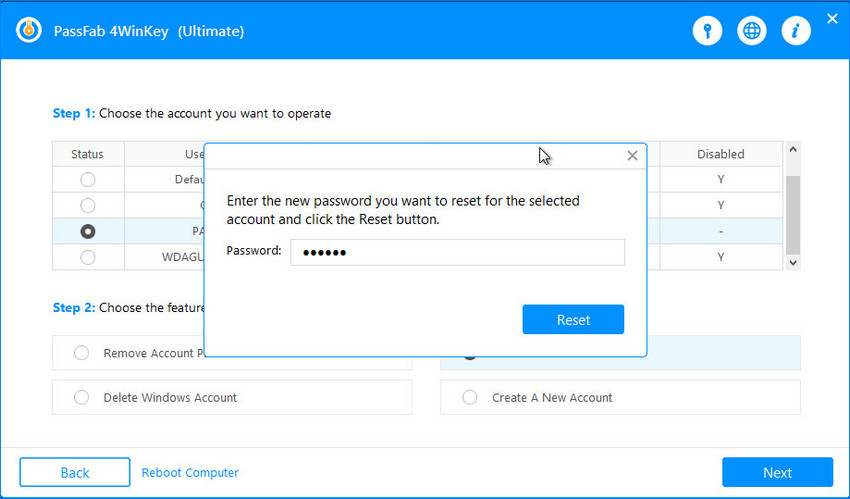
That's about it. Reboot your computer and you're done.
Conclusion
From the above article, it is prominent that when it comes to resetting password for a locked or password forgotten Windows 10 computer, PassFab 4WinKey steals the show. Though, removing the lock screen on Windows 10 is a big task, without PassFab 4WinKey, you might not be able to accomplish it singlehandedly.