Nowadays, there is no control on which softwares you can update on your Windows 10. This is because these updates are made mandatory by the company, and they install automatically to guarantee that your machine remains up to date with the newest improvements and security patches. Although this method is well-situated for most of the consumers, it is not what everybody wishes for. Most of them are looking for how to stop auto update in Windows 10. If you are using Windows 10 Pro or later, it is likely to take control of such updates and stop Windows 10 updates from installing and downloading automatically employing the Registry or the Local Group Policy Editor.
In this Windows 10 guide, we will have a look on how to stop Windows 10 update automatically installing on your PC. But first, we need to know how the installation happens.
- Method 1. How To Stop Windows Update Via the Local Group Policy Editor
- Method 2. How To Disable Windows 10 Update Using the Registry
Method 1. How To Stop Windows Update Via the Local Group Policy Editor
If you are using Windows 10 (Enterprise, Professional, or Education), you can employ the Local Group Policy Editor to modify the settings so as to disable Windows 10 updates from automatically installing and downloading.
- Step 1: With the keyboard shortcut Windows key + R, start the Run command. Now enter "gpedit.msc" and tap OK to enter the Local Group Policy Editor.
- Step 2: Go to the below mentioned path: Computer Configuration\Administrative Templates\Windows Components\Windows Update
- Step 3: Below "Options," you see a number of options to configure automatic updates. These may include Auto download and notify for install, Notify for download and notify for install, Auto download and schedule the install, and Allow local admin to choose setting.
Select the option of your choice. If you chose "Allow local admin to choose setting" option, you can decide when to install new updates and end the "Windows 10 stop automatic updates" issue. - Step 4: Tap on "Apply." Next, select OK to end the process.
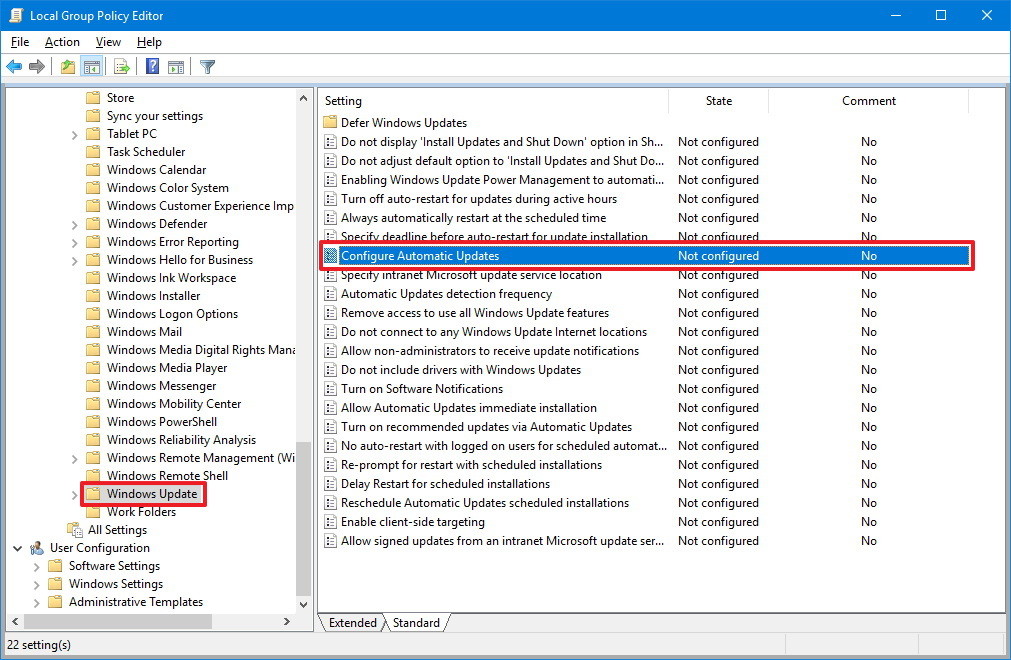
Double-tap the Configure Automatic Updates policy present on the right side. Now switch on the "Enabled" option to enable the policy on the left side.
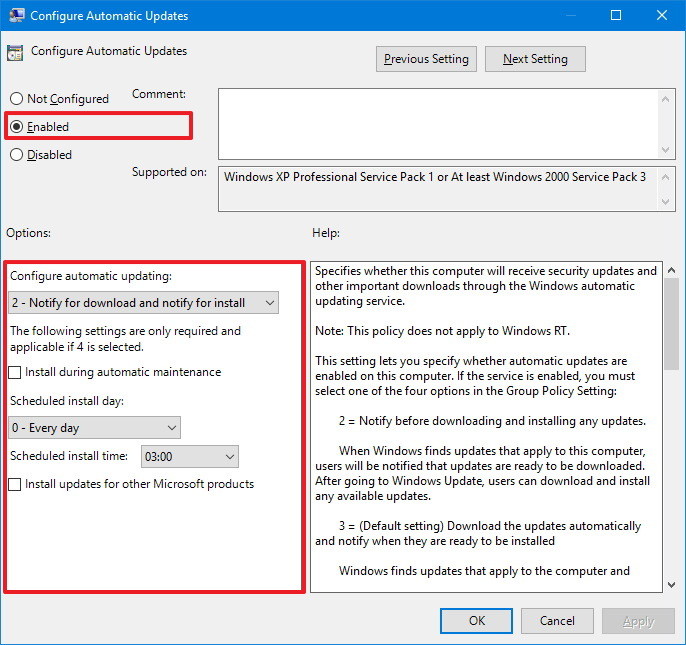

While you can choose from a verity of available options, your best option to select is "Notify for download and notify for install." This will not only stop Windows 10 update from automatically downloading, but you will receive a notification when any fresh updates are present for downloading. When new updates are launched, you will get a message in Action Center, but updates will not install or download until you give the permission and carry out the following steps:
All you need to do is go to Settings >> Update & security >> Windows Update >> Click the Download button. Next, tap on Restart to end the process. Users have found this method optimal for solving the Windows 10 stop updates issue.
Method 2. How To Disable Windows 10 Update Using the Registry
As an alternative to using the Local Group Policy Editor to stop Windows update, you can also modify the Windows 10 updates employing the Registry.
Important warning: Altering the registry is a great risk to take and it can lead to permanent damage to your PC if you do not conduct it properly. It is suggested that you take a complete backup of your data prior to beginning with the process.
- Step 1: Employ the keyboard shortcut Windows key + R to open the Run command. Enter "regedit," and tap OK to go to the Registry.
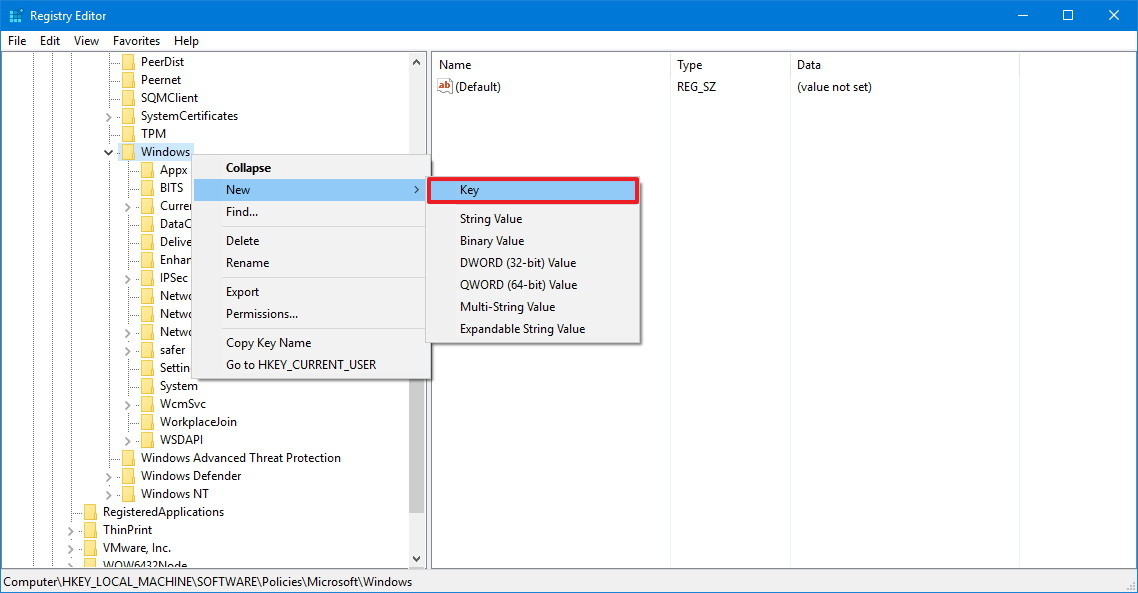
- Step 2: Go to the following path: HKEY_LOCAL_MACHINE\SOFTWARE\Policies\Microsoft\Windows
- Step 3: Select New by right-clicking the Windows folder. Next, tap on the Key. Name this key as "WindowsUpdate" and press Enter.
- Step 4: Whenever you wish to enable the Windows Defender again, simply follow above same steps except change the value on to 0 from 1. Now again restart your system to revert the required changes.
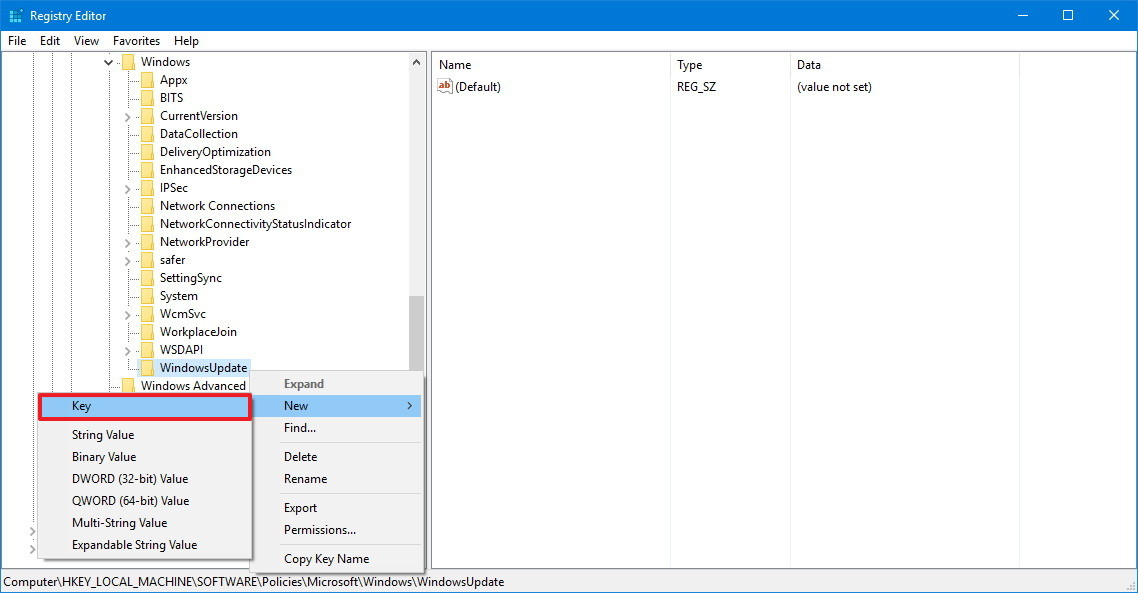
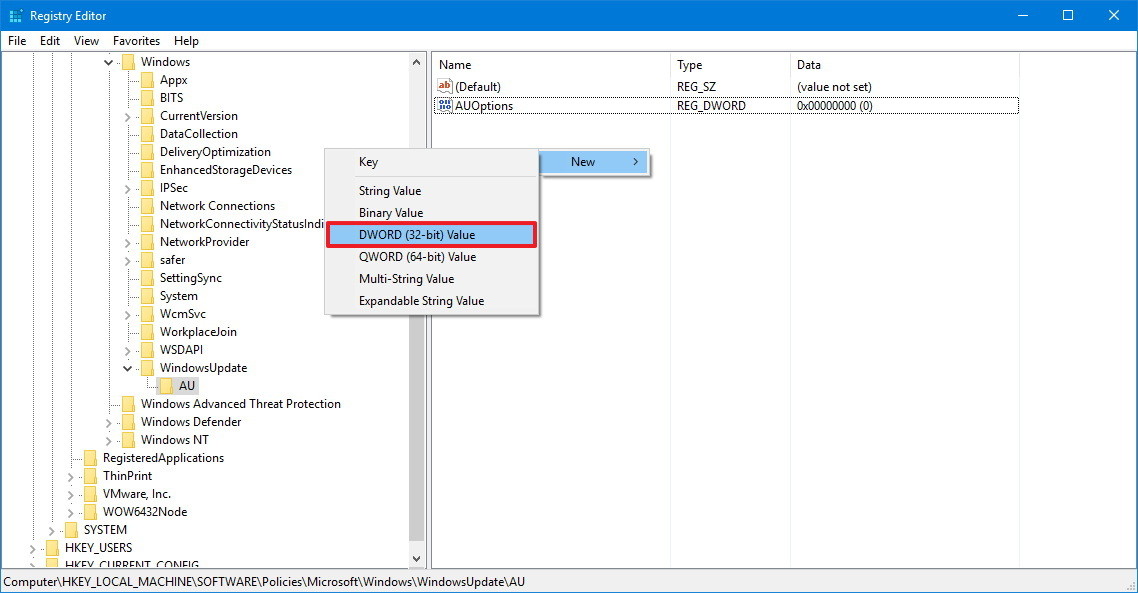
Select New by right-clicking the newly created key and click on the Key. Name this key as key "AU" and press Enter.
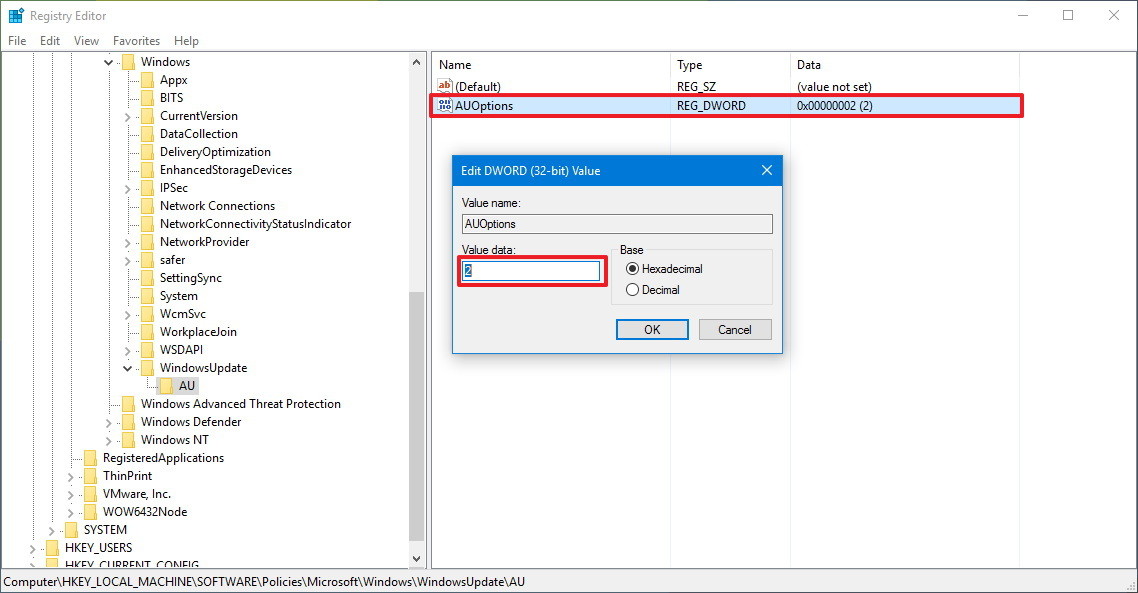
Within the newly made key, select New by right-clicking on the right side and select DWORD (32-bit) Value. Name this key "AUOptions" and press Enter.
- 5: Allow local admin to choose settings
- 4: Auto download and schedule the install
- 3: Auto download and notify for install
- 2: Notify for download and notify for install
Now tap on OK and close the Registry to conclude the process. This will end the "Windows 10 stop automatic download of updates" issue once and for all. Using option 2 will disable windows 10 update from automatically downloading, and you will get a message when fresh updates are present.
After altering the Registry, when new updates are present for your device, you will get a notification in Action Center. However these updates will not install or download until you permit and carry out following steps. Just go to Settings >> Update & security >> Windows Update >> Download. Tap on Restart to conclude the procedure. In this way, you will know how to stop automatic updates in Windows 10.
Bonus Tips: What If You Forgot Windows 10/11 Login Password?
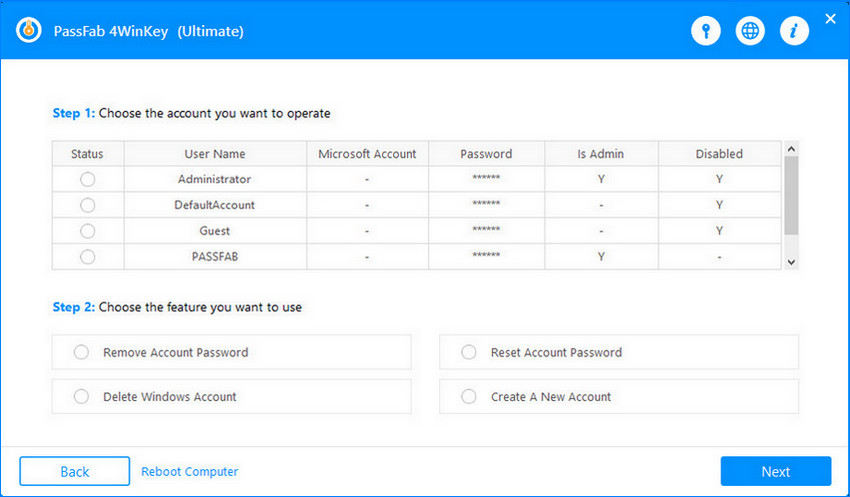
If you forgot the login password for your Windows 10/11 and cannot access the system anymore, you can try PassFab 4WinKey to reset the password with high efficiency.
Summary
In a nut shell, you just had a look at the best 2 ways on how to stop Windows 10 updates. Using these methods is reliable and will offer solution for Windows 10 update disable. Hence, if you need to stop automatic updates for Windows 10, you can always rely on them. In addition, we also introduced PassFab 4WinKey in case you encounter Windows password recovery issues. Do let us know your thought by commenting below.