A Windows 7 bootable USB drive can easily help you boot into Windows when something goes wrong with your PC, and conveniently install Windows instead of using the Windows installation CD. In this article, we will show you the detailed steps with pictures on how to create a Windows 7 bootable usb using Windows 7 USB/DVD download tool or CMD.
Before we start, you’ll need the Windows installation files or Windows 7 ISO file (combined all the Windows installation files into a single uncompressed file) and a USB flash drive about 4 GB to create Windows 7 USB disk.
- Way 1: Create Bootable USB Windows 7 from ISO File
- Way 2: Make Boot USB Windows 7 Using CMD
- Way 3. Create Windows 7 Bootable USB drive without CMD
Way 1: Create Bootable USB Windows 7 from ISO File
Microsoft has provided its own official tool for creating Windows 7 bootable usb called Windows USB / DVD Tool. With this tool, you can easily create a copy of your Windows 7 ISO file on a USB flash drive or a DVD.
- Step 1. Click to open the Windows USB/DVD Download Tool page. Click Download then Run and Follow the steps in the setup dialogs to install the Windows USB/DVD Download Tool.
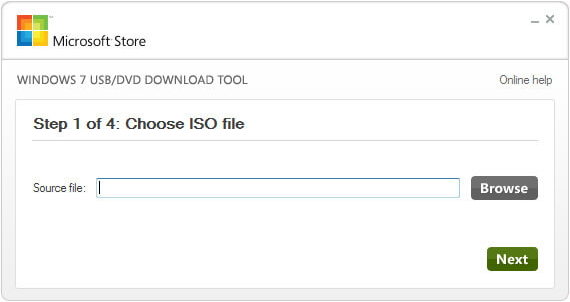
- Step 2. After installed, run this tool and click Browse to import your Windows 7 ISO file.

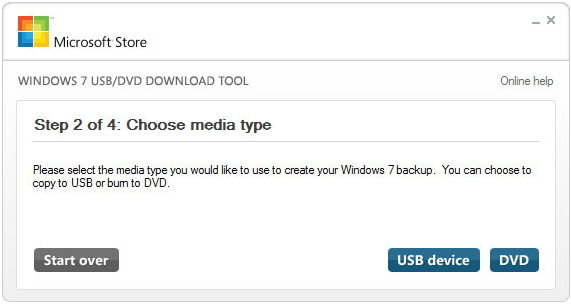
- Step 3. Click USB Device to select it as the media type you would like to use to create Windows 7 bootable USB drive.

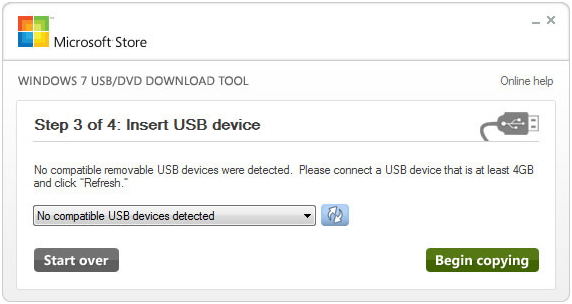
- Step 4. Now select your USB drive and click Begin copying to make Windows 7 bootable USB from ISO file.

Way 2: Make Boot USB Windows 7 Using CMD
Another way to create Windows 7 USB bootdisk without software is using DISKPART command. In this way, you can copy the Windows installation files to the USB drive.
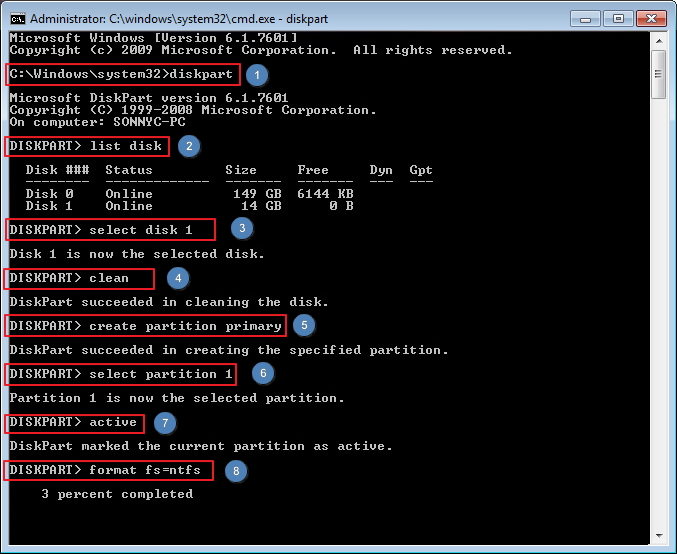
- Insert a USB flash drive into a running computer and open a Command Prompt window as an administrator. Type diskpart in cmd window and press enter.
- Type list disk, and then click ENTER. The list disk command display the list of Disk connected to your computer like Hard disk and USB disk.
- Type select disk <X> , where X is the drive number or drive letter of the USB flash drive, and then click ENTER.
- Type clean, and the click ENTER. This command deletes all data from the USB flash drive.
- To create a new primary partition on the USB flash drive, type create partition primary, and then click ENTER.
- Type select partition 1, and then click ENTER to select the specified partition.
- Type active, and then click ENTER.
- Type format fs=ntfs quick, and then click ENTER to format the selected disk and specifies the NTFS file system.
- Type assign to assign a letter to your USB drive. Now you can manually copy Windows installation files to the USB drive or extract ISO files using WinRAR and copy all files to USB.

Way 3. Windows 7 Make Bootable USB without CMD
If you unfortunately want to create a Windows 7 Bootable USB flash drive and use it to reinstall Windows 7, PassFab for ISO can do it easily. It is a shareware that is created to burn ISO to USB flash drive, CD or DVD-ROM on Windows 10/8.1/8/7 system.
Let's look at the steps as below:
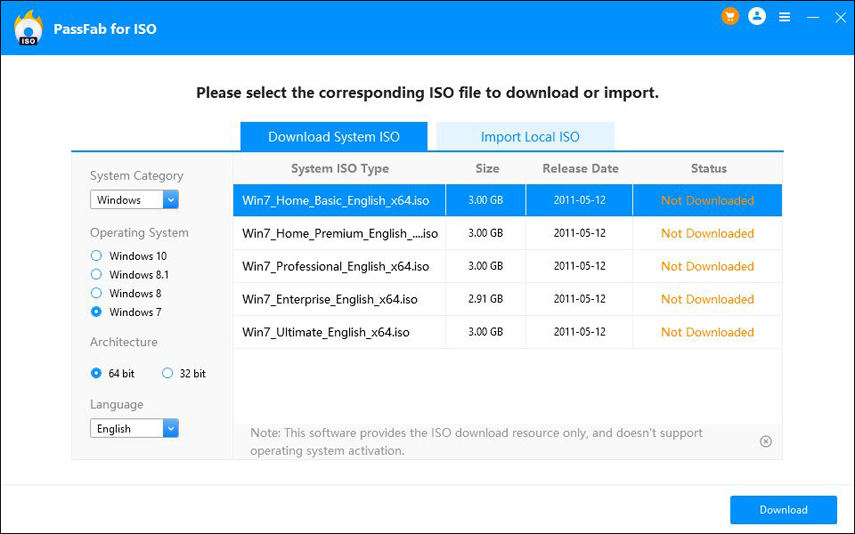
Step 1. Download, install and launch PassFab for ISO to your computer. Then you will see 2 options, one is to dowload system ISO, the other is to import local ISO. Choose one.
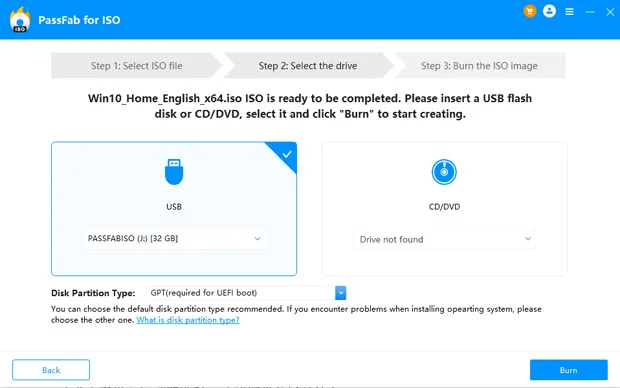
Step 2. After that, you need to choose CD/DVD/USB, in this topic, we need to choose USB flash drive and click "Burn" button.
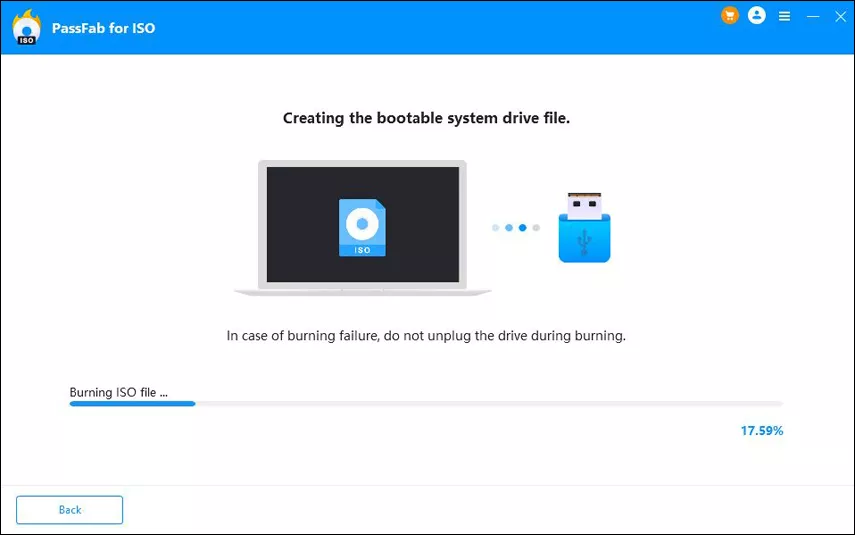
Step 3. Just wait for a while until the burning process is finished.
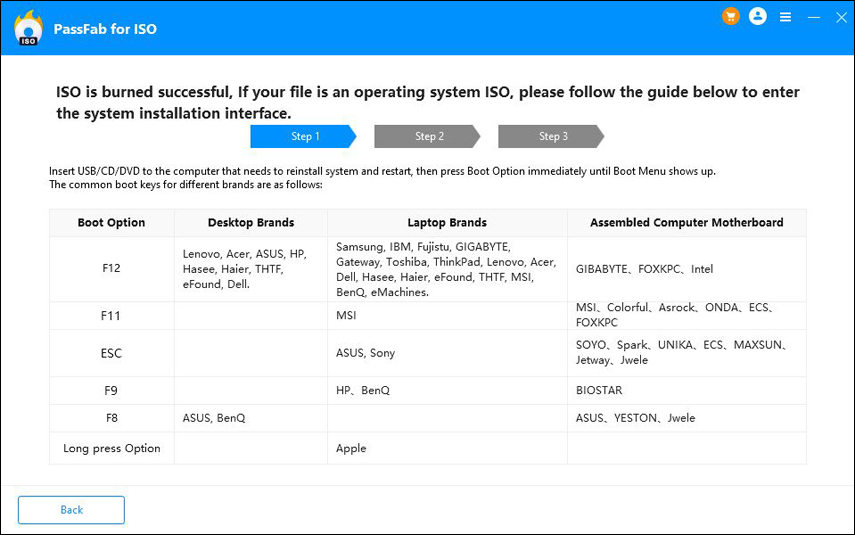
Step 4. You will get a on-screen prompt that your Windows 7 ISO is burned successfully.
Summary
Through this article, I believe you already know how to make bootable USB Windows drive easily. Furthermore, once you locked out of your Windows you can also use PassFab for ISO to reinstall your Windows system. If you benefit from this article, don't forget to share it with your friends.
