As a computer user, sometimes you might encounter BIOS/UEFI or while installing Windows you may be asked to change your BIOS/UEFI settings. Have you ever wondered that what is BIOS? BIOS stands for Basic Input Output System. It is a small programmable chip installed on the motherboard that instructs system on how to perform basic functions like booting and keyboard control. Most commonly, BIOS settings are used to boot Windows from USB flash drive.
For different systems, there are different methods to access BIOS settings. A typical method for accessing BIOS is pressing ESC, F1, F2, F8 or F10 during the boot sequence. Accessing key for BIOS for different laptops are given below along with their manufacturers. Go find your model and get into your BIOS settings.
| Manufacturer | Type | Models | Boot Menu Key |
| Acer | NetBook | Aspire One ZG5, ZG8,Timepne, v3,v5,v5 | F2 |
| Asus | Desktop | F9 | |
| Asus | Laptop | VivoBook f200ca, f202e, q200e, s200e, s400ca, s500ca, u38n, v500ca, v550ca, v551, x200ca, x202e, x550ca, z202e | Delete |
| Asus | NoteBook | k25f, k35e, k34u, k35u, k43u, k46cb, k52f, k53e, k55a, k60ij, k70ab, k72f, k73e, k73s, k84l, k93sm, k93sv, k95vb, k501, k601, R503C, x32a, x35u, x54c, x61g, x64c, x64v, x75a, x83v, x83vb, x90, x93sv, x95gl, x101ch, x102ba, x200ca, x202e, x301a, x401a, x401u, x501a, x502c, x750ja | F8 |
| Asus | Laptop | N550JV, N750JV, N550LF, Rog g750jh, Rog g750jw, Rog g750jx,Zenbook Infinity ux301, Infinity ux301la, Prime ux31a, Prime ux32vd, R509C, Taichi 21, Touch u500vz, Transformer Book TX300 | F2 |
| Asus | NoteBook | k25f, k35e, k34u, k35u, k43u, k46cb, k52f, k53e, k55a, k60ij, k70ab, k72f, k73e, k73s, k84l, k93sm, k93sv, k95vb, k501, k601, R503C, x32a, x35u, x54c, x61g, x64c, x64v, x75a, x83v, x83vb, x90, x93sv, x95gl, x101ch, x102ba, x200ca, x202e, x301a, x401a, x401u, x501a, x502c, x750ja | F8 |
| Dell | Laptop, Desktop | All Models | F2 |
| HP | Desktop | Pavipon Media Center a1477c,Pavipon g6 and g7, Pavipon HPE PC, h8-1287c, Pavipon PC, p6 2317c, Pavipon PC, p7 1297cb, TouchSmart 520 PC | ESC |
| HP | Desktop | Pavipon 23 All In One, Pavipon Epte e9000, e9120y, e9150t, e9220y, e9280 | F10 |
| HP | Laptop | 2000 | ESC |
| HP | NoteBook | Pavipon g4,Probook 4520s, 4525s, 4540s, 4545s, 5220m, 5310m, 5330m, 5660b, 5670b | F10 |
| HP | Notebook | ENVY x2, m4, m4-1015dx, m4-1115dx, sleekbookm6, m6-1105dx, m6-1205dx, m6-k015dx, m6-k025dx, touchsmart m7, Envy, dv6 and dv7 PC, dv9700, Spectre 14, Spectre 13, 2000 - 2a20nr, 2a53ca, 2b16nr, 2b89wm, 2c29wm, 2d29wm | Esc |
| Lenovo | Desktop | Inspiron One 2025, 2305, 2320, 2330 All-In-One | F2 |
| Lenovo | Laptop | ThinkPad edge, e431, e531, e545, hepx, l440, l540, s431, t440s, t540p, twist, w510, w520, w530, w540, x140, x220, x230, x240, X1 carbon | F1 |
| Lenovo | Laptop | IdeaPad s300, u110, u310 Touch, u410, u510, y500, y510, yoga 11, yoga 13, z500 | NovoButton |
| Lenovo | Netbook | IdeaPad S10-3, g460, g470, g475, g480, g485 | F2 |
| Samsung | Laptop | Ativ Book 2, 8, 9 | F10 |
| Samsung | Netbook and Ultrabook | NC10, np300e5c, np300e5e, np350v5c, np355v5c, np365e5c, np550p5c, Series 5 Ultra, Series 7 Chronos, Series 9 Ultrabook | F2 |
| Toshiba | Laptop | Kira, Kirabook 13, Ultrabook ,Qosmio g30, g35, g40, g50 , Qosmio x70, x75, x500, x505, x870, x875, x880 | F2 |
| Compaq | PRESARIO | F10 | |
| eMachines | Tab, DEL |
Now as you have learned all about getting into BIOS of the computer, now let's know about how to set BIOS to boot from USB. As you enter into Windows boot menu from BIOS, you will see multiple options like CD/DVD, Floppy Disk, Hard Drive, USB. Now we will show you to select USB to Boot Windows From USB.
- Part 1. How to Set Acer Laptop to Boot from USB
- Part 2. How to Set ASUS Laptop to Boot from USB
- Part 3. How to Set Dell Laptop to Boot from USB
- Part 4. How to Set HP Laptop to Boot from USB
- Part 5. How to Set Lenovo Laptop to Boot from USB
- Part 6. How to Set Samsung Laptop to Boot from USB
- Part 7. How to Set Sony Laptop to Boot from USB
- Part 8. How to Set Toshiba Laptop to Boot from USB
- Part 9. How to Set Microsoft Surface to Boot from USB
- Part 10. How to Unlock Computer Lock Screen Password After Booting from USB
Part 1. How to Set Acer Laptop to Boot from USB
If you have got a Acer laptop and want to boot it from USB, that's simple. Just follow the procedure below and you won't be having trouble.
1. First of all your USB should be bootable.
2. Insert your bootable USB to your Acer laptop.
3. Turn ON your laptop if it's OFF, otherwise restart your system as you need to get into BIOS.
4. As ACER logo appears, press F2 to enter BIOS setting.

5. Now use arrow keys to enter Boot tab.
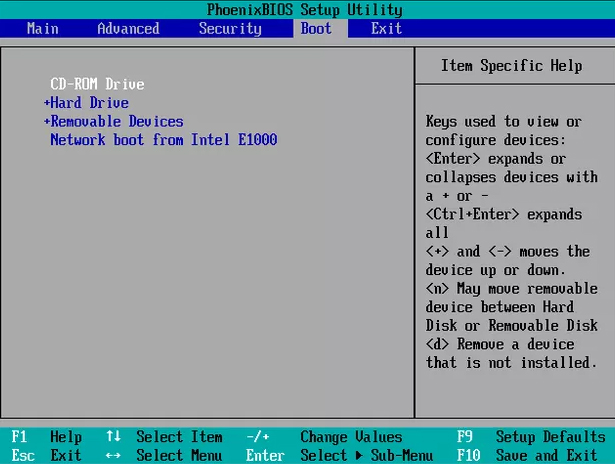
To boot from USB, follow the instructions:
1. Move the hard drive device to the top of the boot sequence first.
2. Expand the hard drive device to display all hard drives.
3. Move the USB device to the top of the list of hard drives.
4. Now save the changes and exit. Let computer restart and it will Boot from USB now.
Part 2. How to Set ASUS Laptop to Boot from USB
For ASUS users, the process is simple to boot your system from USB. But one thing you should keep in mind that USB should be made bootable correctly. If you got bootable USB, follow the procedure.
1. Plug-in your USB in your system.
2. Switch on your system if it's OFF, otherwise restart to get into BIOS setting. As ASUS logo appears, press DEL to enter into BIOS setting.

3. Use arrow keys to switch to the Boot tab.

4. Go to "Boot Option #1" and press enter. A small window will appear with different drives name.
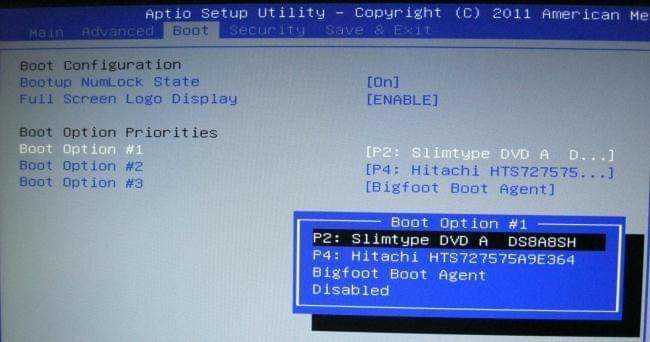
5. Select your USB and press enter.
6. Now save changes and let system restart from USB.

Part 3. How to Set Dell Laptop to Boot from USB
So you might want to change the boot order of that DELL machine from default to USB. Don't worry it's not too much difficulty. Just grab your bootable USB and let's get started.
1. Connect USB to your DELL computer and turn it on.
2. As the Dell logo along with F2=BIOS appears on top right corner, press F2.

3. With the help of arrow keys, switch to Boot tab.

4. Now change the boot order. Move the "Removable Devices" to the top of the boot sequence. Expand it to display all hard drives. Select your USB device to the fist boot option.
5. Now save the changes and restart the computer. It should boot from USB. If not, try again.

Part 4. How to Set HP Laptop to Boot from USB
Most people prefer using HP machines for their daily use. In order to boot HP machine from USB, grab a bootable USB and plug it in your HP machine.
1. Start or restart your machine.
2. As you see HP logo, press Esc or F10 depending upon your machine model. (You can check BIOS key from above table)

3. Get into Boot tab with the help of arrow keys and select Boot Priority option.
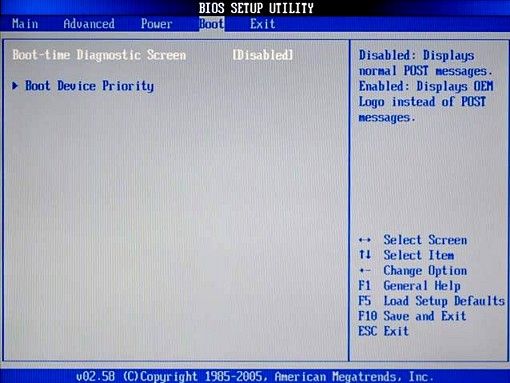
4. Now select 1st boot device option. A new pop-up will appear. Select your USB from that window and press enter.
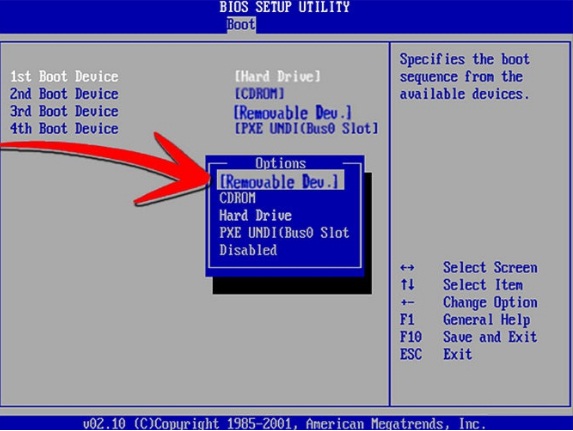
5. Save changes and let your system restart and boot from USB.

Part 5. How to Set Lenovo Laptop to Boot from USB
Setting USB as booting device in Lenovo machine is too much easy. Follow the procedure but first do get your bootable USB device.
1. Plug USB into your Lenovo machine and let it restart.
2. As Lenovo logo screen appears, press Dell, F11, F12, depending on your device model.
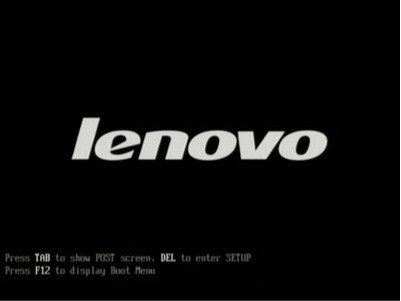
3. This will bring you inside BIOS setup. Now use arrow keys to get into Boot tab.

4. You have to change the Boot order and bring USB to the first position. In order to do so, follow the process:
- Move the hard drive device to the top of the boot sequence list.
- Expand the hard drive device to display all hard drives.
5. Now save the changes and restart the computer. It should boot from USB. If not, try again.

Part 6. How to Set Samsung Laptop to Boot from USB
Just like other machines, changing BIOS setting for USB in Samsung machines are easy as well. Bring your bootable USB along with your Samsung machine and get started.
1. Plug USB into Samsung machine.
2. Turn your machine ON. As Samsung logo appears, press F2 or F10 to get into BIOS depending upon your model.
3. After you get into BIOS setting, use arrow keys to navigate to Boot tab and select Boot Priority.
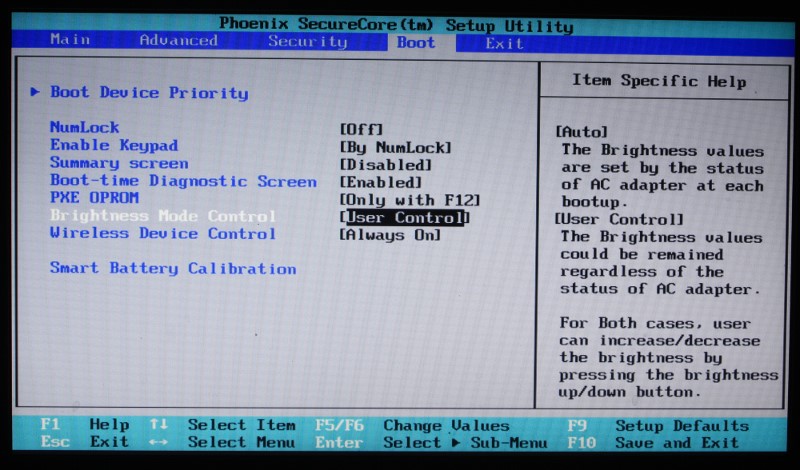
Bring your USB to first place by:
- Move the hard drive device to the top of the boot sequence list.
- Expand the hard drive device to display all hard drives.
- Move the USB device to the top of the list of hard drives.
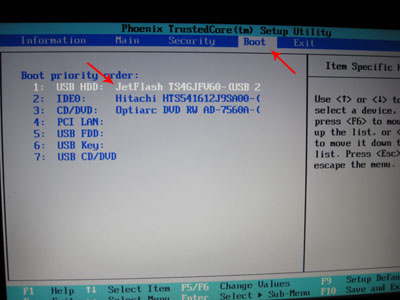
4. Now restart your Samsung machine but before that do save the BIOS changes. In this session, you will reboot from USB.

Part 7. How to Set Sony Laptop to Boot from USB
In order to change the boot sequence for your Sony machine, you will be needing two things: the first one would be Sony computer and the second one would be USB drive.
1. Plug USB into your Sony machine and restart it.
2. As Sony logo appears, press F1 or F2 or F3 depending upon your machine's model.
3. This will bring you inside boot menu directly.
4. Now find your USB name and select by pressing enter.
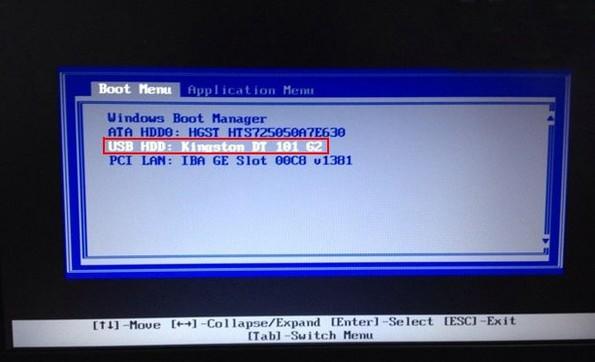
Your system will restart and will be booted from USB.
Part 8. How to Set Toshiba Laptop to Boot from USB
As you know from the above table that which key to press to get into Boot option. So let's get started without wasting time.
1. Plug in USB and restart you Toshiba machine.
2. As Toshiba logo appears, press F12 to enter the boot menu. If it does not work once, try pressing twice thrice.

3. Once you get into Boot menu, you will see multiple options. Select your USB and get it going.
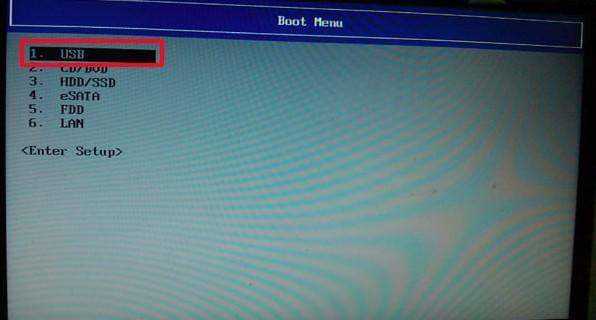
Your system should restart and boot from USB after this action.
Part 9. How to Set Microsoft Surface to Boot from USB
Setting BIOS setting for USB in Microsoft Surface is little tricky but not too much difficulty. You need both of your hand free and little consciousness. If you are ready, just get started.
1. Do shut down your Surface first.
2. Now plug bootable USB into your Surface.
3. Press and hold Volume Down button.
4. Now press and release Power button with other hands while holding Volume Down button.
5. Keep holding Volume Down button until the Surface logo appears. This process will directly boot from USB.
6. Now you can easily set Boot priority to boot Windows form USB for any of your machines. You can also help your friends in setting boot priority rather than getting your machine to IT specialist.
Part 10. How to Unlock Computer Lock Screen Password After Booting from USB
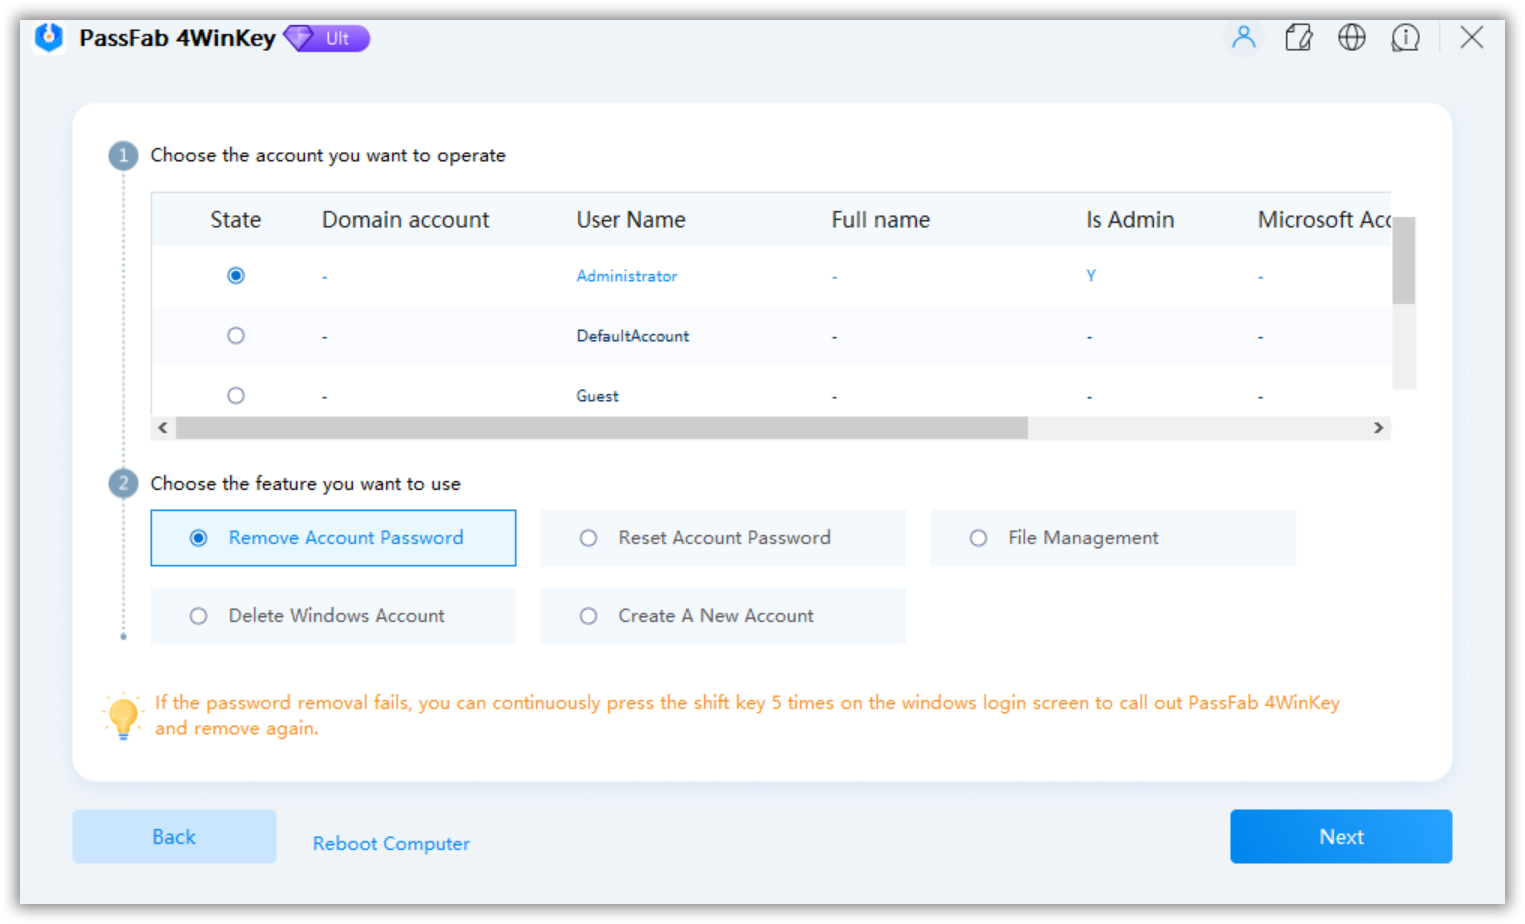
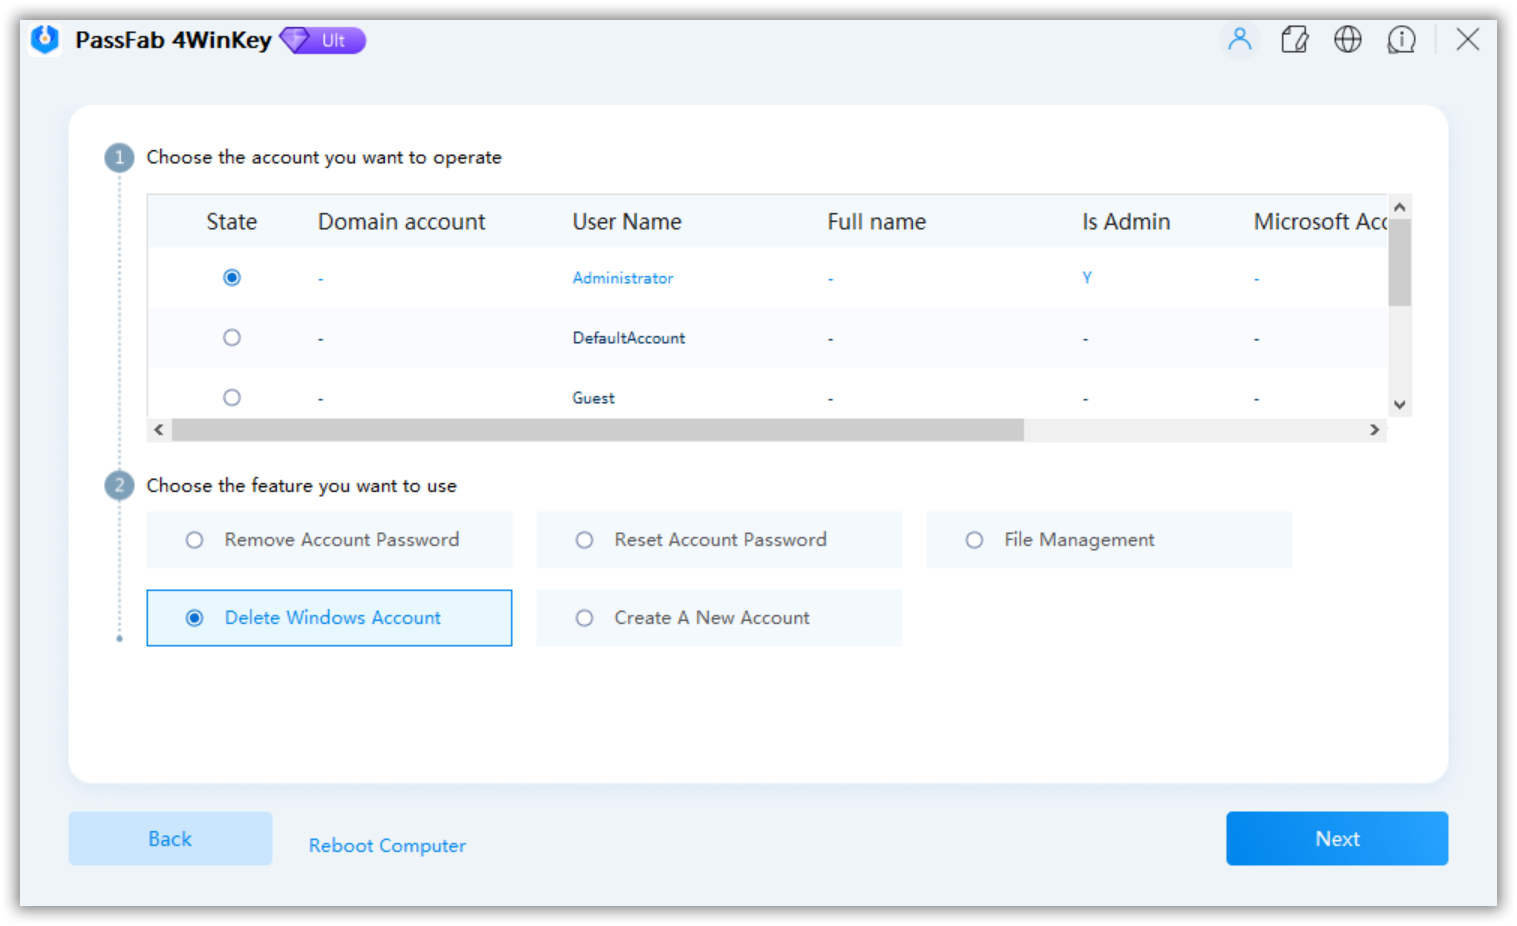
Once you successfully enter the locked computer from the boot disk, you will see PassFab 4WinKey main interface. Select your Windows system first, then click on "Next". Now, you will see four features.
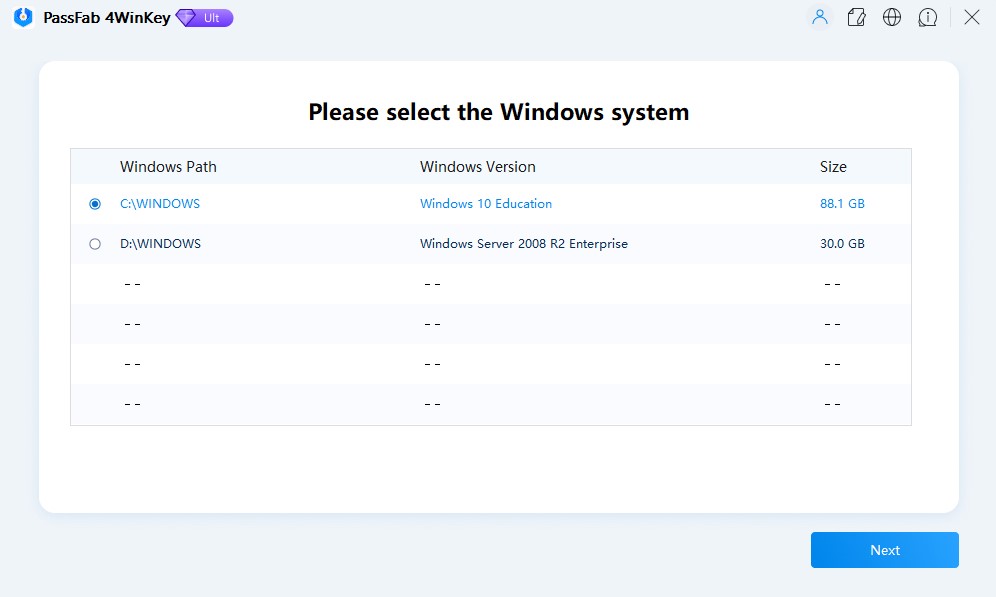
1. Remove Account Password
- Click "Remove Account Password", and all Windows user accounts will be listed. Select the user account you want to remove the password, click "Next".

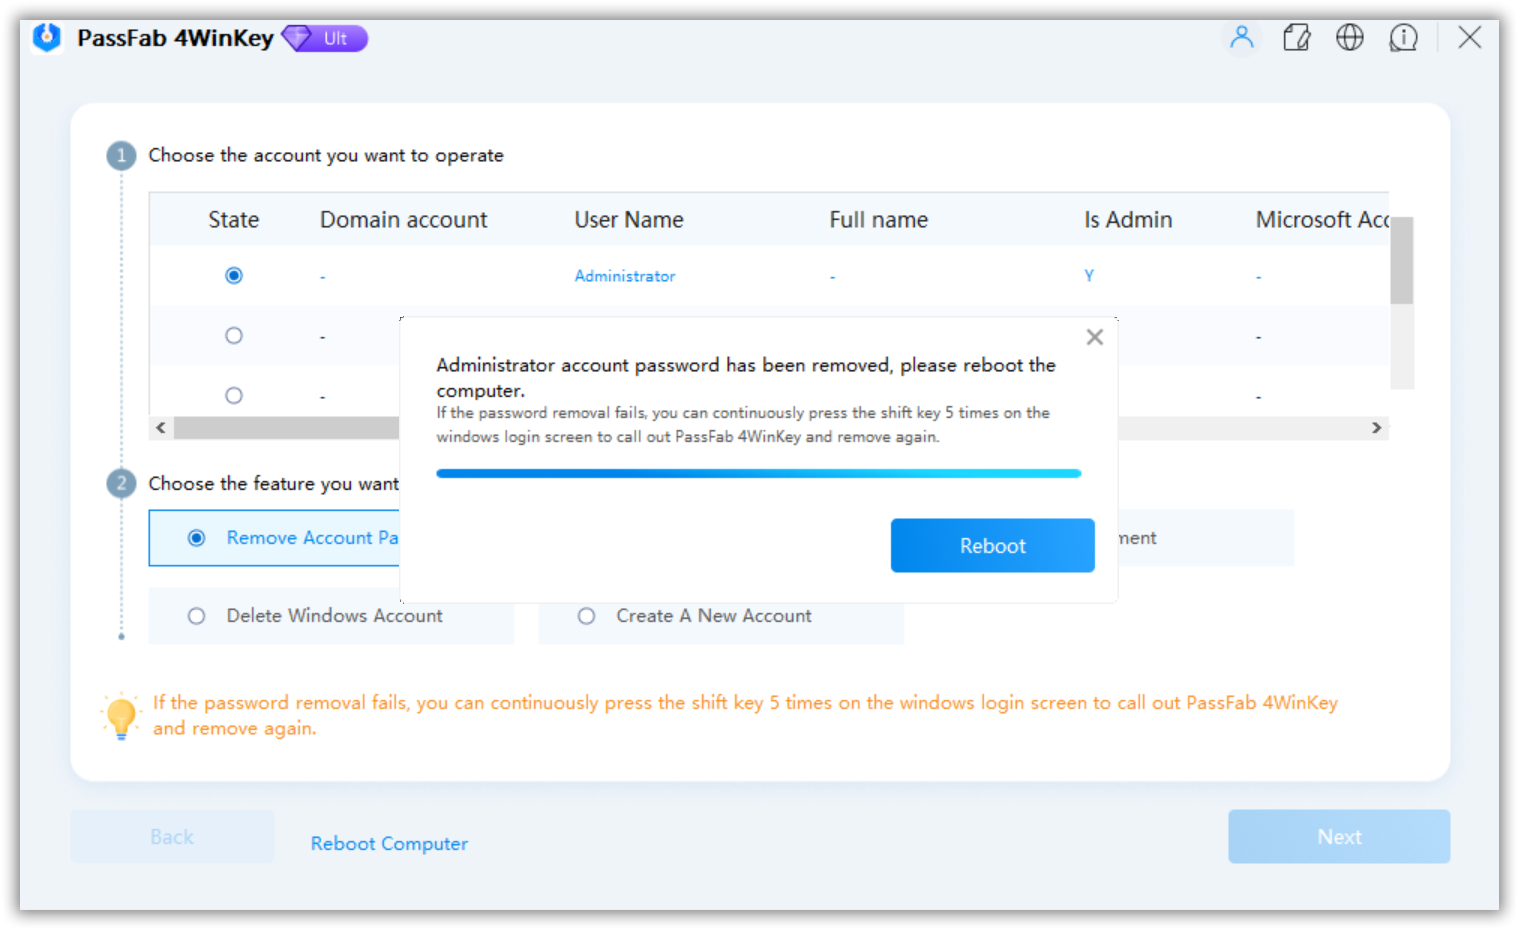
- The whole process of remove account password will take a few minutes, after that click "Reboot" option to restart your computer and pull out USB.

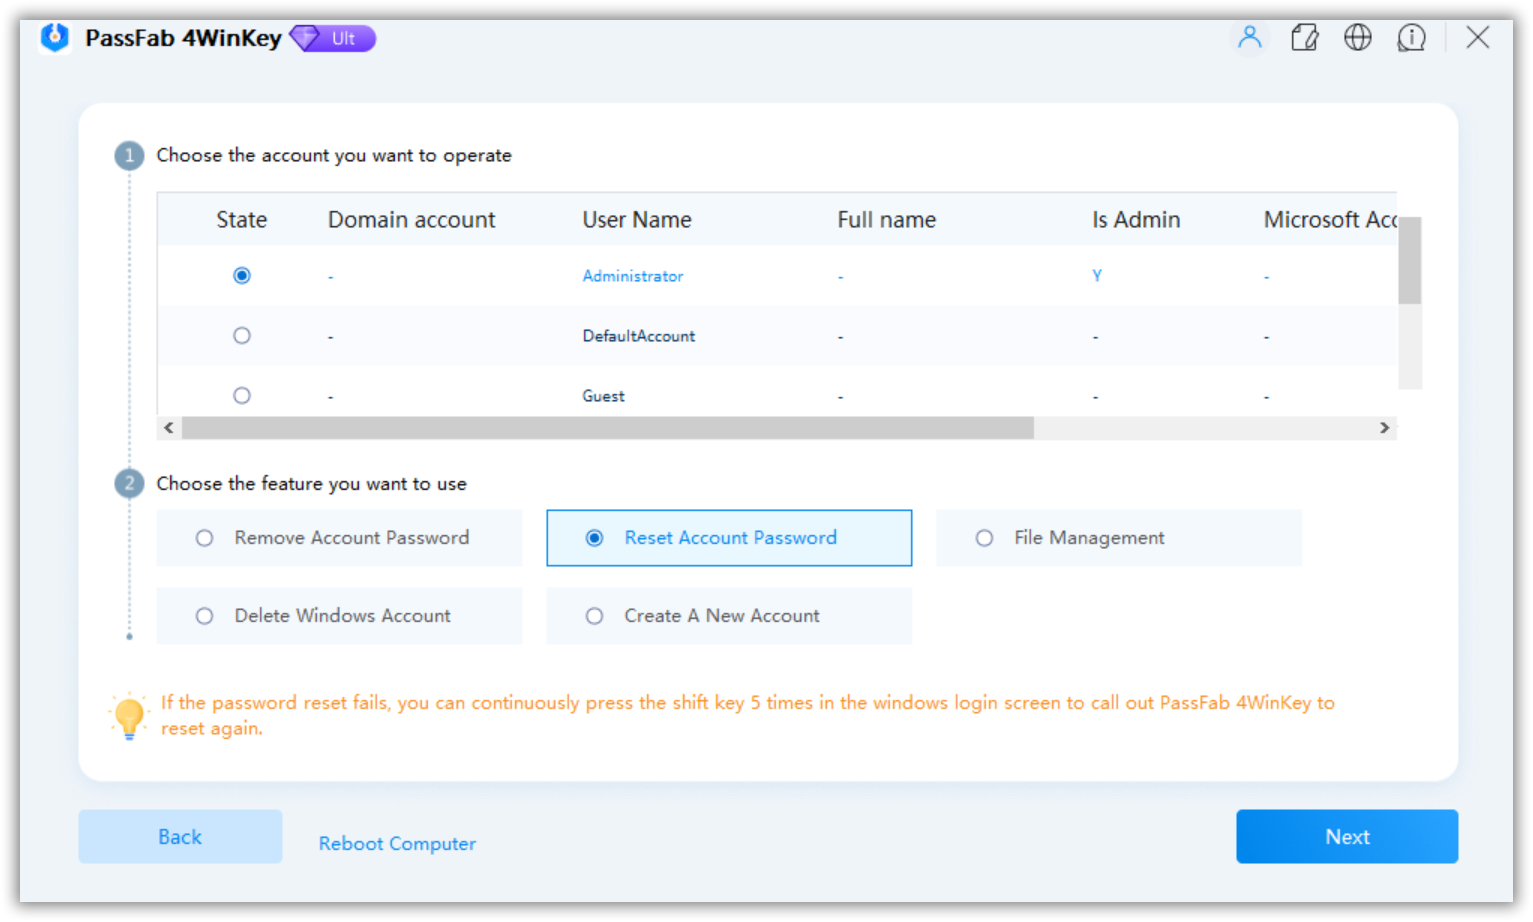
2. Reset Account Password
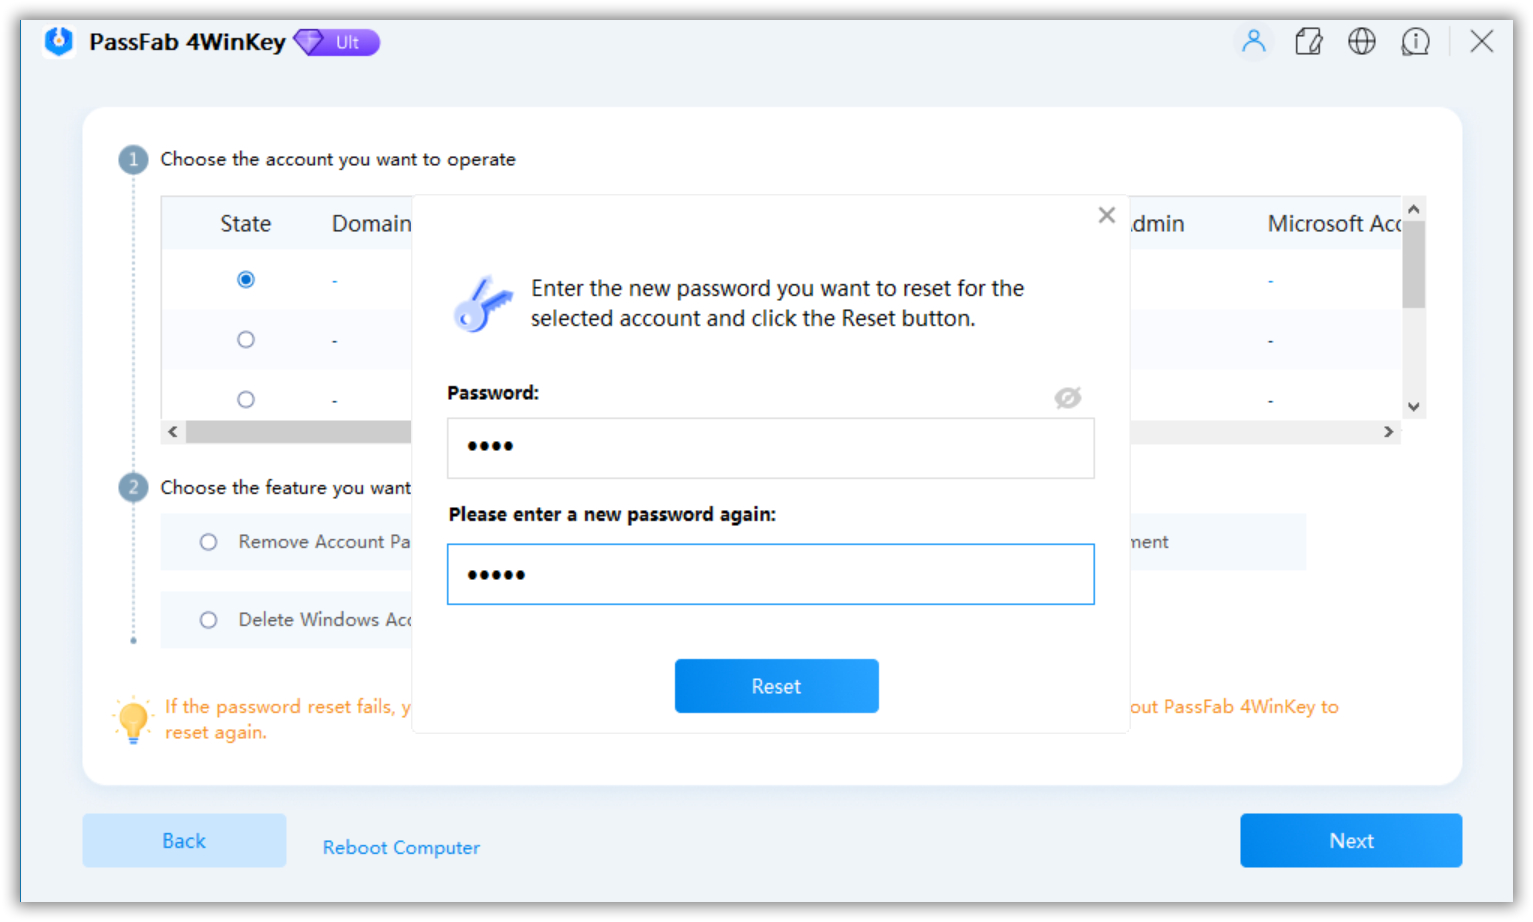
- Click "Reset Account Password", and select the account that you want to reset the password. Enter your new password and click "Reset".


- Reboot your computer and remove USB once the password has been reset. After restraing, you can log into your computer with the new password.

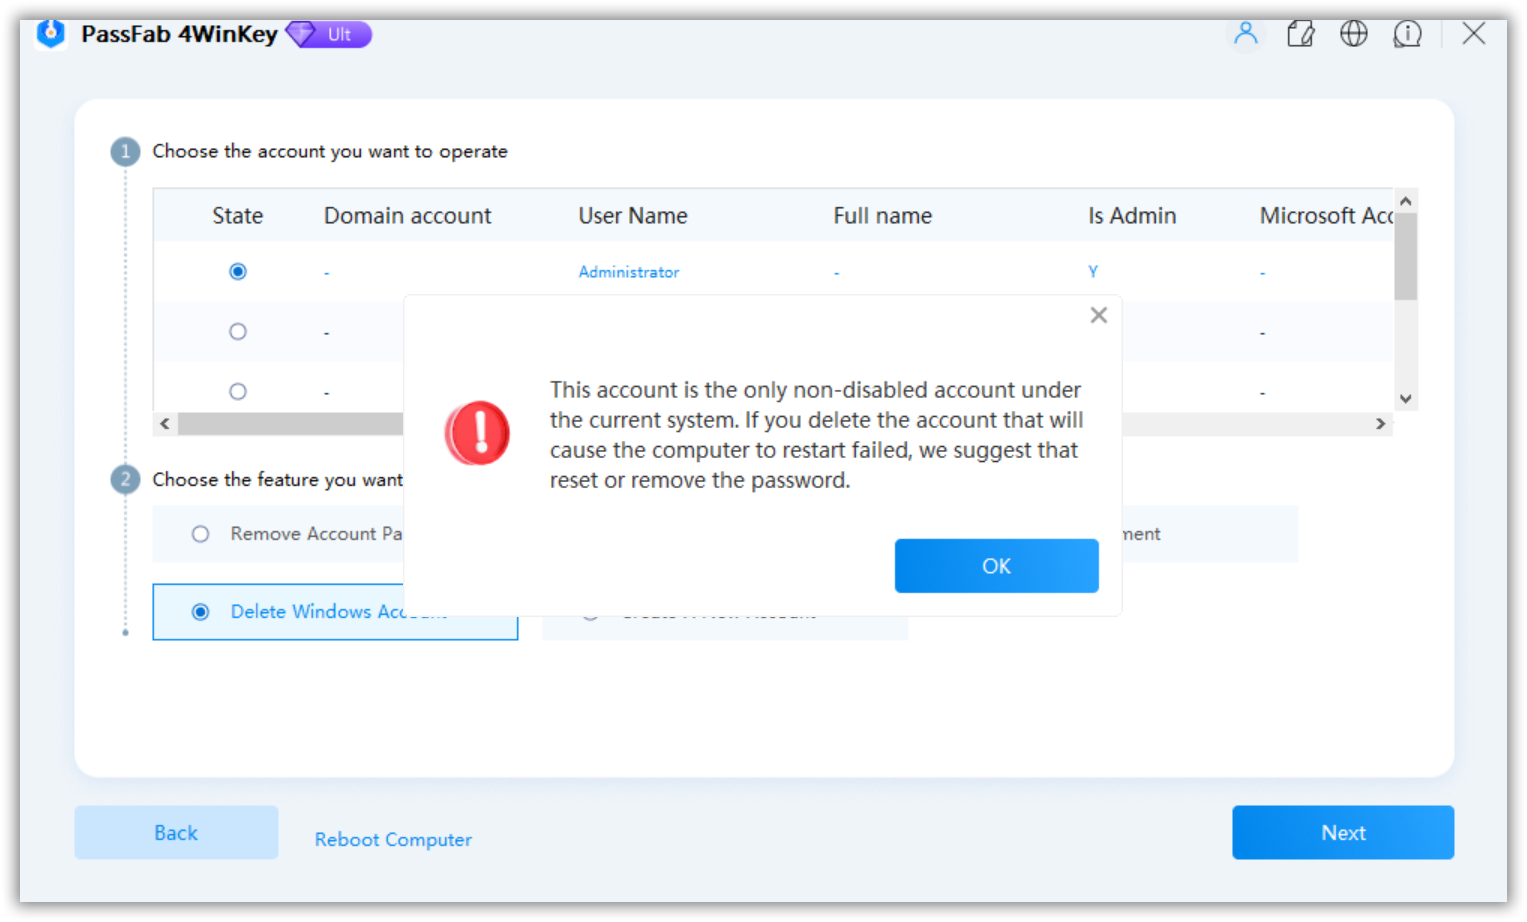
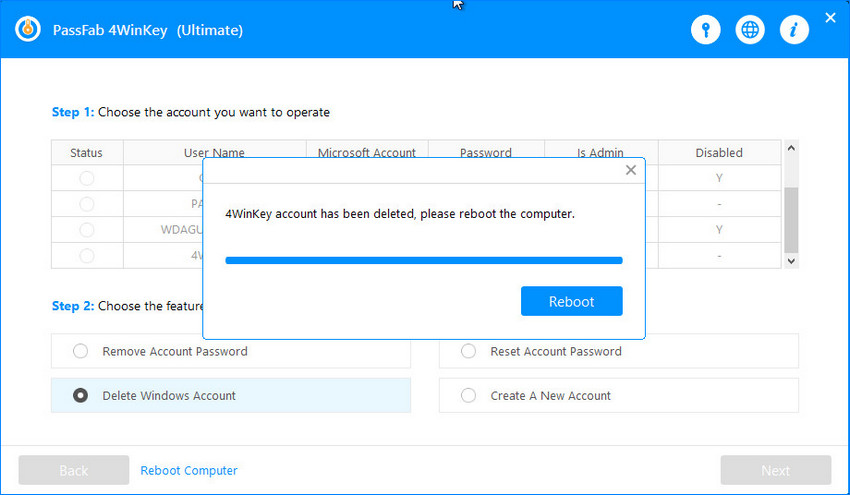
3. Delete Windows Account
- Select the Windows account that you want to delete and click "Next". But, it will erase the data of deleted account.


- Last, ReBoot your computer and remove the USB disk to access your computer with another account.

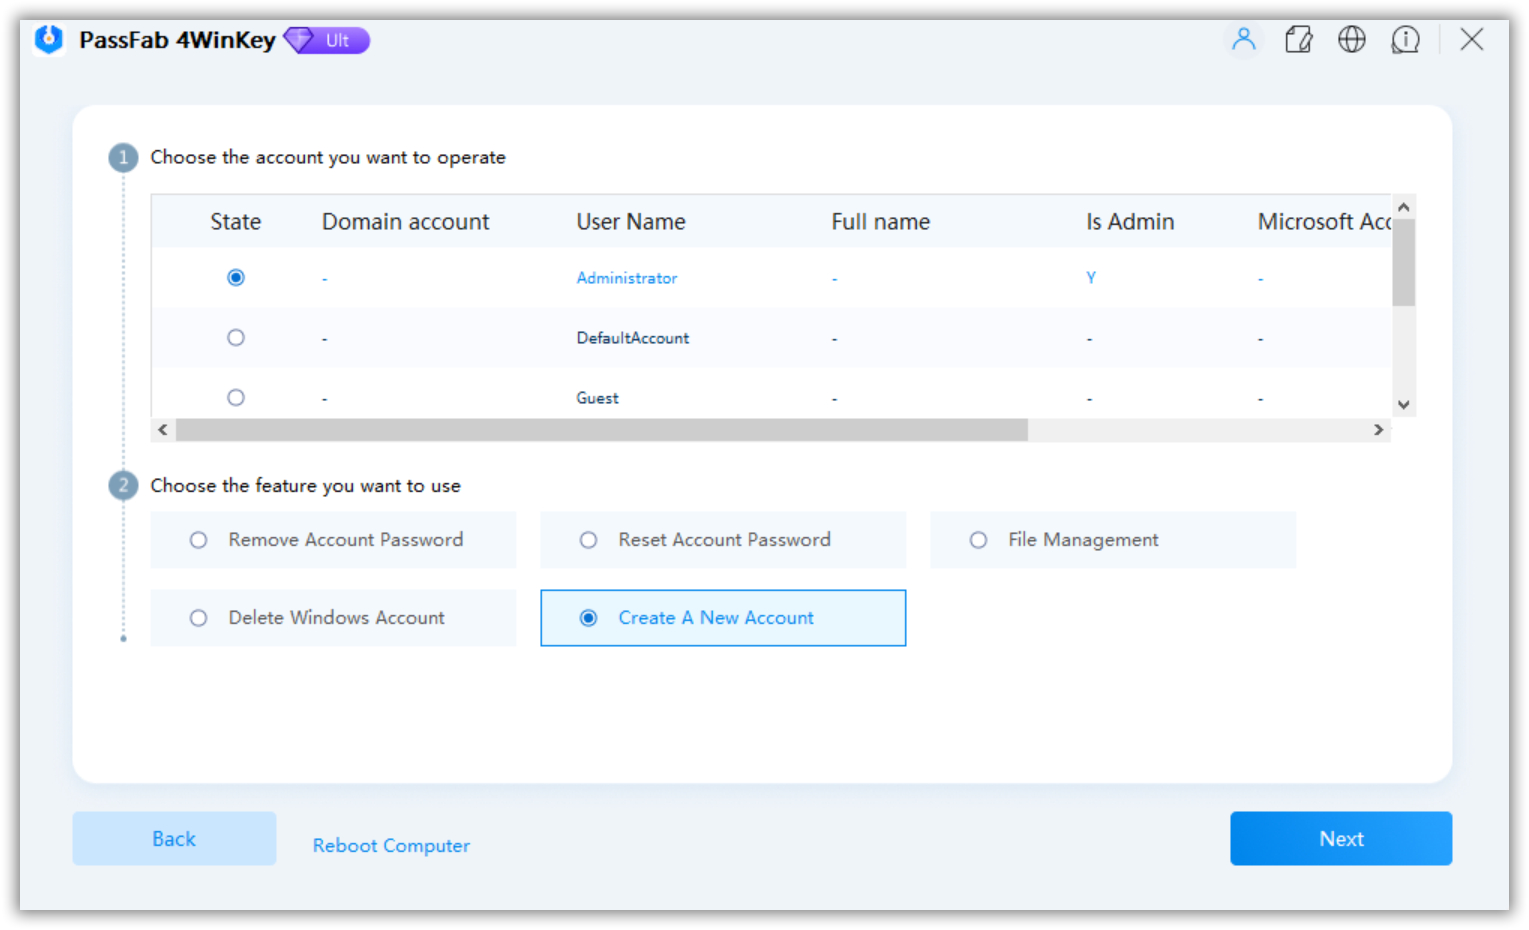
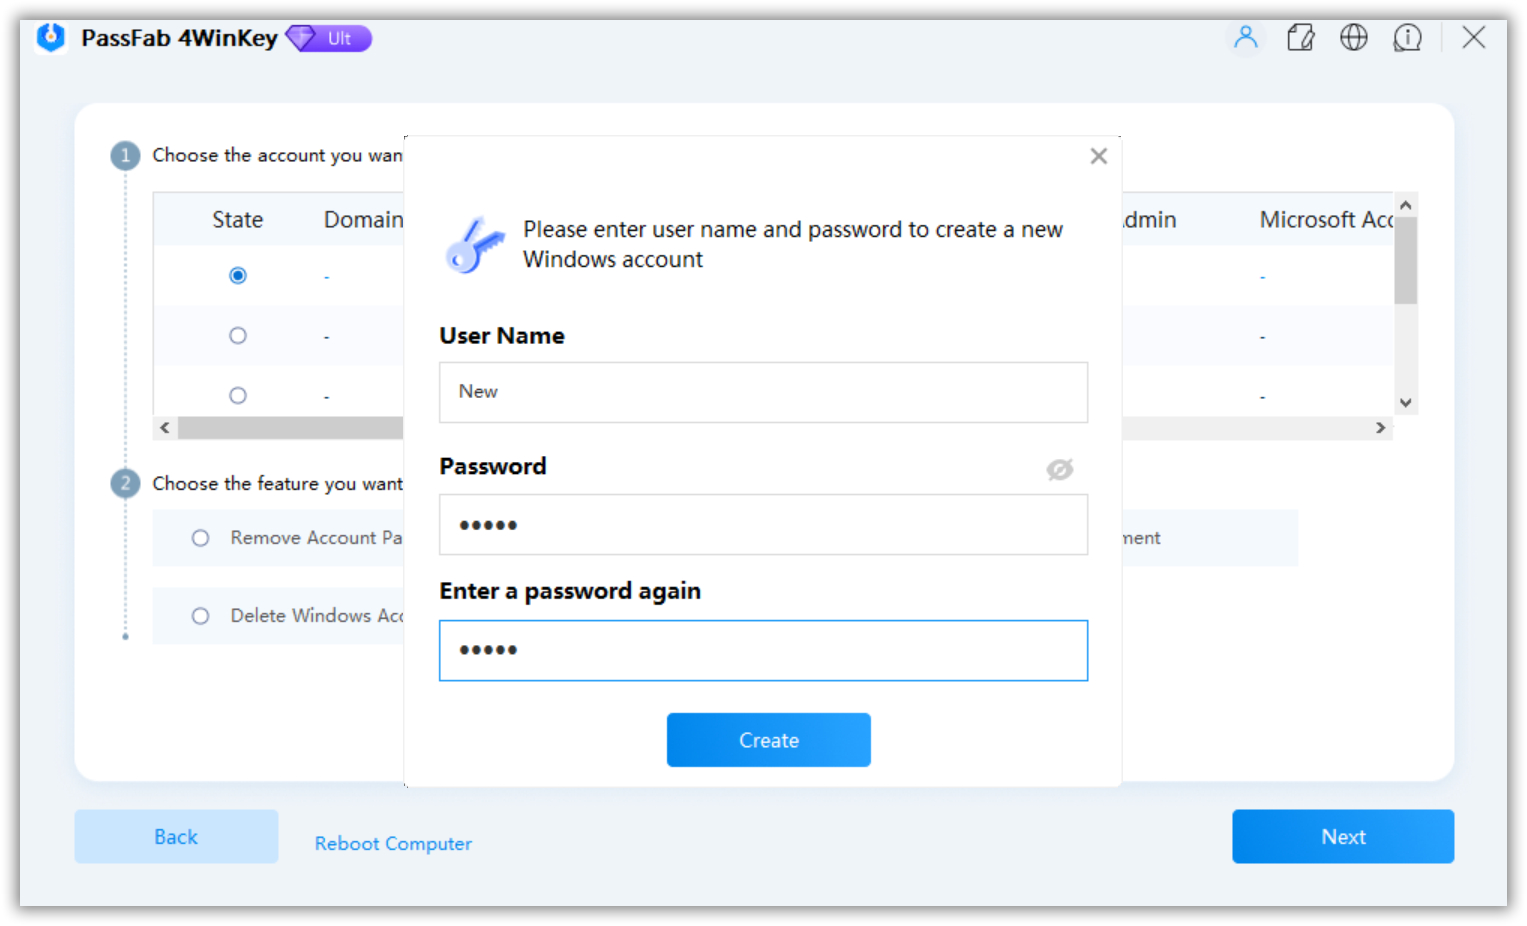
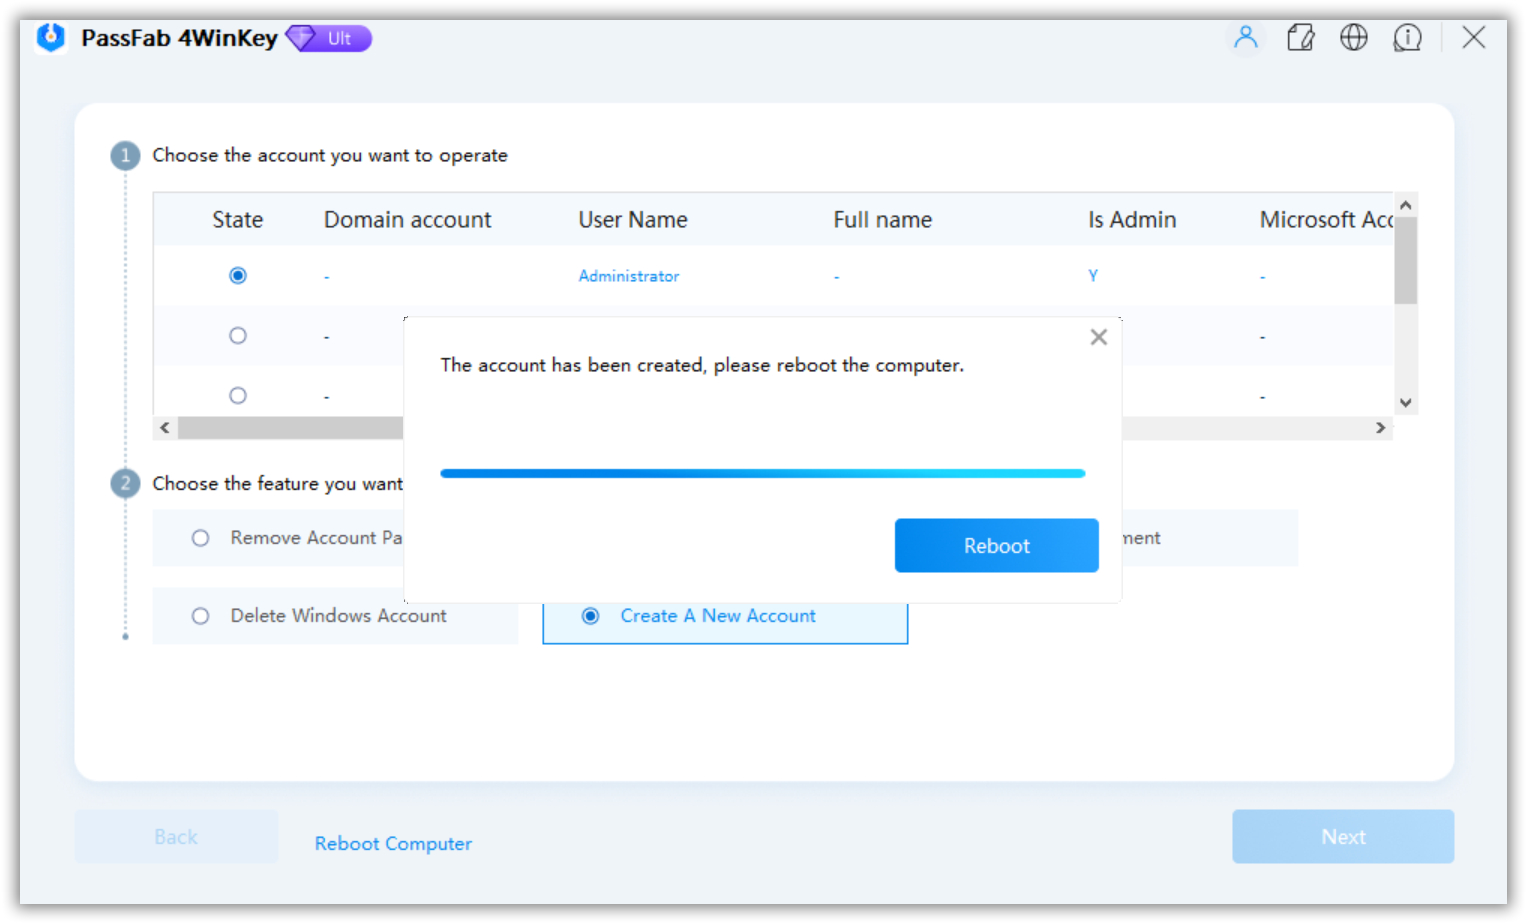
4. Create A New Account
- You can creaet a new user account in this feature. Choose "Create A New Account" option to enter the User Name and password. Next, click "Create".


- After restaering your computer, you can log into your computer with the new account. Note: you have to remove USB drive once click "Reboot".

Summary
The real reason people want to get into boot priority is that they forget their Windows password. Here we would like to mention that we have a solution easier than getting new Windows. PassFab 4WinKey is a third party software used widely around the globe to recover all type of Windows password. It is specially designed for recovering the lost password. It is not too much heavy software and is easy to use. Its interface is user-friendly.
