Protecting a Word document is a great way to prevent unauthorized access to the contents of a given Word document. To protect a Word documents, a given protection protocol is applied (usually a password), for which authorized persons are familiar.
What happens if the protection is no longer needed and you don’t have the password? Suppose, the colleague who created the document left for another company without leaving you a password. Or worse, if you’ve received a protected Word document whose contents are urgently needed, and you don’t have the password. The solution is surprisingly simple.
This article will show you how to unprotect a Word document without the password while we review what a protected document is and why we need to unprotect it.
Part 1: What is a Protected Microsoft Word Document?
Part 2: Why Do We Unprotect a Microsoft Word Document?
Part 3: How Do I Unprotect a Word Document?
Part 4: How to Password-Protect a Word Document
- Read-Only Restriction
- Password Encryption
- Restrict Formatting and Editing
- Add a Digital Signature
- Mark as Final
Our Recommendation
Part 1: What is a Protected Microsoft Word Document?
A protected MS Word document is a file with a security measure applied to it to prevent its contents from being altered by unauthorized persons. A word document can be protected via passwords, encryption, and digital signing.
It is possible to protect, certain text within a document instead of the whole document. This type of protection is intended to prevent other users from editing certain parts of a document to maintain consistency or uniformity of the document’s content. That being said, why do we unprotect a Word document?
Part 2: Why Do We Unprotect a Microsoft Word Document?
The only reason we unprotect a Word document is to access its contents that has previously been made inaccessible. Just like protecting a Word document is very important, there are circumstances in which unprotecting the document is equally important. Which circumstances are these?
To make it accessible for content revision
Suppose you are looking to share the document with other people in a group. In that case, you will need to know how to unprotect a Word document because a protected document could be troublesome when revisions are required. You’ll need to remove the protection so that they can edit the Word file without having to go through the trouble of figuring out how to unprotect a word document.
Password unavailability
When the protection of the document is no longer needed, it could become an inconvenience. For example, when a coworker leaves the company leaving behind a series of protected documents without leaving the password. Perhaps, you may no longer remember password used to protect the document. Learning how to unprotect a Word document would therefore be a necessary skill. Plus, you get to access the document’s content quickly and edit the text freely and effectively.
With that in mind, let’s see how do you unprotect a word document.
Part 3: How Do I Unprotect a Word Document?
Unprotecting a Word document is as easy as following these methods.
Way 1: PassFab for Word
PassFab for Word is our professional tool for unprotecting all Word document formats (*.doc; *.docx) in the fastest and easiest way possible without a password. With three password attack types using the latest built-in acceleration technique and advanced algorithm support, password recovery has never been easier than before.
-
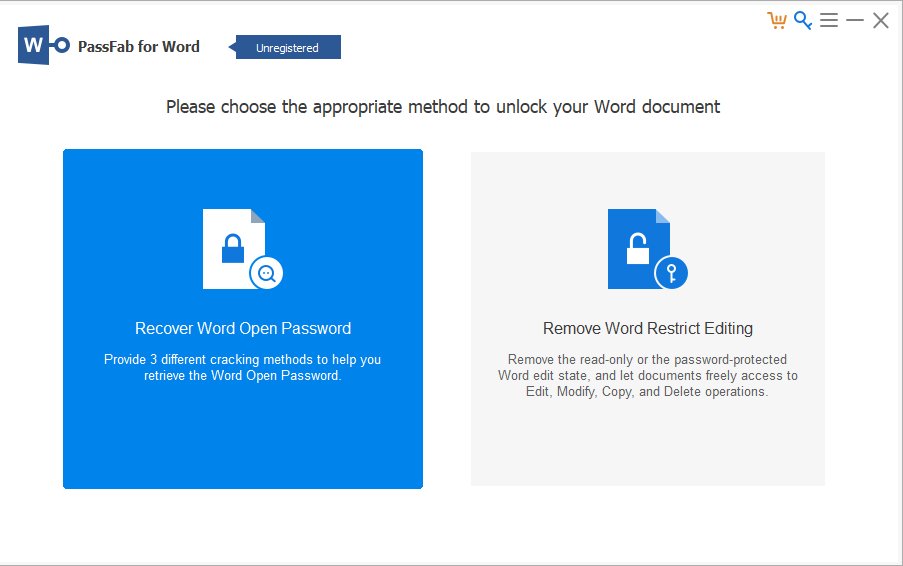
Launch PassFab for Word from our website. Then click on Recover Word Open Password.

-
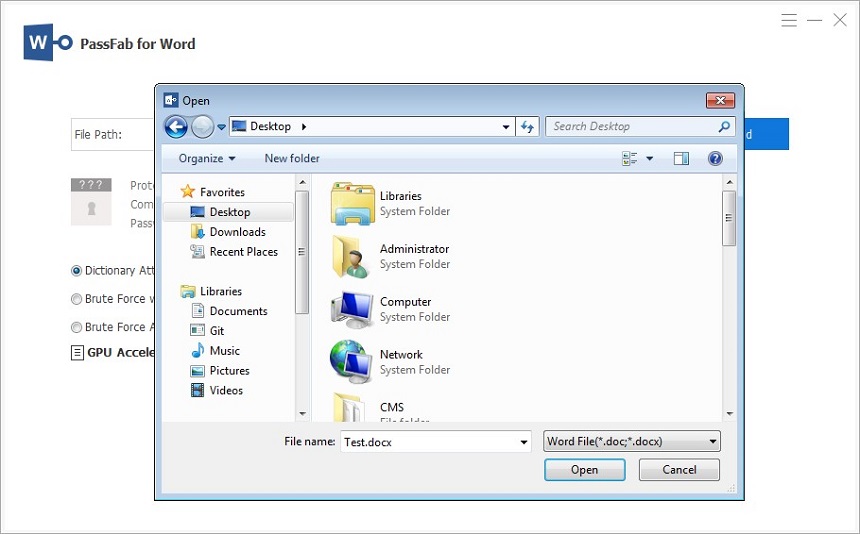
Click Add to import your password-protected Word document.

-
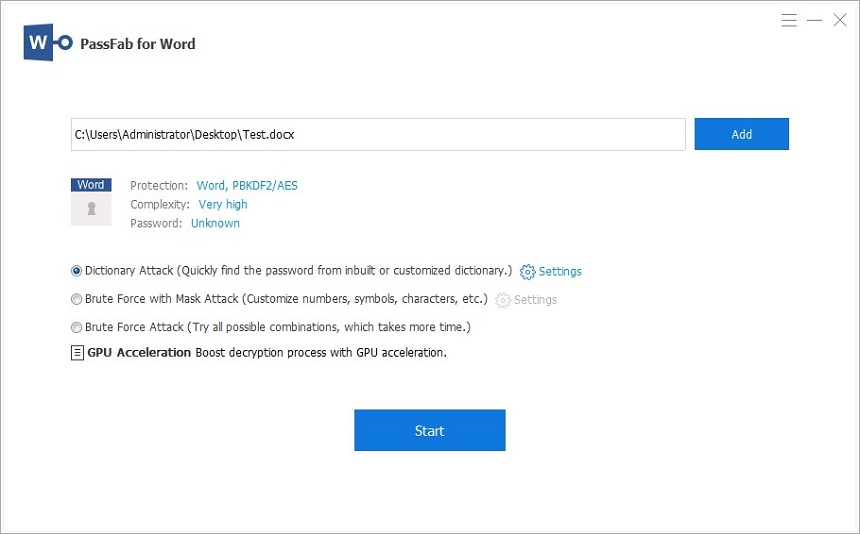
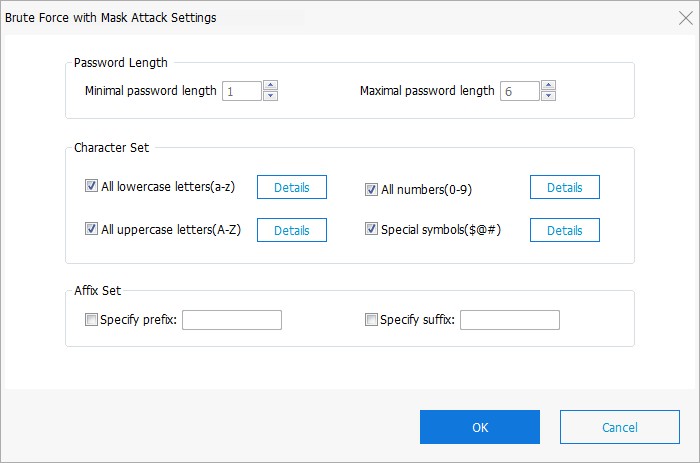
Select one of the three attack modes listed for your choice by checking one that best suits you. Note that you can also define the specific settings to help shorten the password recovery process, like password length and possible characters.
There are three attack modes that PassFab uses to retrieve your password.

Dictionary Attack: Automatically try thousands or millions of possible password combinations in provided dictionary.
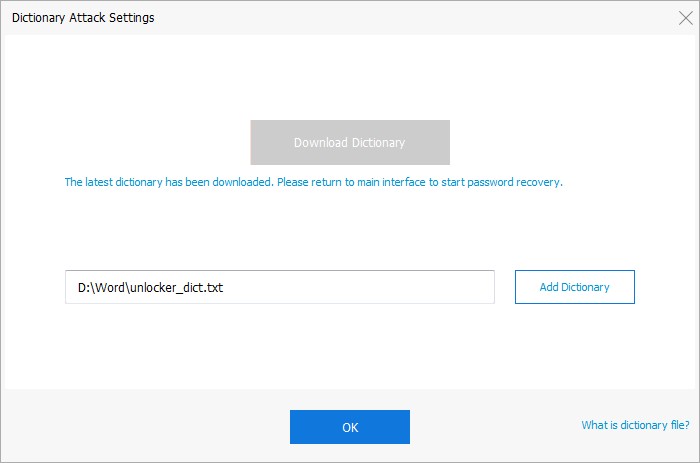
You can also add your own dictionary library by clicking the Settings button.

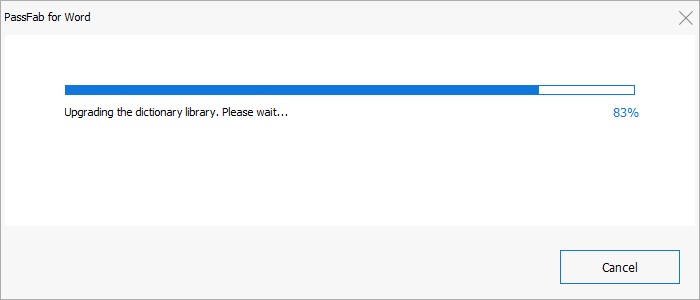
You may be prompted with upgrading the dictionary library. This step is necessary and will take a while.

Brute-force with Mask Attack: Suitable for those who still have a vague impression of the password. Users can define the Min/Max Length, frequently used letters and numbers, special characters to help decrypt accurately.

Brute-force Attack: Run exhaustive matching of every combination of letters and numbers, characters and symbols. This will take the longest time.
-
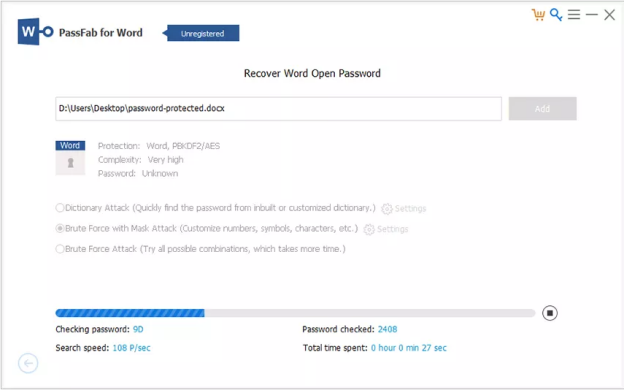
After selecting one of attack modes, click on "Start" button to find the file password.

-
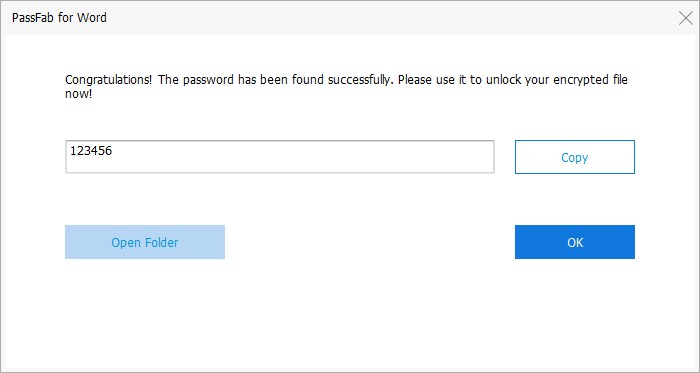
After that, you can use the found password to unprotect a word document.

Note:
Please be patient till the program finds your password. Depending on the password complexity, the process may take different length of time.
Way 2: WordPad
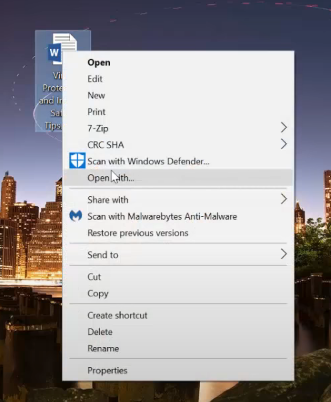
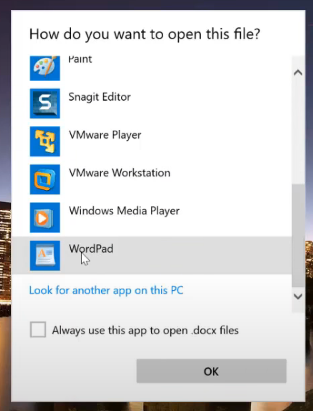
You can use WordPad to edit a whole Word document or file that is protected, or certain text in the file is restricted. It is more basic than MS Word, but it’s able to edit *.doc or *.docx file formats in it. To do this:
- Right-click on the protected Word document and select on Open with > More Apps to select WordPad and click OK to open the file.
- This will allow you to make edits on the file because the protection has been removed. Alternatively, you can Copy & Paste the file content into a new Word document and save it as another file.
- You can also click File to the save the file as Office Open XML document or other file formats.
Way 3: Google Docs
You can use Google Docs to unprotect your Word document on a Mac OS using the steps detailed below.
- Log into your Google Docs account using this link: https://doc.google.com in your web browser. If you don’t have one, check this guide to help you learn how to create a Google account then log in Google Docs.
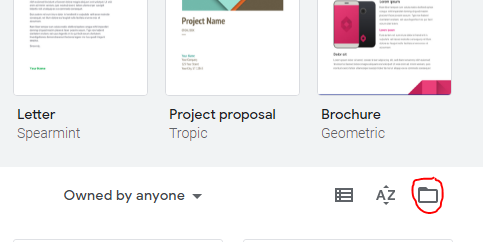
- Click the folder icon at the right part of the screen.
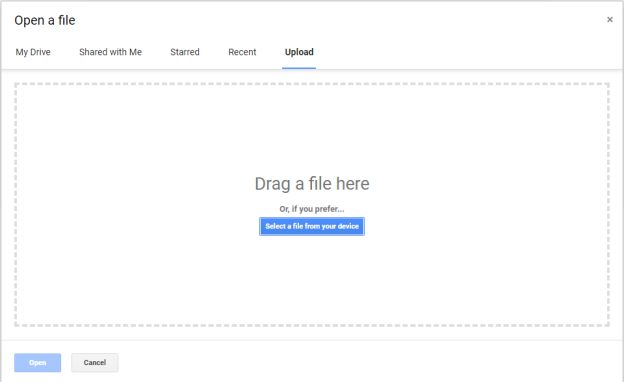
- Click Upload in the Open a file window page that pops up and select a file from your device you need to unprotect.
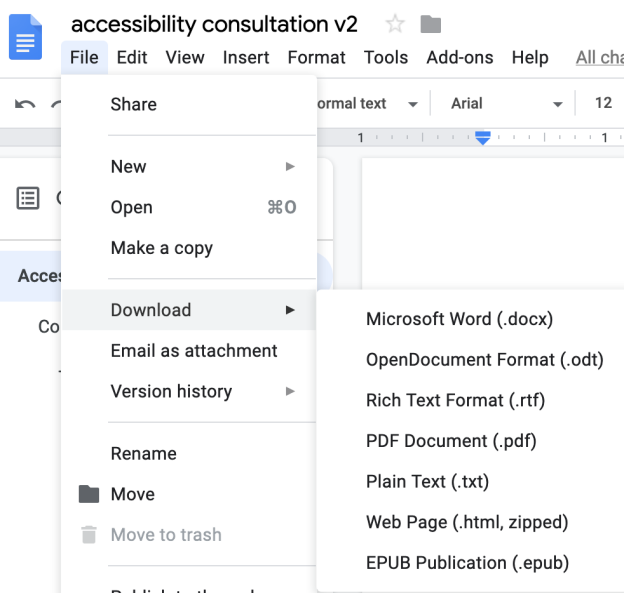
- Protection is removed once the file is uploaded in Google Docs. You can either edit the file while in Google Docs, or you can click File, select Download then choose MS Word from the drop-down list that appears to download your unprotected document.
Note:
You can also drag and drop the protected file into the outlined rectangular section of the screen.
Part 4: How to Password-Protect a Word Document
Read-Only Restriction
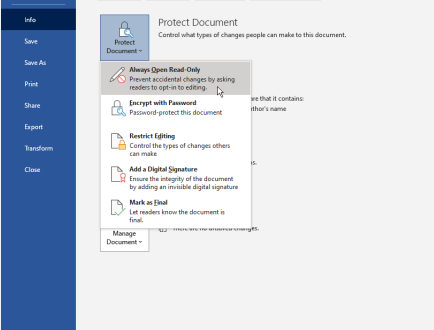
You can protect the document as read-only to prevent accidental edits or modifications of the content. To do this, go to File > Info > Protect Document to view the security options in the drop-down menu. Select Always Open Read-Only and save the document.
Password Encryption
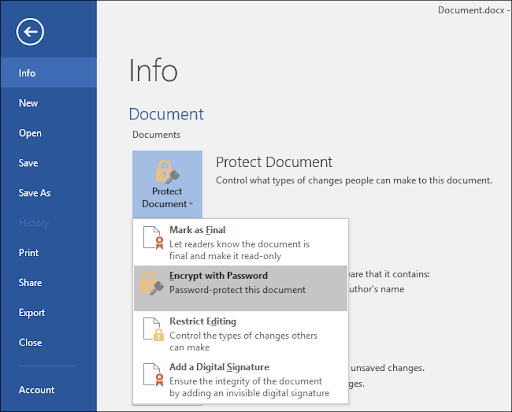
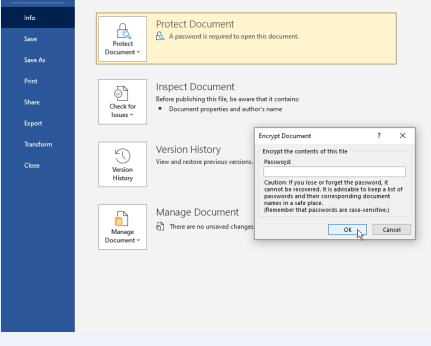
You can encrypt your document with a password by going to File > Info > Protect Document. From the security options provided, select Encrypt with Password option. MS Word will prompt you to create a password for the document. Remember to create a memorable password, then save the document.
Restrict Formatting and Editing
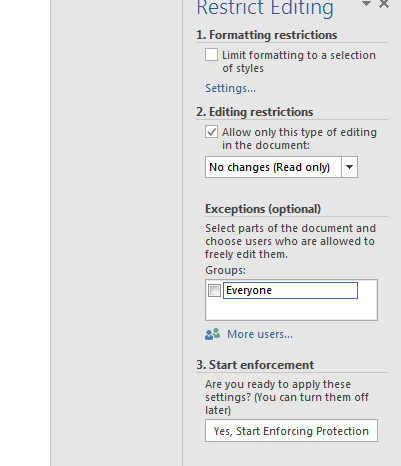
To limit ways in which the content of your document can be edited, click File > Info > Protect Document and select Restrict Editing. A Restrict Editing pane will be displayed on the right-hand side of your document for formatting and editing restrictions.
For formatting restrictions, check the box next to “Limit formatting to a selection of styles” which will prompt you to start enforcing protection, and a password will be required. One will have to provide this password to modify the document.
Under the Editing restrictions, select the check box “Allow only this type of editing in the document” and the restriction type drop down menu gets enabled. Select the option that best fits you, for instance, No changes (Read only) which puts your document in read-only mode so no changes can be made.
Add a Digital Signature
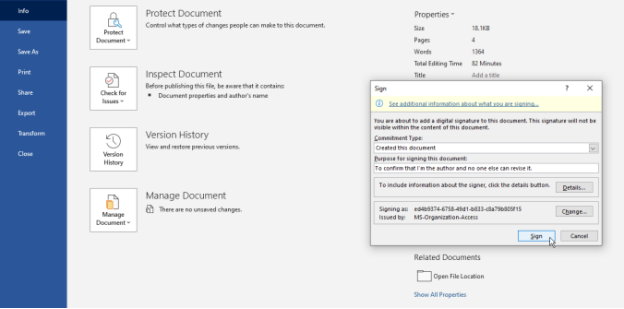
Go to File > Info > Protect Document and select Add a Digital Signature. If this is your first time, MS Word will prompt with a Get a Digital ID message asking you to create a digital signature. Click Yes, and a Microsoft support webpage will appear to help you find a digital ID services.
After you have the digital certificate, go back to Protect the document again and click Add a Digital Signature. Fill out the necessary fields and click the Sign button. You may be asked to confirm the signature, then click OK. Your document is now digitally signed.
Mark as Final
You can mark your document as the final version to protect it from unintentional changes to the content. To do so, go to File > Info > Protect Document and select Mark as Final.
Our Recommendation
Protecting your Word document is a great way to grant controlled access to authorized persons to the contents of a given document. Circumstances could render this protection unnecessary bringing the need to unprotect it. PassFab for Word presents a potent and convenient solution for unprotecting a password-protected Word document when the password is inaccessible. Sign up and start your free trial today.
